57
En
CONNECTING THE CAMERA TO THE COMPUTER
USING ARCSOFT PHOTOIMPRESSION (WINDOWS ONLY)
1. Connect the camera to the computer.
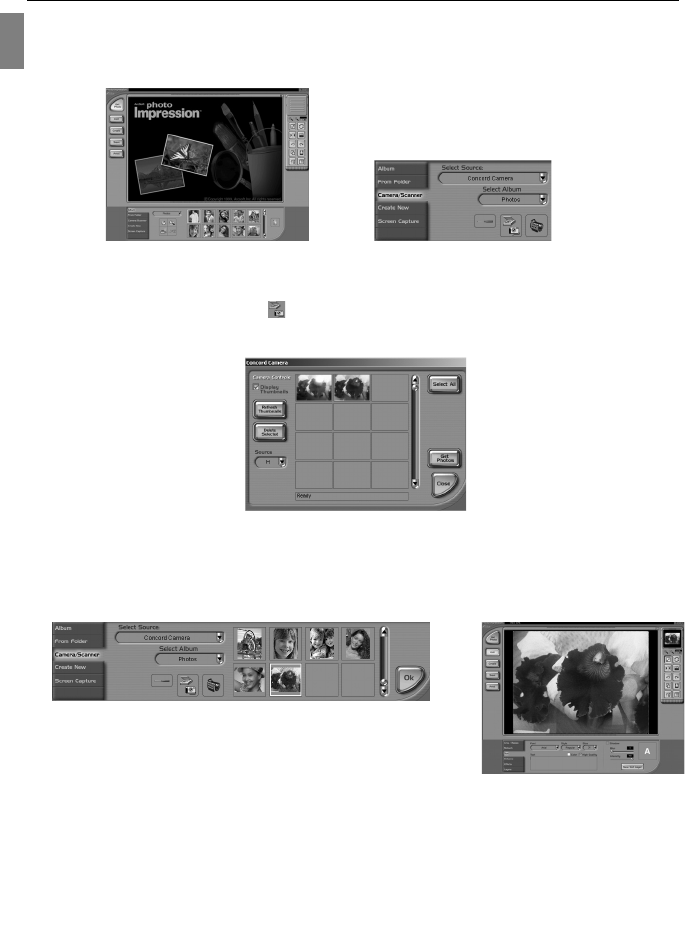
2. Launch ArcSoft PhotoImpression software by clicking on Start-Programs-ArcSoft Camera Suite and choosing
PhotoImpression from the application list on your screen. (fig. 1.1)
3. When the Application opens, click on the Camera/Scanner button.(fig. 1.2)
4. Click on the drop-down list under Select Source and choose Concord Camera.
5. Click on the Camera/ Scanner Icon ( ).
• A second window will appear showing the contents (pictures) in the memory, and options on how to
handle them. (fig. 1.3)
6. Select the desired picture to view, edit or save by clicking on it. The selected image will be highlighted by a
border. To choose all pictures, click on Select All.
7. Click on Get Photos.
The pictures will then be added to your album at the bottom of the application (fig. 1.4).
8. Click on Close to close the Camera Controls windows (as shown in
fig. 1.3).
9. Double-click on the thumbnail or click on OK to open the photo.
10. Click on Edit to edit the photo. You may, for example,
• Resize the photo by using the “Crop/Resize” tools.
• Modify the photo by using the “Retouch” tools. For example, to remove red-eyes.
• Add some text onto the photo by using the “Text” tools.
11. Click on Save to save the photo. Two options are available: “Save” and “Save As”.
12. Click on Print to print the photo. The options available include: Standard Printing, Greeting Card/Multiple
Printing or Thumbnail Printing.
fig. 1.1 fig. 1.2
fig. 1.3
fig. 1.4


