Laufwerk / Drive Mechanism
GRUNDIG Service-Technik 5 - 7
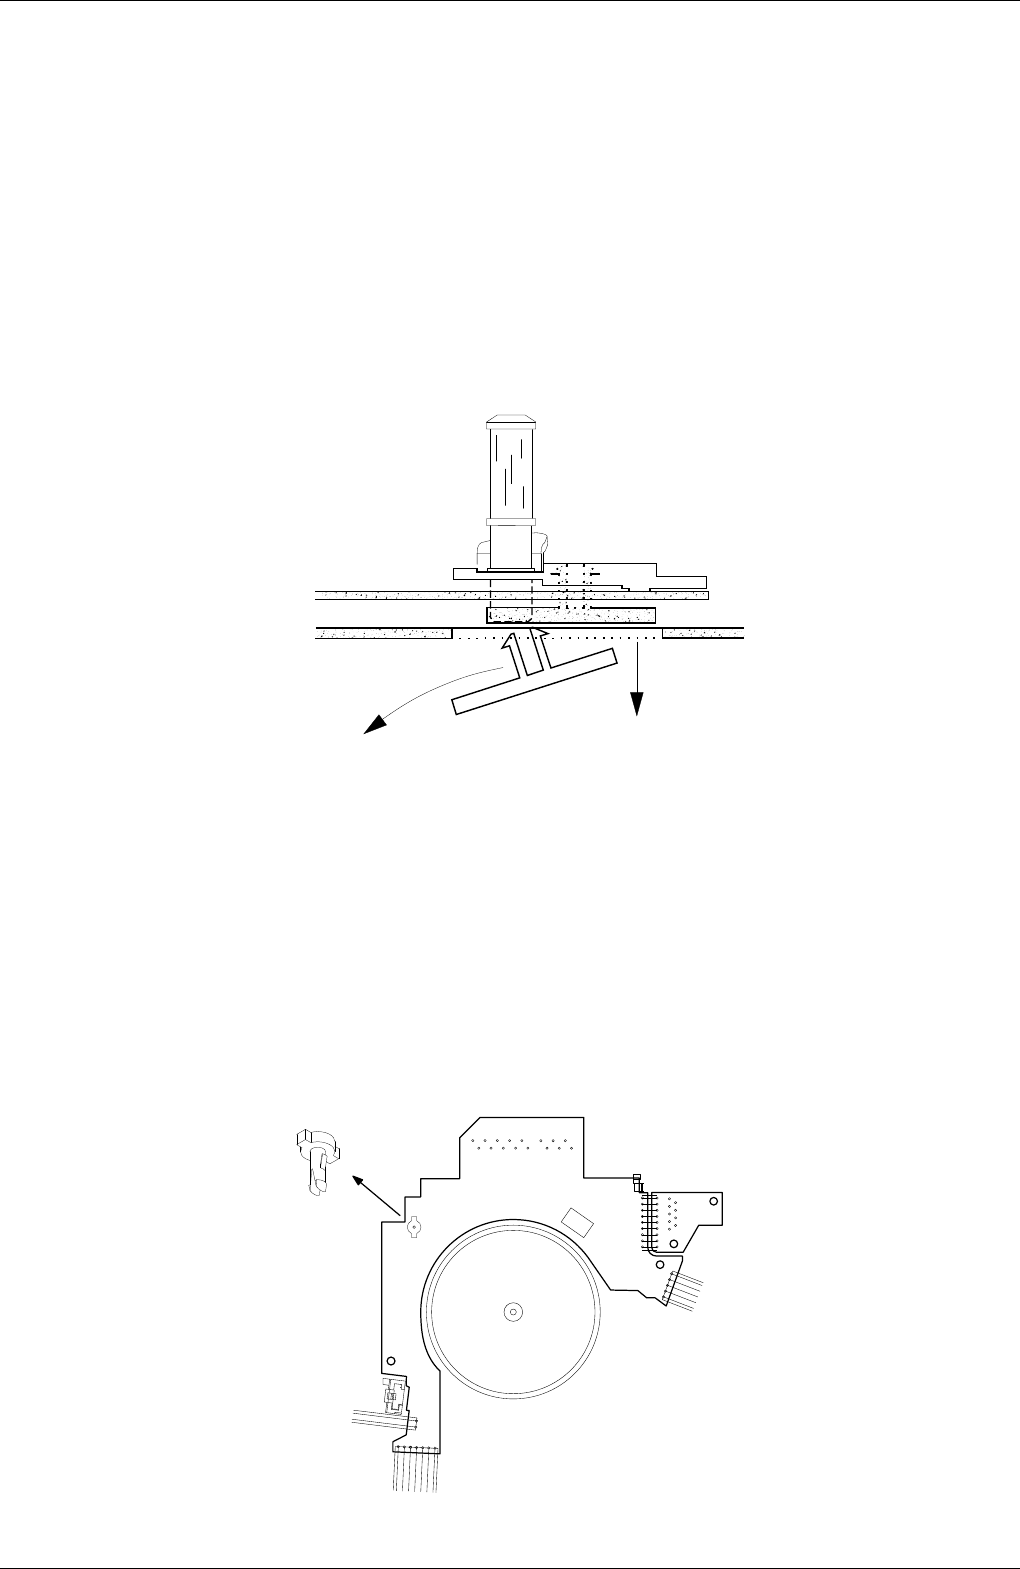
Fig. 15
Fig. 16
2.9 Threading Roller Unit, Left (Pos. 23)
– Set the tape deck to the "Eject" position.
– Unhook the tension arm spring (pos. 11) to avoid the tension arm
spring being pre-loaded.
– At the bottom side of the tape deck, partially unhinge the sensor print
and remove the tension lever (pos.112).
– Compress the two snap hooks by means of tweezers (Fig. 14) and
remove the reverse roller "A" from the plate "B" (Fig. 15).
– Release the loading arm (left) from the holding plate and withdraw
the latter through the cutout in the chassis (Fig. 15).
– Reassemble in reverse order.
After replacing the threading roller unit (left) check and if necessary
readjust the tape transport (chapter 3.1).
2.10 Sensor Print Assy (Pos. 118)
If part of the sensor print is defective the whole sensor print has to be
replaced as follows:
– Remove the tape deck from the video recorder (Service Instructions,
chapter 1).
– Lift off the sensor print assembly with the expanding arbor A
(Fig. 16).
– All other individual circuit boards are fastened with snap hooks.
Reassemble the sensor print assembly by snapping the snap hooks
into place and by pushing in the expanding arbor.
2.9 Fädelschlitten links (Pos. 23)
– Laufwerk in Position "Eject" bringen.
– Feder (Pos. 11) aushaken, damit der Bandzugfühler nicht vor-
gespannt ist.
– An der Unterseite des Laufwerks die Sensorplatine teilweise aus-
hängen und den Hebel (Pos. 112) entfernen.
– Mit einer Pinzette die beiden Schnapphaken zusammendrücken
(Fig. 14) und die Umlenkrolle "A" von der Platte "B" abnehmen
(Fig. 15).
– Fädelarm links aus der Platte aushängen und diese durch die
Aussparung im Chassis nach unten aus dem Laufwerk entfernen
(Fig. 15).
– Der Zusammenbau erfolgt in umgekehrter Reihenfolge.
Nach Austausch des Fädelschlittens links muß der Bandlauf (Kap. 3.1)
kontrolliert und gegebenenfalls eingestellt werden.
2.10 Sensorplatinen-Einheit (Pos. 118)
Bei einem Fehler auf der Sensorplatinen-Einheit ist diese komplett zu
tauschen:
– Laufwerk aus dem Gerät ausbauen (Servicehinweise, Kap. 1).
– Sensorplatinen-Einheit mit Spreizanker A (Fig. 16) heraushebeln.
– Alle anderen Einzelplatinen sind mit Schnapphaken befestigt.
Nach dem Einsetzen der gesamten Sensorplatinen-Einheit müssen
die Rastnasen eingerastet und der Spreizanker eingesetzt sein.
A


