


GV44…, GV45…, GV46… Allgemeiner Teil / General
GRUNDIG Service-Technik 1 - 57
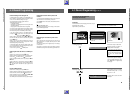
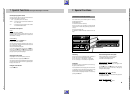
7. Special Functions Inserting New Recordings at a Later Date
Selecting the programme source
Turn the jog-knob to the left or right until the desired indica-
tion apears in the display of the recorder:
I
...
6O
= programme position of TV stations;
AI
/
A2
= picture/sound source connected to the EURO-AV
A1 or A2 socket;
CU
= picture/sound source connected to the L AUDIO
IN R and VIDEO IN/CV sockets.
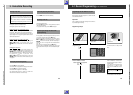
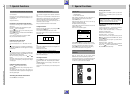
The different insert options
Inser
t
Display on the recorder: "
INSERT
".
Only the new picture signal is inserted, the sound of the old
recording on the mono (longitudinal) track is recorded onto
the helical track of the tape.
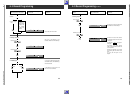
Insert/Dubbing
Select the function with the
¡
DUBBING
button.
Display on the recorder: "
INSDUB
".
The new picture/sound signal is inserted. The new sound sig-
nal is recorded onto the longitudinal and helical tracks, and
the old sound signal is erased.
The sound is automatically adjusted.
If you wish to manually adjust the sound, press the
Ü
but-
ton and use the
Q
RECORDLEVEL
W
buttons to adjust the
sound until the first red mark (+1dB) of the sound level dis-
play lights up during the loudest passages.
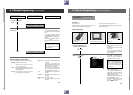
Starting the insert function
Start playback from the external picture/sound source.
Start the insert function by pressing the
K
button.
The new picture scenes are inserted between the marked tape
positions and then the recorder switches to playback-pause.
Display on the recorder: "ll".
Exiting the insert function
Press the
`
button.
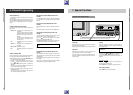
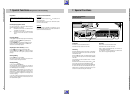
7. Special Functions
The Recorder as a HiFi tape recorder
Your recorder offers you two different systems for recording
and playing back the sound:
the HiFi (helical) track,
for stereo and two-channel recordings.
This way you can use your recorder as a HiFi tape recorder
with which you can record and play back top quality HiFi re-
cordings.
the mono (longitudinal) track,
for playback on standard VHS video recorders and for dub-
bing).
Audio recording from the HiFi system
Press the
HIFI
button (= loop-through mode).
"
HI
" appears in the display of the recorder.
The sound is automatically adjusted.
Manually adjusting the sound (if desired)
Press the
Ü
button (on the recorder); "
MAN
" appears in the
display of the recorder.
Use the
S
RECORD LEVEL
A
buttons on the recorder to
adjust the volume until the first red mark (+1dB) lights up
during the loudest passages.
Selecting long-play mode (if desired)
Press the
w
button.
"
LP
" apears in the display of the recorder and the playing time
of the cassette is doubled.
Starting the audio recording
Press both of the
M
RECORD
;
buttons.
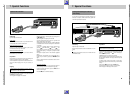
DECODER A2
H
L
H
L
ń
ń
EURO-AV A1
L
R
AUDIO
L
R
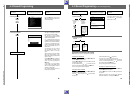
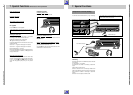
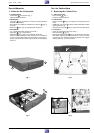
Connecting
Connect a HiFi system to the AUDIO sockets (at the back of
the unit) with a commercially available cinch cable.
ňLR = sound input, L = left channel, R = right channel;
ŇLR = sound output, L = left channel, R = right channel.
Preparation
Switch the HiFi system on and select the sound source (e.g.
CD player, cassette recorder, etc.
Insert a cassette with sufficient playing time into the recorder.
It is advisable to switch the hours/minutes display to "tape
length indication" (5-digit) by pressing the
o
button.
You can switch the "tape length indication" to "
0:00:00
" by
pressing the
p
button.
ŁŁ