


Allgemeiner Teil / General GV44…, GV45…, GV46…
1 - 60 GRUNDIG Service-Technik
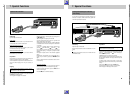
7. Special Functions
The Continuous Mode Functions of the Recorder
Your recorder can:
Continuously record from different signal sources, e.g. from
TV broadcasts or from units that are connected to a cor-
responding socket.
Play back continuously.
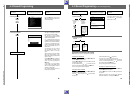
Preparation for the continuous mode functions
For continuous recording, insert a cassette with sufficient
playing time.
For continuous playback, insert the cassette to be played.
Press the
J
button to start playback.
Press the
`
button when you have located the position
where playback should end.
Press the
Z
button, the numbered buttons
8501
,
and then the
OK
button.
You will see this in the display of the recorder: "
CONT
."
Now you can select the different functions.
Continuous record mode function
Select the desired programme source:
Use the numbered buttons
1
…
0
to select a TV station
or
if the picture/sound source is connected to the EURO-AV A1
socket, press the
a
button until "AI" appears in the display
of the recorder.
or
if the picture/sound source is connected to the VIDEO IN/CV
and L AUDIO IN R sockets, press the
a
button until "CV"
appears in the display of the recorder.
Start the recording by pressing both of the
M
RECORD
;
buttons.
The recorder records all the way to the end of the tape and
then rewinds to the beginning of the tape where it begins
recording again.
Continuous playback mode function
Press the
J
button to activate this function.
The tape is rewound all the way to the beginning where it
starts playback.
The recorder plays back all the way to the position you
marked and then rewinds the tape back to the beginning and
starts the playback again.
Terminating the continuous mode functions
Press the
>
button on the recorder.
The Electronic Combination Lock
Your recorder is equipped with an electronic combination
lock.
This allows you to lock all functions of the recorder. Even a
cassette which is inserted after the lock has been activated
cannot be removed until you have unlocked the recorder.
You can lock and unlock your recorder quite simply with a
code number of one to four digits.
Write your personal code number in the boxes below.
Locking the recorder
Prepare to enter the code number by first pressing the
`
button and then the
D
button.
You will see this in the display of the recorder: "
KEY
".
Enter a code number of one to four digits with the numbered
buttons
1
...
0
.
Store the code number in the memory with the the
OK
but-
ton.
The indication "
LOCKED
" and the clock time will appear in the
display of the recorder.
The recorder is now locked.
If you forget or misplace your code number, your specialized
dealer will be able to help you.
Unlocking the recorder
Press the
D
button, enter your personal code number with
the numbered buttons
1
...
0
, and then press the
OK
but-
ton.
"
LOCKED
" disappears from the display of the recorder and
the clock time appears.
The recorder is now unlocked and you can select any desired
function.
If you insert a cassette now, it cannot be removed.
You personal code number!
7. Special Functions
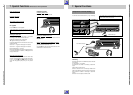
Copying with ...
... a D 2-MAC decoder,
... TV sets with the 16:9 format.
When operating the recorder with one of these units it is
necessary to adapt the input sockets of the recorder.
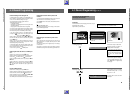
Press the
ø
button.
Select the "Special functions" line from the "Info" menu by
pressing the numbered button
4
.
The "Special functions" menu appears.
Press the
4
to select the line "16:9 Automatic" line from the
"Special functions" menu.
Them menu "16:9 Automatic" appears.
Press the
E
or
R
button to select the desired function.
The position you selected is underlined in blue. If you store
this position in the memory, the marking will turn green.
Press the
O
button to store the function in the memory.
The recorder switches back to the TV programme.
GRUNDIG
TEXT-PROGRAMMING
< > : Select
OK : Save
INFO : Return to Info menu
16:9 Automatic
16:9 Automatik OFF ON
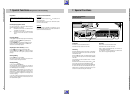
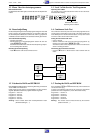
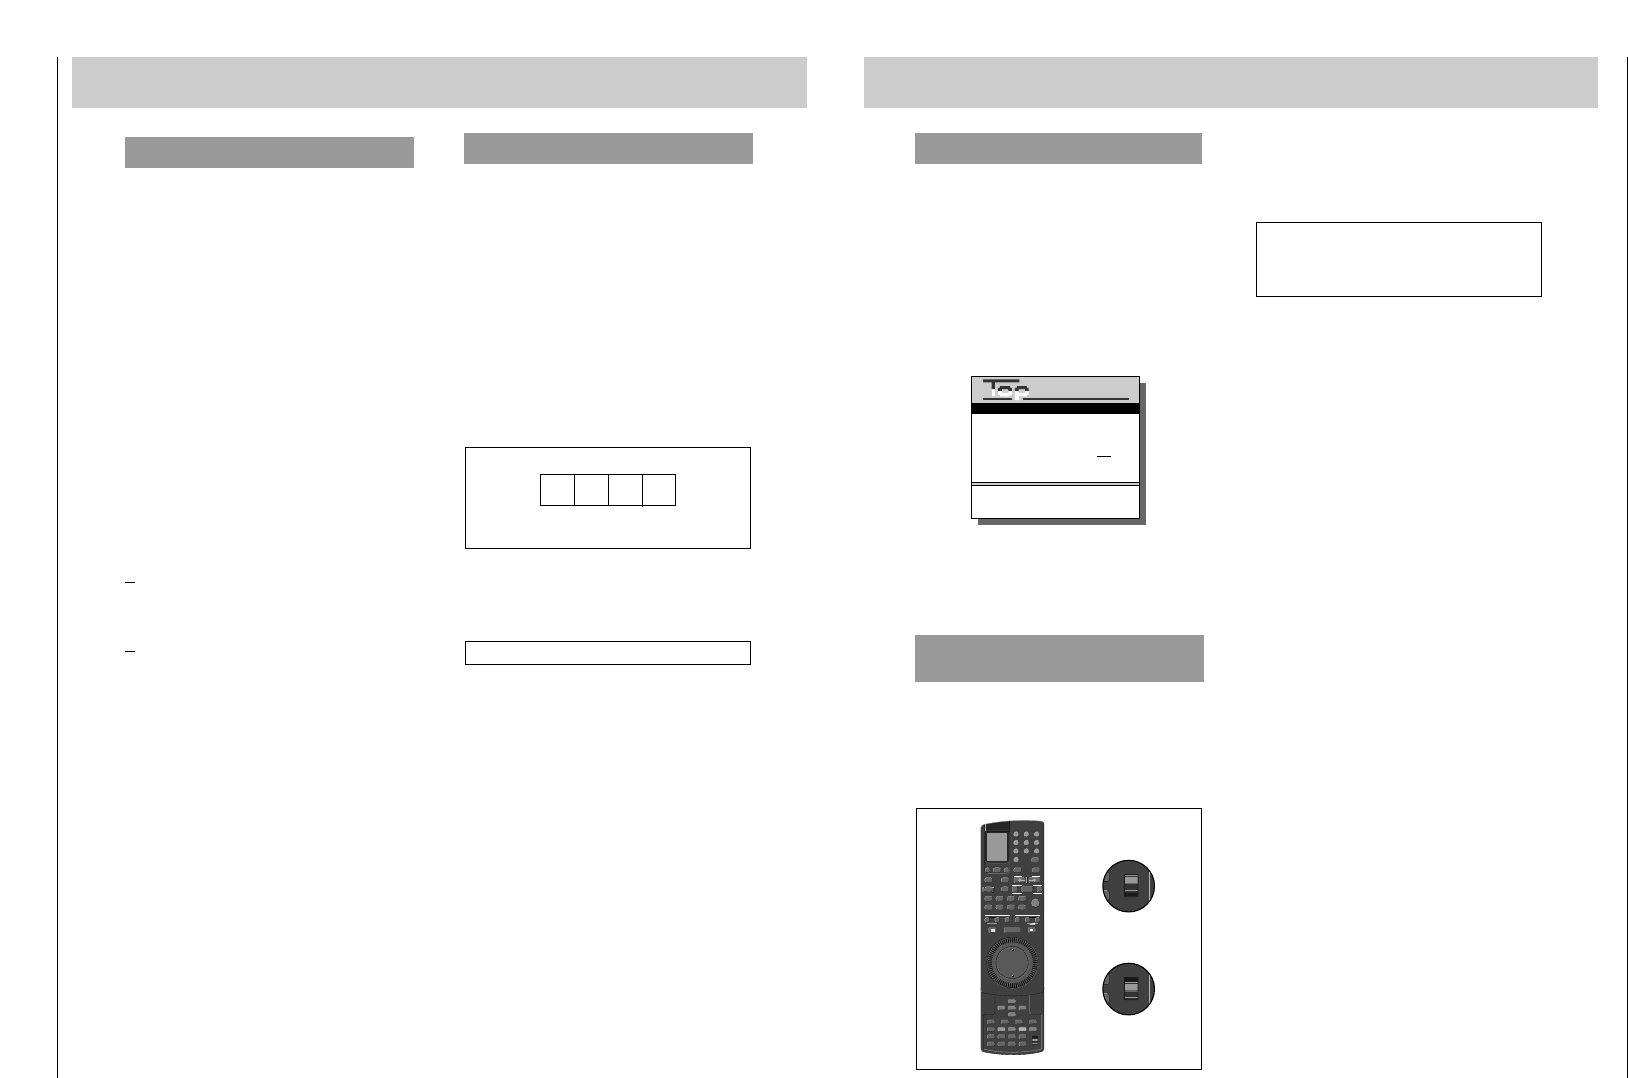
Remote Control of Other GRUNDIG Video
Recorders
With this remote control you can control different
GRUNDIG video recorders independently of each other.
You can use it with your GV 4… and a second recorder of the
series VS600 to VS900 and the GV 200 and later models.
In order to do so, the recorder must be adapted.
AV/CV
TRACKING
PROGRAM
2 31
54
8 97
0
SAT
6
EW/ED
SET
ɠ
OK
CL
CHECK
AUTO
ļ
Ļ
ɚ
ɫ
HIFI
COUNT
0000
LP
ɺ
Ǽ
V
RECORD
ON/OFF
TIMER
S-VHS
TV
AV
Ǽ
Ļ
ļ
+
–
PROGRAM
ı
RP 35
VIDEO 1
VIDEO 2
ATS
STOP
t
PAL/SEC
CODE
PICTURE
OK
TIP VPT INFO
ɳ
ɾ
Ƒї
ǷǸ
Ń
Ľ
VIDEO 1
VIDEO 2
DE
ORE
VIDEO 1
VIDEO 2
DE
ORE
Selecting the video level
When the switch is in the VIDEO 1 position, you can control
your GV 4…;
When the switch is in the VIDEO 2 position, you can control
the second recorder.
Adapting the second recorder for use with the
remote control
In order to control your GV 4…, set the switch to the VIDEO 1
position. An adaption is not necessary in this case.
In order to control the second recorder, it is necessary to
change the command structure.
Set the switch to the VIDEO 1 position.
Disconnect your GV 4… from the mains.
Point the remote control at the second recorder, press the
Z
button, the numbered buttons
8517
, and then
press the
O
button.
The second recorder will only respnd if you set the switch to
the VIDEO 2 position.
Reconnect your GV 4… to the mains.
If you wish to undo the adaption, set the switch to the VIDEO 2
and press the
Z
button, the numbered buttons
851
6
, and the
O
button consecutively.
If the switch 1 VIDEO 2 is not set to the selected video level
when controlling your GV 4…, the indication "
VIDEO I
" or
"
VIDEO 2
" on the recorder advises you that you must
switch the remote control to the other video level.