


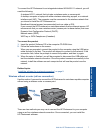


To connect the HP Photosmart to an integrated wireless WLAN 802.11 network, you will
need the following:
A wireless 802.11 network that includes a wireless router or access point.
A desktop computer or laptop with either wireless networking support, or a network
interface card (NIC). The computer must be connected to the wireless network that
you intend to install the HP Photosmart on.
Broadband Internet access (recommended) such as cable or DSL.
If you connect the HP Photosmart on a wireless network that has Internet access, HP
recommends that you use a wireless router (access point or base station) that uses
Dynamic Host Configuration Protocol (DHCP).
Network name (SSID).
WEP key or WPA Passphrase (if needed).
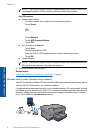
To connect the product
1. Insert the product Software CD in the computer CD-ROM drive.
2. Follow the instructions on the screen.
When you are prompted, connect the product to the computer using the USB setup
cable included in the box. The product will attempt to connect to the network. If the
connection fails, follow the prompts to correct the problem, and then try again.
3. When the setup is finished, you will be prompted to disconnect the USB cable and
test the wireless network connection. Once the product connects successfully to the
network, install the software on each computer that will use the product over the
network.
Related topics
“
Install the software for a network connection” on page 9
Wireless without a router (ad hoc connection)
Use this section if you want to connect the HP Photosmart to a wireless-capable computer
without using a wireless router or access point.
There are two methods you may use to connect the HP Photosmart to your computer
using an ad hoc wireless network connection. Once connected, you can install the
HP Photosmart software.
Add the HP Photosmart to a network 7
Finish setting up the HP Photosmart