74
You can connect the camera to your computer in order to view and store images
(snapshot and movie files).
NOTE
• You also can use your computer’s card slot (if it has one) or a commercially
available card reader to access image files directly from the camera’s memory
card. For details, see the user documentation that comes with your computer.
• When this camera is connected to your PC, two removable drives will display.
Please click AP link (Magix) in the second drive, and then Setup window will
dispaly (an Internet connection is required). After installation, you can import / edit
your photos, movies and music. Please note that AP link (Magix) is the trial version
and will be used permanently after registration.
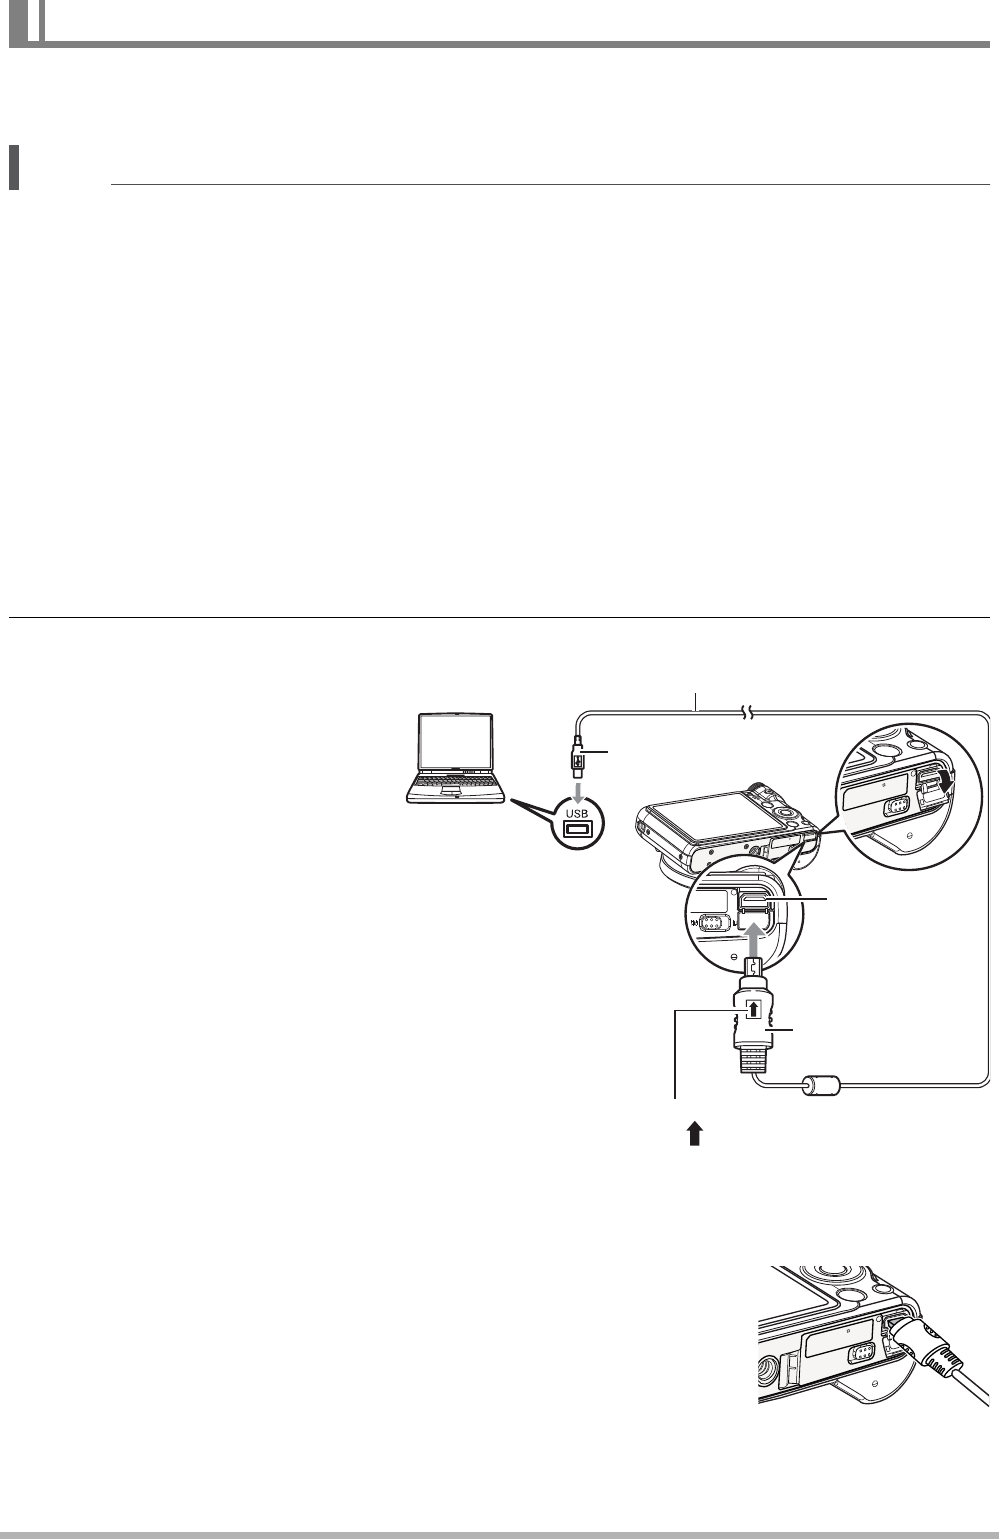
• To connect the camera to your computer and save files
1. Turn on the camera. Next, press [SET] and then display the REC menu
(page 47) or the PLAY menu (page 60).
2. Turn off the camera and
then use the USB cable
that comes with the
camera to connect it to
your computer.
• Connecting the camera to
a computer with a USB
cable starts charging of
the camera’s battery (page
14).
• Make sure that you insert
the cable connector into
the USB/AV port until you
feel it click securely into
place. Failure to insert the
connector fully can result
in poor communication or
malfunction.
• Note that even while the connector is fully inserted, you
still will be able to see the metal part of the connector as
shown in the illustration.
• When connecting the USB cable to a USB port, make
sure you align the connector correctly with the port.
• Your computer may not be able to recognize the camera
if you connect via a USB hub. Always connect directly to the computer’s USB
port.
Viewing and Storing Images on a Computer
USB port
USB cable
(included with camera)
[USB/AV]
port
Large connector
Small
connector
Making sure that the mark on the USB cable
connector is towards the lens side, connect the
cable to the camera.
