


59
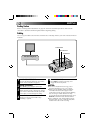
Audio Dubbing
Using a tape recorded at 32 kHz, you can customize the soundtrack of a tape you’ve recorded.
NOTE:
Audio Dubbing is not possible on a tape recorded at 48 kHz.
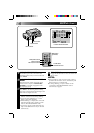
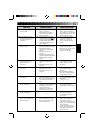
4
PAUSE DURING DUBBING
Press PAUSE.
5
STOP DUBBING
Press STOP.
NOTES:
●
When editing onto a tape that was recorded at 32
kHz, the old and new soundtracks are recorded
separately.
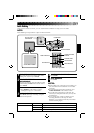
●
To select the desired sound for playback, press
AUDIO MONITOR on the remote control.
●
If you dub onto a blank space on the tape, the
sound may be disrupted. Make sure you only edit
recorded areas.
●
If you change from 32 kHz to 48 kHz in mid-
recording and then use the tape for Audio
Dubbing, it is not effective from the point where
48 kHz recording began.
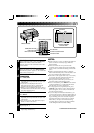
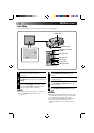
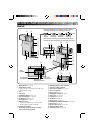
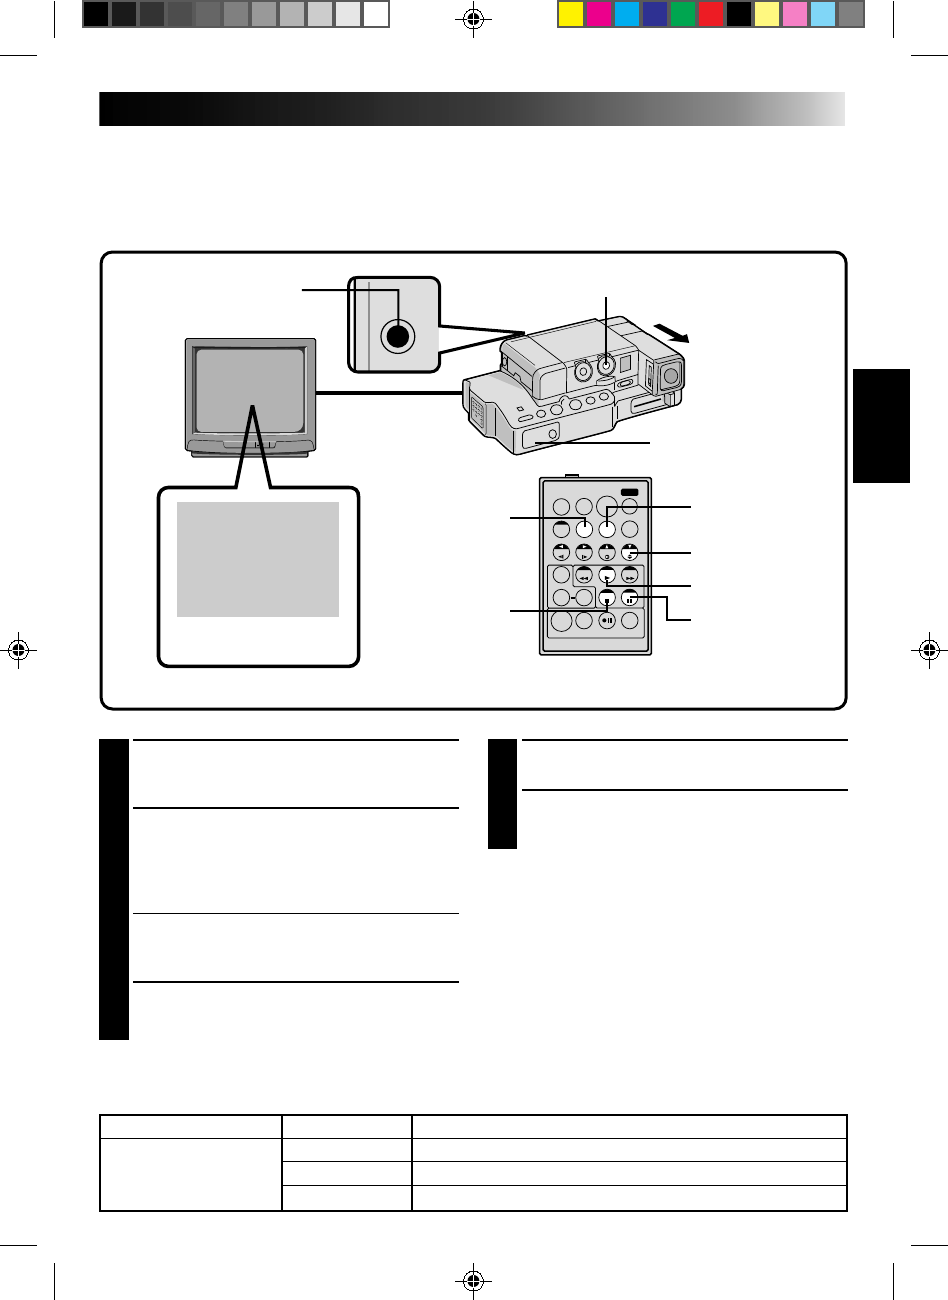
1
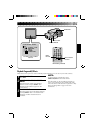
FIND EDIT-IN POINT
Play back the tape to locate the point where
editing will start, then press PAUSE.
2
CONNECT EXTERNAL
MICROPHONE
Connect an optional stereo microphone. Then
while holding A. DUB on the remote control,
press PAUSE.
•Pull out the viewfinder and “6e” appears.
•Press DISPLAY on the remote control if
sending the image to a connected TV.
3
BEGIN DUBBING
Press PLAY, then begin “narrating” using the
external microphone.
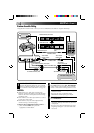
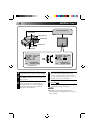
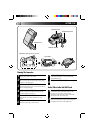
6e
TW
POWER DIAL
REMOTE SENSOR
AUDIO DUB STANDBY
A.DUB BUTTON
PLAY BUTTON
PAUSE BUTTON
EXT. MIC INPUT
CONNECTOR
DISPLAY BUTTON
STOP BUTTON
AUDIO MONITOR
BUTTON
RM-V708U (provided)
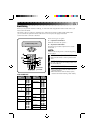
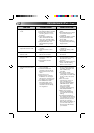
RECORDING SOUND DISPLAY OUTPUT SOUND
32 kHz FULL SOUND Original and new tracks are combined and output in stereo.
SOUND 1 Original track is output on both "L" and "R" channels in stereo.
SOUND 2 New track is output on both "L" and "R" channels in stereo.