


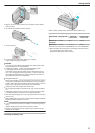
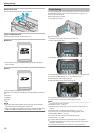
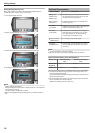

Removing the Card
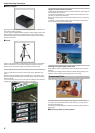
Push the card inward once, then pull it out straight.
.
Types of Usable SD Card
The following SD cards can be used on this unit.
SDHC Card
.
●
Use a Class 4 or higher compatible SDHC card (4 GB to 32 GB) for
video recording.
SD Card
.
●
This unit supports 256 MB to 2 GB SD cards.
Operations are confirmed on the SD cards from the following manufactur-
ers.
●
Panasonic
●
TOSHIBA
●
SanDisk
●
ATP
NOTE:
●
Using SD cards (including SDHC cards) other than those specified
above may result in recording failure or data loss.
●
Class 4 and Class 6 are guaranteed to have a minimum transfer rate of
4 MB/s and 6 MB/s respectively during reading or writing of data.
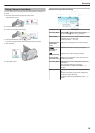
Clock Setting
The “SET DATE/TIME!” screen appears when you turn on this unit for the
first time after purchase, when it has not been used for a long time, or
when the clock is not set yet.
Set the clock before recording.
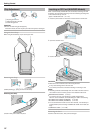
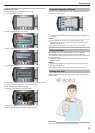
1
Open the LCD monitor.
.
●
This unit turns on.
●
When the LCD monitor is closed, this unit turns off.
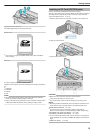
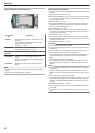
2
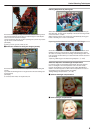
Select “YES” and touch C.
.
3
Set the date and time.
.
●
Use the slider to adjust the year, month, day, hour, and minute in order.
●
Touch the operation buttons "E" / "F" to move the cursor.
●
After setting the date and time, touch C.
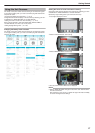
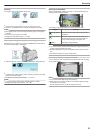
4
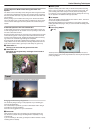
Select the region where you live and touch C.
.
●
The city name and time difference are displayed.
●
Touch C after the color of the selected region changes.
NOTE:
●
The clock can be reset again later.
"Resetting the Clock" (A P.15)
●
When using this unit overseas, you can set it to the local time for re-
cording.
"Setting the Clock to Local Time when Traveling" (A P.17)
●
You can turn on or off the clock display during playback mode.
"ON-SCREEN DISPLAY" (A P.91)
●
The clock set style of this unit varies with the models.
"Clock Set Style" (A P.95)
●
Touch the slider and buttons around the screen with your fingers.
●
The slider and buttons do not function if you touch them with your fin-
gernails or with gloves on.
●
The displays on the screen do not work even if you touch them.
Getting Started
14