17
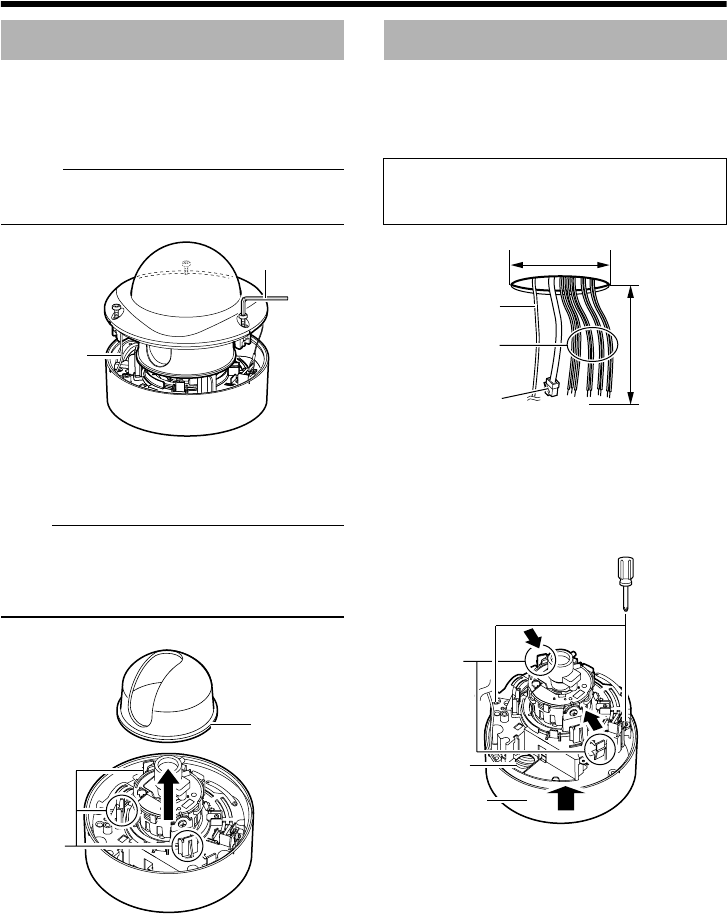
1.Remove the dome cover
Loosen the dome cover fastening screws (x3)
with the wrench (supplied) and remove the dome
cover.
Memo:
● The dome cover is connected to the base via
a fall-prevention wire.
2.Remove the inner dome
The inner dome is secured by 3 claws. Remove
the inner dome from the claws.
Note:
● Make sure you touch the metal surface of the
[MONITOR] terminal to release the static
electricity from your body. Static electricity
may cause the camera to malfunction.
Remove the camera unit from the base and
mount the base to the ceiling or wall.
To mount on a wall, use the same procedures
below but replace the word “ceiling” with “wall”.
1.Remove the camera unit from the base
A Loosen the camera fastening screws (x2)
with the screw driver.
B Remove the camera from the base while
pressing in the two claws.
Removing the dome cover
Fall-prevention
wire
Wrench (Supplied)
Inner
dome
Claw
(
3 locations)
Mounting the base
Setup
If necessary, use the attached template to drill
a hole (R30 mm, 1-1/8 inches) for mounting.
Power cable,
alarm cable,
heater cable
Approx. 100 mm
(3-7/8 inches)
R30 mm
(1-1/8 inches)
Fall-prevention wire
(not attached)
LAN cable
A
B
Camera unit
Base
Claw
(2 locations)
VN-C215VP_EN.book Page 17 Wednesday, December 20, 2006 4:26 PM


