28
Setup
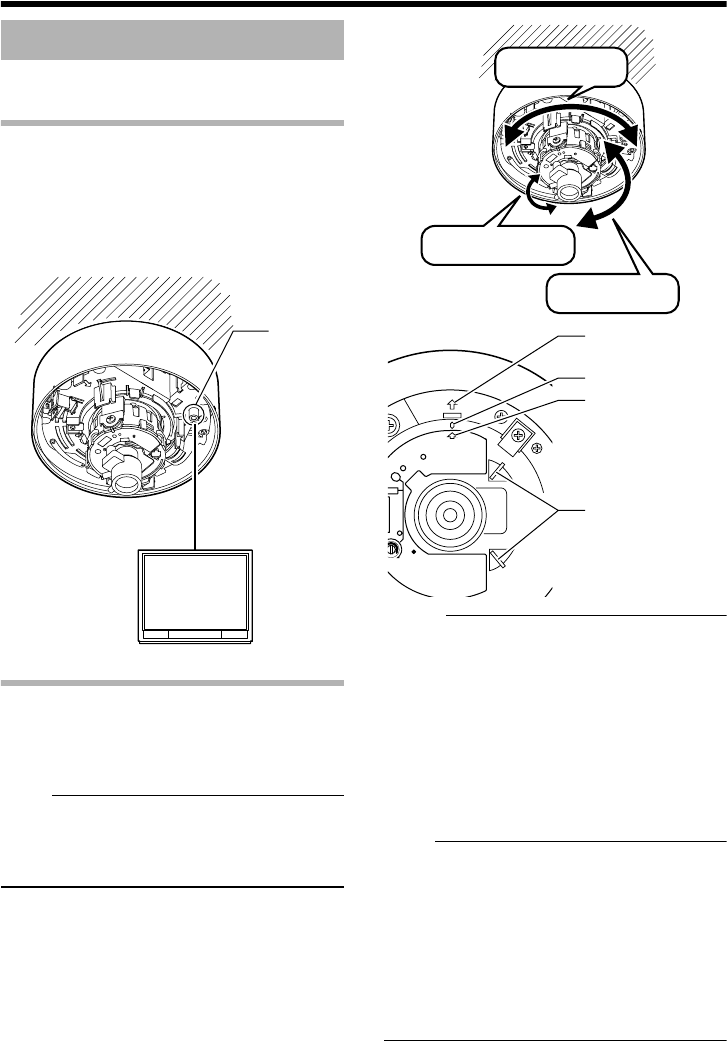
When the camera is mounted, adjust the image
settings while looking at the actual image.
Mounting the test monitor
Connect the [MONITOR] terminal of the camera
to the test monitor to adjust the camera shooting
direction, field angle and focus.
T When configuring, turn on the power of the
camera.
Adjusting the camera shooting direction
This camera can be adjusted for pan, tilt and
rotation. Adjust the direction and face the
camera towards the object.
Note:
● Make sure you touch the metal surface of the
[MONITOR] terminal to release the static
electricity from your body. Static electricity
may cause the camera to malfunction.
Memo:
● Rotate both pan and rotation ±175 Њ from the
positions aligned with the camera imaging
direction mark, pan center mark and rotation
center mark. Make sure you hold the rotation
knob and adjust the rotation without holding
the lens section.
● After adjusting the field angle, tighten and
secure the tilt fastening screw so that the field
angle will not be misaligned when using the
camera in locations with vigorous vibrations.
(A Pg. 12)
Note:
● Moving the camera when it has exceeded the
adjustment range may cause its performance
to deteriorate.
● As the tilt and rotation range of this camera is
wide, part of the camera may be reflected in
the shooting screen depending on the field
angle and direction.
● Do not hold the lens section when adjusting
the camera direction. The lens section may
be damaged if you apply force to it.
Adjusting Images
[MONITOR]
terminal
75 K terminated
Test monitor
Tilt: ±70 Њ
Pan: ±175 Њ
Rotation: ±175
Њ
H
RIS
VEL
ADJ
E
ADJ
SPOT
Pan center mark
Shooting direction mark
Rotation center mark
Rotation clasp
:Make sure you hold
and turn this clasp when
adjusting the rotation.
VN-C215VP_EN.book Page 28 Wednesday, December 20, 2006 4:26 PM


