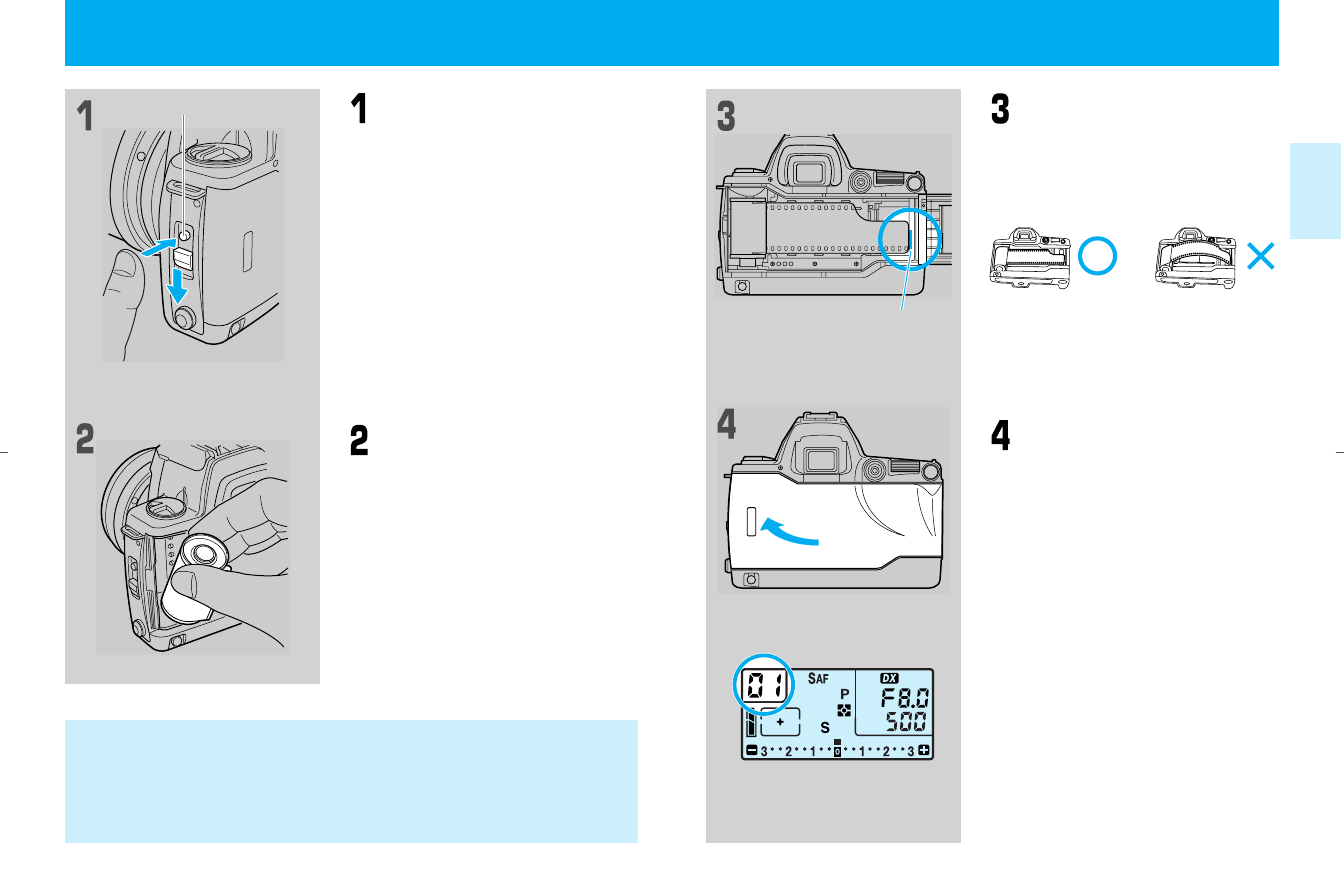
Pulling on the tip of the film, draw
out the film to the position of the
orange “ I ” mark, then set it over the
spool.
Make sure the film is flush (not bulging
out), as shown in the diagram.
• If the drawn out section of the film is too
long, do not try to continue loading the film.
Wind it back up into the film cartridge to
adjust the length.
Securely close the camera back,
turn the main switch on and press
the shutter release button.
The film is automatically advanced to
the first frame and the exposure counter
is set to “01”.
• If “00” still flashes on the exposure counter,
the film has not been properly loaded. Open
the camera back and reload the film.
2120
6. Loading film
Open the camera back by lifting
the camera back release knob
while sliding the camera back open-
ing lever downwards.
• The first time you use the camera be sure to
remove the protective sheet inside the cam-
era before loading film.
• Be careful not to touch the DX and data
back contacts. If they become dirty clean
them off with a soft cloth.
• Load and remove film out of direct sunlight.
Insert the film at an angle as
shown on the diagram.
Insert the film fixing shaft onto the pro-
jection in the film cartridge.
Shutter curtain
The shutter curtain is a precision part. Be extremely careful not to touch it or
poke it with the tip of the film or your finger. In particular, never press the
shutter release button when the tip of the film is positioned over the shutter
curtain.
Camera back release knob
“ I ” mark
Display panel
04-1BC(E)_P013-024 11/15/01 7:27 PM Page 20


