


62 (E)
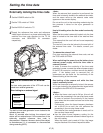
Variable frame rate
This camera/VTR enables the frame rate (shooting
speed) to be set from 4 fps to 60 fps.
Since the 720P/59.94 Hz or 720P/60.00 Hz format is
used for recording onto the tape or outputting to the
HD SDI OUT connector, users now have the exciting
opportunity to create a whole new dimension of
moving images with clearer slow-motion images and
blur effects—a world which was hitherto confined to
the field of film production—in their own video
productions.
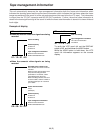
This unit automatically stores as the tape
management information both the frame rate
information which indicates the shooting speed and
the active frame information which indicates the first
frame where the frame image was switched in the
user’s bit of the sub-code track area (this used to be
the LTC area). This information is output from the TC
OUT connector and HD SDI OUT connector. Further,
the active frame information is stored in the least
significant digit of the user’s bit while the frame rate
information is stored in its lower third and fourth digits.
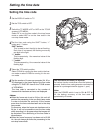
Setting the frame rate
There are two ways in which the frame rate can be
set.
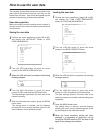
Using menu operations
1
Perform the menu operations (pages 86 to 88),
and display the “FRAME MODE” screen of FILM
(CAM) MAIN MENU 2.
2
Turn the JOG dial button to move the arrow
(cursor) to the “FRAME RATE” item.
3
Press the JOG dial button, and set the desired
frame rate.
Turn the JOG dial button to select the frame rate,
and press the JOG dial button to enter the
selection.
4
Press the MENU button to exit the menu
operations.
The setting menu is cleared, and the displays
showing the unit’s current statuses appear at the
top and bottom of the viewfinder screen.
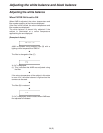
n
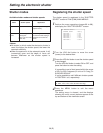
< FRAME MODE >
FRAME RATE RANGE:60-12
FRAME RATE :24
SCAN REVERSE :OFF
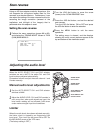
Using the synchro scan adjustment switches
(“+” and “–”)
1
Set the unit to a status other than the menu
operation status.
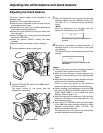
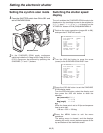
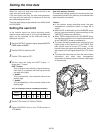
2
When the JOG dial button is pressed, the frame
rate information display at the top left of the
viewfinder screen starts flashing.
3
Press the synchro scan adjustment switches (“+”
and “–”) to set the desired frame rate.
<Note>
After about 5 seconds, the frame rate information
display stops flashing and lights. Press the
synchro scan adjustment switches (“+” and “–”)
while this display is flashing.
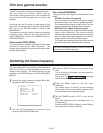
4
Press the JOG dial button to enter the frame rate.
Refrain from further operation, and in about 5
seconds the frame rate information display on the
viewfinder screen will stop flashing, and the frame
rate will be set.
24
EX2
1/250 S 10min 14.6V
/46 BP402
1B A 12dB
TCG 00:00:00:00
F5.6 Z99
iREC
!D.L.
<Note>
When the frame rate has been changed, adjust the
black balance once again.