


10
For assistance, please call : 1-800-211-PANA(7262) or, contact us via the web at: http://www.panasonic.com/contactinfo
Before Use
Quick Guide
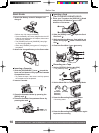
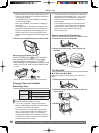
• Before use, fully charge the Battery.
• Since the Battery will not be charged when the DC
Cable is connected to the AC Adaptor, disconnect
it from the AC Adaptor.
• The [POWER] Lamp and [CHARGE] Lamp light
up, and charging starts.
• When the [CHARGE] Lamp goes off, charging is
completed.
1 Attach the Battery to the AC Adaptor and
charge it.
2 Attach the charged Battery to the Camcorder.
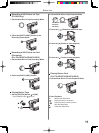
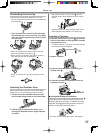
1 Slide the [OPEN/EJECT] Lever
1
toward the
front and pull down to fully open the Cassette
Compartment Cover.
• To protect the tape, if the cover is not fully opened,
the cassette cannot be ejected.
2 Insert a Cassette.
3 Close the Cassette Holder by pressing the
[PUSH] mark
2
.
4 Close the Cassette Compartment Cover by
pressing the mark
3
.
2
1
Inserting a Cassette
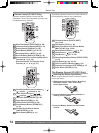
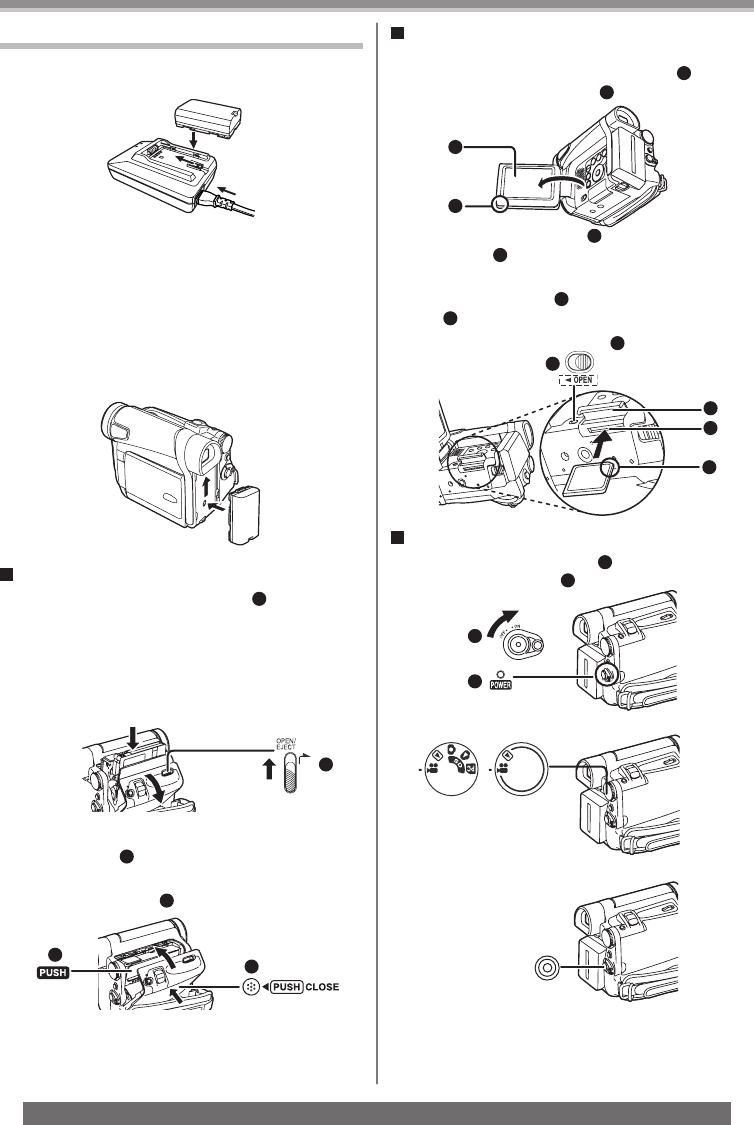
Inserting a Card
(For PV-GS12/PV-GS14/PV-GS15)
2 Slide the [OPEN] Lever
3
to open the Card
Slot Cover
4
.
3 While holding the Memory Card with its cut
corner facing right
5
insert it into the Card
Slot
6
.
4 Close the Card Slot Cover
4
securely.
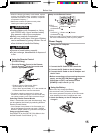
Recording on a Tape
1 Set the [OFF/ON] Switch
1
to [ON].
• The [POWER] Lamp
2
lights up.
2 Set the Mode Dial to Tape Recording Mode.
3 Press the Recording Start/Stop Button.
• Recording starts.
(PV-GS12/
PV-GS14/
PV-GS15)
(PV-GS9)
1
2
4 Press the Recording Start/Stop Button again
to pause the recording.
3
1 Place your Thumb on the [OPEN▼]
1
Knob
and pull the LCD Monitor
2
out in the
direction of the arrow.
1
2
5
3
4
6