45
Editing Mode
To Dub Audio While Listening to a Pre-recorded
Sound
When pausing the audio dubbing, set the [12bit
AUDIO] on the [PLAYBACK] Sub-Menu to [ST2]
and you can check the pre-recorded sound.
When a microphone (For PV-GS14/PV-GS15) is
used for audio dubbing, use headphones to listen
to the pre-recorded sound while dubbing the audio.
(When using headphones, set [AV JACK] on the
[INITIAL] to [OUT/PHONES].)
When the line input is used, you can dub audio
while listening to the pre-recorded sound from the
speaker.
• For other notes concerning this item, see page 65.
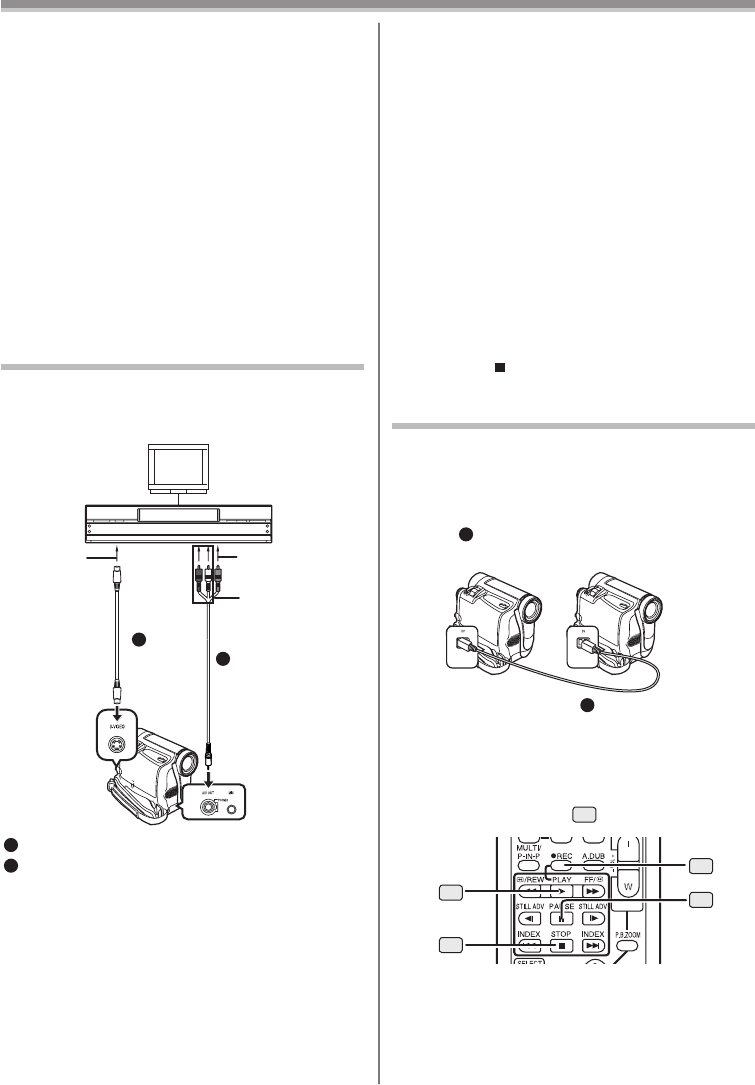
Using the DV Cable for Recording
(Digital Dubbing)
By connecting this Camcorder with other digital video
equipment (such as another Camcorder of the same
format/model) that has a DV input/output Terminal, and
using a 4-pin to 4-pin DV Interface Cable PV-DDC9
(optional)
1
, high quality images and sounds can be
dubbed in the digital mode.
Player/Recorder:
1 Insert the Cassette and set to Tape Playback
Mode.
Player:
2 Press the [►] Button
72
to start playback.
1
69
54
70
72
Copying on an S-VHS (or a VHS)
Cassette
( Dubbing)
After connecting the Camcorder and the VCR as
illustrated, start the following procedures.
1
AV Cable
2
S-Video Cable (not supplied)
[VIDEO IN]
[AUDIO IN]
[S-VIDEO IN]
1
2
(For PV-GS14/
PV-GS15)
• Be sure to press the [OSD] Button (p. 14) on
the Remote Control prior to copying so that no
indications are visible. Otherwise, the displayed tape
counter and function indications are also copied.
Camcorder:
1 Insert the recorded Cassette.
VCR:
2 Insert an unrecorded Cassette with an
erasure prevention tab.
• If various setups (such as external input, tape
speed, etc.) are required, please refer to the
operating instructions of your VCR.
Camcorder:
3 Press the [►] Button to start playback.
VCR:
4 Start recording.
5 Press the Pause or Stop Button to stop
recording.
Camcorder:
6 Press the [
] Button to stop playback.


