31
Recording Mode
3/3
3/3
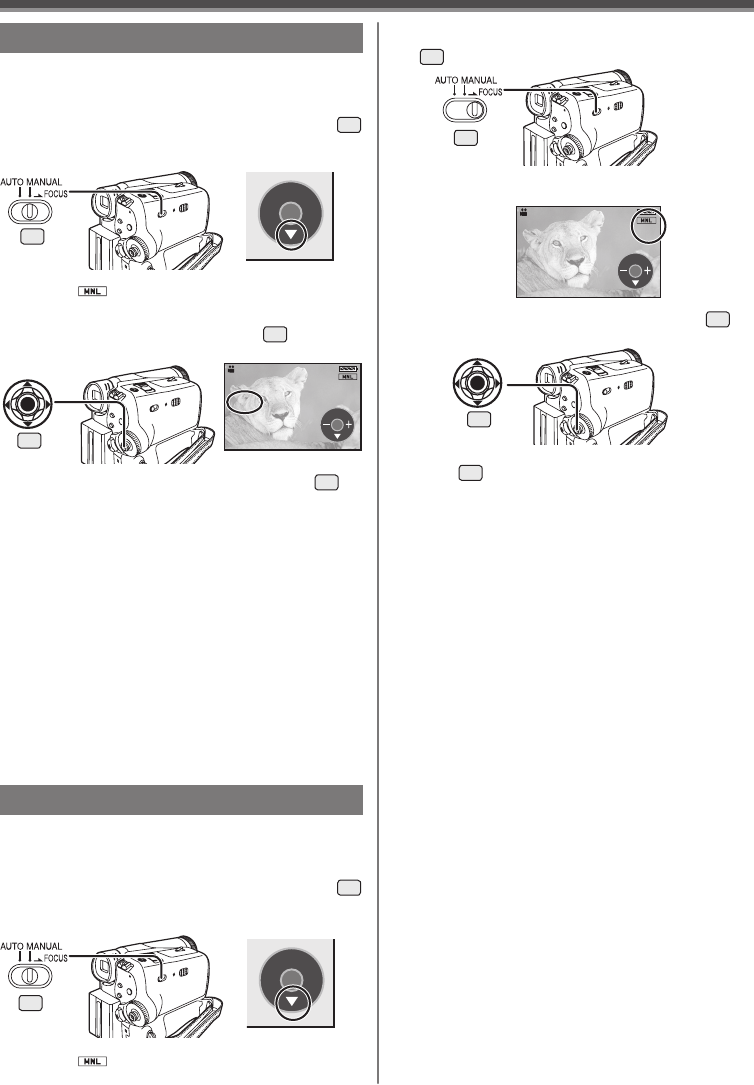
Manual Iris Adjustment ( F Number)
You can use this function when the screen is too
bright or too dark.
• Set to Tape/Card Recording Mode.
1 Set the [AUTO/MANUAL/FOCUS] Switch
24
to [MANUAL].
3 Move the Joystick Control [◄] or [►]
33
to
adjust the iris.
24
• The [ ] Indication and the One-Touch
Navigation icon appears.
2 Move the Joystick Control [▼]
33
until the
Iris Indication appears.
33
Range of Iris Adjustment
CLOSE (Closed), F16, ..., F2.0,
OPEN (Opened) + 0dB, ..., 18dB
When a value closer to [CLOSE] is selected, the
image becomes darker.
When a value closer to [18dB] is selected, the
image becomes brighter.
The value to which + dB is attached indicates a
Gain-up value. If this value is too large, the quality
of the image deteriorates.
To Resume Automatic Adjustment
Set the [AUTO/MANUAL/FOCUS] Switch to
[AUTO].
• For other notes concerning this item, see page 55.
Manual Focus Adjustment
Focus can be adjusted manually for recording in a
situation where auto focus may not function well.
• Set to Tape/Card Recording Mode.
1 Set the [AUTO/MANUAL/FOCUS] Switch
24
to [MANUAL].
2 Slide the [AUTO/MANUAL/FOCUS] Switch
24
to [FOCUS].
• The [►MF] Indication (Manual Focus Mode)
appears.
3 Move the Joystick Control [◄] or [►]
33
to
adjust the focus.
To Resume Automatic Adjustment
Set the [AUTO/MANUAL/FOCUS] Switch to [AUTO]
or [FOCUS].
• If you keep moving the Joystick Control [►] or
[◄]
33
, the speed of adjusting becomes faster.
24
24
SP 3h59m59s29f
R2:00
►MF
12:34:56AM
JAN 2 2005
3/3
33
SP 3h59m59s29f
R2:00
1/60
►F2.0
0dB
12:34:56AM
JAN 2 2005
3/3
• The [ ] Indication and the One-Touch
Navigation icon appears.
• When focused with a wide angle, the subject may
not be in focus when zoomed in. First, zoom in on
the subject, and then focus on it.
[One-Touch Navigation icon]
[One-Touch Navigation icon]


