43
With a PC
3 Click the [Video Stream Driver].
• The set up program starts running.
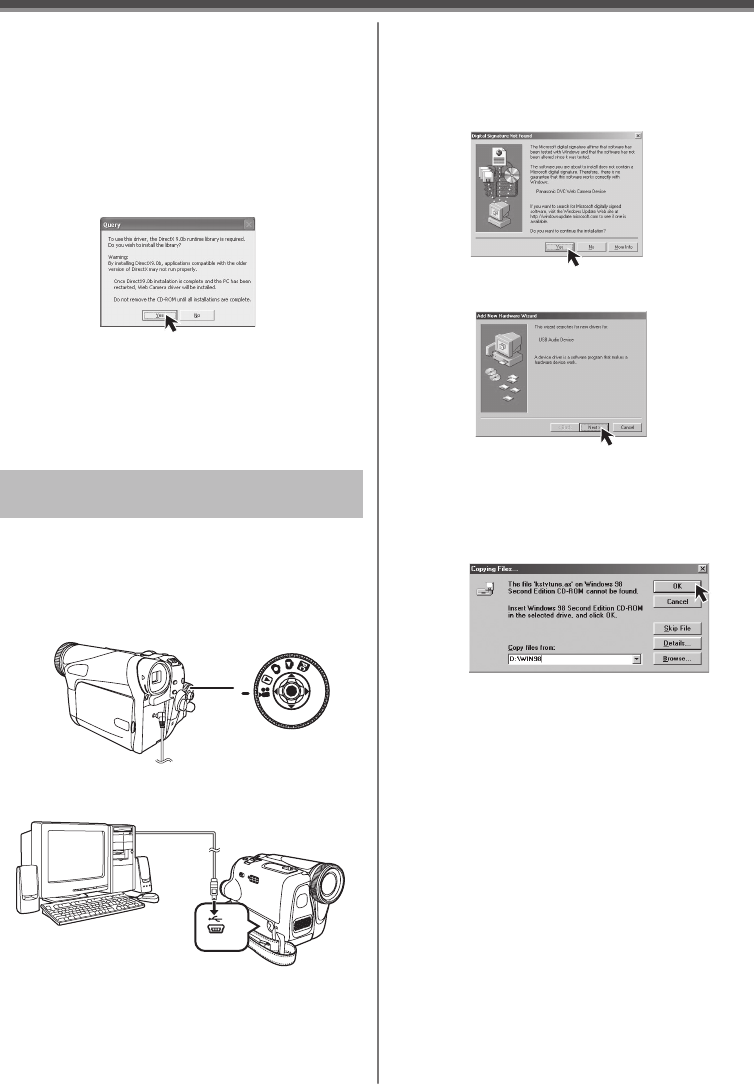
4 For Windows XP users:
Depending on your system environment,
installation of “DirectX9.0b” may be
required. Click [Yes] and continue with
installation.
• After “DirectX9.0b” is installed, the computer will
restart.
• Do not remove the CD-ROM.
5 Finish installation by following the
on-screen instructions.
• Click [Next] and proceed with installation.
• After completing the installation, click [Finish].
6 After the Video Stream Driver is installed,
please restart your computer.
• When the Camcorder and personal computer
(with Windows 2000) are connected via USB
Cable, a message, such as the one below, is
displayed. However, testing by the manufacturer
has confirmed functionality of this Camcorder
with Windows 2000. Click [Yes] and proceed.
2 Connect the Camcorder to your personal
computer with USB Cable.
1 Set the Camcorder to Tape Recording Mode
or Tape Playback Mode.
• To send the live camera picture to a PC, set the
Camcorder to Tape Recording mode.
• To send pictures recorded on a tape to a PC,
set the Camcorder to Tape Playback mode.
Connecting the Camcorder to Personal
Computer (For Using as a Web Camera)
• For Windows 98SE/Me users, “USB Audio
Device” is required. Click [Next] and proceed.
• If you use Windows 98SE, the OS installation
CD may be required.
Windows 98SE/Me Users
The following messages may be displayed when
connecting this Camcorder and your personal
computer via USB Cable.
1) The message “The file ‘kstvtune.ax’ on
[Unknown] cannot be found...” is displayed.
• Enter “C:\Windows\system” for Windows 98SE.
Enter “C:\Windows\options\CABS” for Windows
Me.
• If the “kstvtune.ax” file is missing in one of
the 2 above-mentioned folders, insert the OS
CD-ROM and assign the path.
2) The message “The file ‘ksclockf.ax’ on
[Unknown] cannot be found...” is displayed.
• Enter “C:\Windows\system”.
• If the “ksclockf.ax” file is missing in the above
mentioned folder, insert the OS CD-ROM and
assign the path.
• You may click [Browse] to look for and assign the
path.


