C1696M-A (7/08) 37
Exporting Video
STARTING AN EXPORT
The DVR5100 allows you to export video as QuickTime
®
MPEG-4 Files (*.3gp) or Pelco video format (*.pef) and save the file to a USB device,
CDROM, or DVD. The default export format is configured by the system administrator for a given user, but this may be changed during the export
process. Exported video clips can be very large. Ensure that the media to which you are exporting the video contains sufficient storage space
before you begin the export.
There are three paths for exporting a video clip:
• Quick Export menu
• Quick Search dialog box
• Enhanced Search dialog box.
To export a video clip:
1. Select a video pane that is displaying video to be exported (exporting can start in live or playback mode).
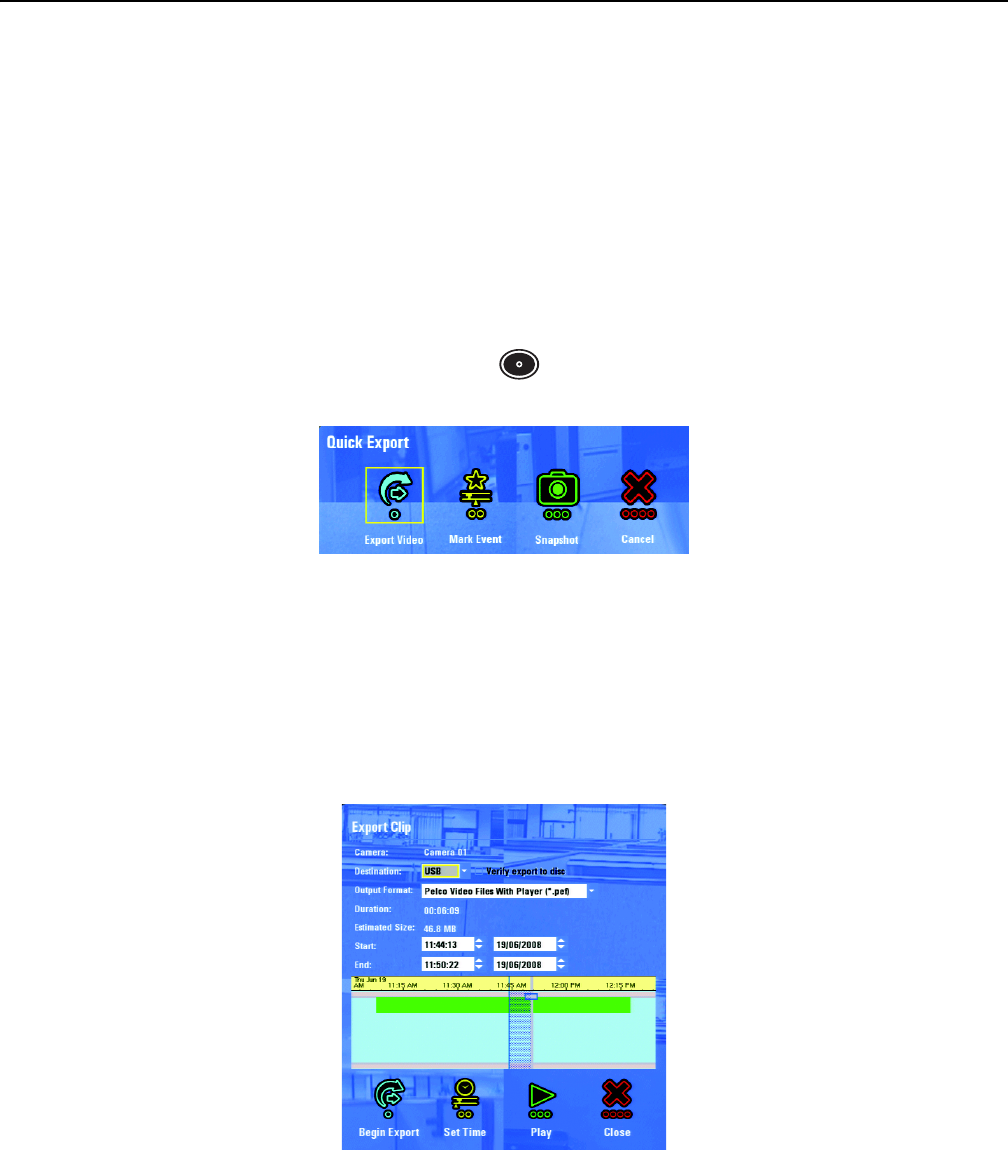
2. Press the “X” key [or press the Quick Export function button ] to select Quick Export. The Quick Export menu appears (refer to
Figure 35).
Figure 35. Quick Export Menu
3. Click Export Video. The Export Clip dialog box appears (refer to Figure 36). (Regardless of your starting point, you will arrive at the same
dialog box.)
NOTE: The following are the default start and end times:
• Arriving from Live: The previous 10 minutes
• Arriving from Quick Search: The currently selected time on the time line plus 10 minutes forward
• Arriving from Enhanced Search: The whole video clip, defined by the video clip’s start and end times
Figure 36. Export Clip Dialog Box
4. Select your destination (CD/DVD or USB device).
5. Select the output format: Pelco Video File with Player (*.pef), Pelco Video File without Player (*.pef), or QuickTime MPEG-4 Files (*.3gp).
NOTE: When exporting in the MPEG-4 format, the system will not export associated audio, the time and date stamp, or the digital
signature required to authenticate a clip.


