


C2910M-A (4/05) 27
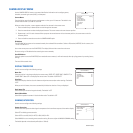
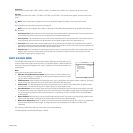
Active Zone
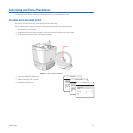
Select the zone to enable: ZONE 1, ZONE 2, ZONE 3, or ZONE 4. The default zone is ZONE 2. You can activate only one zone at a time.
Edit Zone
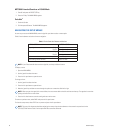
Select the zone to define: EDIT ZONE 1, EDIT ZONE 2, EDIT ZONE 3, or EDIT ZONE 4. The zone edit screen appears, and the zone has a white
border.
Use the following four steps to define the zone’s size and position:
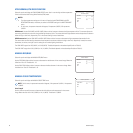
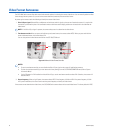
1. Horizontal position: Press the top button to move the zone right. Press the bottom button to move the zone left. Press the center button to
accept the horizontal position and move to the next adjustment; the zone border changes to red.
2. Vertical position: Press the top button to move the zone up. Press the bottom button to move the zone down. Press the center button to
accept the vertical position and move to the next adjustment; the zone border changes to white with a green bottom line.
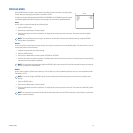
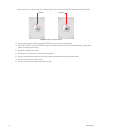
3. Vertical size: Press the top button to move the green bottom line up, decreasing the zone height. Press the bottom button to move the
green bottom line down, increasing the zone height. Press the center button to accept the vertical size and move to the next adjustment; the
green bottom line changes to white and the white right line changes to green.
4. Horizontal size: Press the top button to move the green right line to the right, increasing the zone width. Press the bottom button to move
the green right line to the left, decreasing the zone width. Press the center button to accept the horizontal size and return to the first
adjustment; the green right line changes to white.
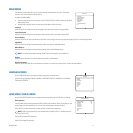
WHITE BALANCE MENU
The CCC5100H Series camera offers six white balance options. White balance settings define how the
camera processes video images to render true colors in a scene. White balance is especially effective in
scenes with changing color temperatures. Use it also in installations with incandescent, fluorescent, or
outdoor lighting.
Mode
Select one of the following white balance modes:
• ATW (Auto Tracing White Balance) Normal: Select this option for constant lighting scenes,
such as indoor applications. To configure the low and high color temperature limits for this mode,
refer to ATW Normal/ATW Desaturation.
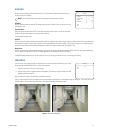
• ATW Desaturation: Select this option for mixed lighting scenes, such as indoor hallways with exterior windows or doorways. To configure
the low and high color temperature limits for this mode, refer to ATW Normal/ATW Desaturation.
• ATW Extended: This option extends the high and low color temperature limits to a special factory setting. Select this option to render
colors accurately in unusual color settings, such as sodium lighting or for light changes at sunset.
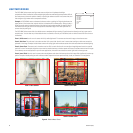
• Auto White Balance: In most cameras, scenes with one or two dominant background colors affect how the camera adjusts image color.
For example, when a camera sees a large blue surface with a small white object, it may redden the image, giving the white object a reddish
tint. Use this option to calibrate the camera to the white balance in a neutral scene. For more information, refer to Auto White Balance
(AWB) Calibration.
• Manual Red/Blue: Select this option to set the red and blue gain settings manually. The camera will not automatically adjust the white
balance as the color changes. To configure the red and blue gain for this mode, refer to Manual Red/Blue.
• Manual Color Temp(erature): Select this option to set the white balance color temperature manually. The camera will not automatically
adjust the white balance as the color changes. To configure the manual color temperature for this mode, refer to Manual Color
Temperature.
After selecting a white balance mode, use a short center press to enable the setting.
The default depends on the selected profile (refer to Table K).
NOTE: If the zone border does not appear, the zone may be located off the edge of the display or the zone may be full screen.
NOTE: If you are using a keyboard, refer to Table J in Accessing the Setup Menus (Pelco Controller) for the equivalent Pelco controller
commands.
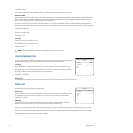
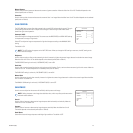
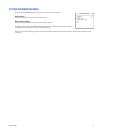
WHITE BALANCE
MODE ATW NORMAL
<ATW NORMAL/DESAT>
<MANUAL RED/BLUE>
<MANUAL COLOR TEMP>
BACK
EXIT