DATE AND TIME SETTING
The digital camera will record the date and time an image or audio recording
is taken so that you can display them during playback. Therefore, before
capturing images, make sure the correct date and time are set.
Example: To set the clock to 7:30 p.m. on July 23, 2003
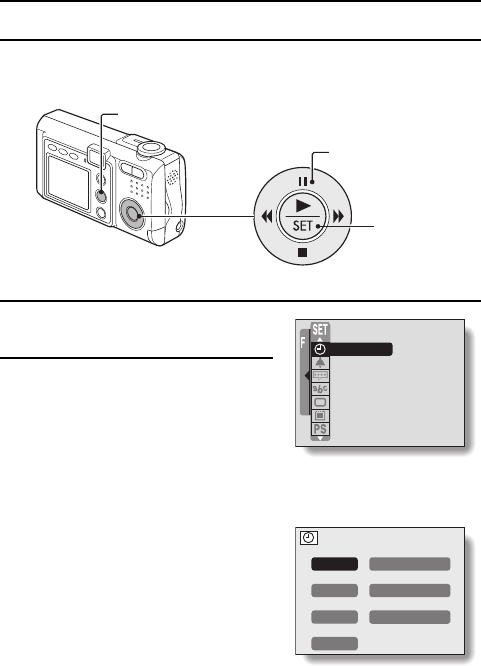
1
Display the Option Setting Mode
Screen (see page 135).
2
Select the clock set icon r, and
press the SET button.
œ The CLOCK SET menu appears.
œ The current date and time settings
appear.
œ Follow the procedures below to
enable or disable the date display
during playback, to set the display
format for the date, and to set the
date and time.
œ To return to the Option Setting Mode
Screen, press the MENU button, or
select “EXIT” and press the SET
button.
<Example: Shooting Options
Screen>
Arrow button
MENU button
SET button
CLOCK SET
OPERATION BEEP
GUIDANCE
LANGUAGE
TV SYSTEM
REFORMAT
POWER SAVE
CLOCK SET
DATE
p
2003/03/01
TIME
p
00:00
DISP
p
Y/M/D
EXIT
SX711/EX, GX, U (VPC-J1 GB) Tue. Feb., 25/2003
137
English
