16 Camfire DCi User's Guide
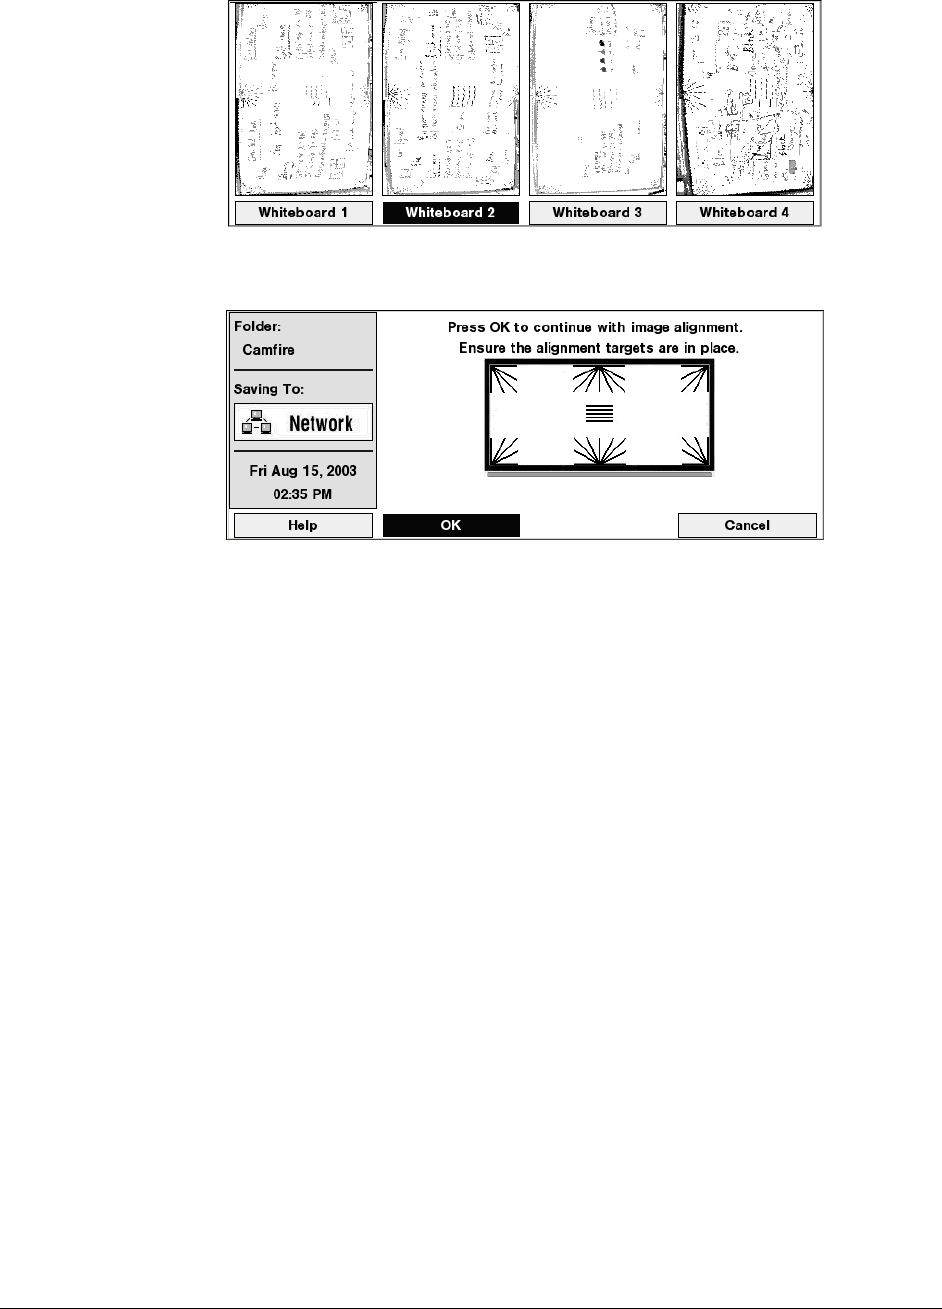
If you have multiple whiteboards, the following screen appears.
9. Select a whiteboard, if required.
The following screen appears.
10. Press OK.
A screen appears, indicating that the alignment is in progress.
11. Wait for the Administration screen to appear (approximately three minutes), indicating
that the alignment is complete.
12. Without removing the image targets from your whiteboard, press the Save button.
An image of your whiteboard appears on the control unit screen.
13. If you configured a printer, press the Print button on the control unit. Otherwise, access
the saved image at your desk using Image-Saving Software or the USB storage device
(page 17).
14. If the horizontal lines are unbroken in the saved image, the alignment was successful and
you can remove the image targets. Some jaggedness in the lines is normal even for a
well aligned system. Do not be concerned unless the lines are completely broken.
OR
If the horizontal lines are completely broken, leave the image targets on your whiteboard
and repeat steps 5–14, or contact SMART Technical Support at 1.866.518.6791
(Canada/U.S.) or +1.403.228.5940 (all other countries).
