


34
G:\SONY\PV\CX18500_GB_kaihan\2887515141\2887515141HDRFX7E\01GB05BAS.fm
HDR-FX7E
2-887-515-14(1)
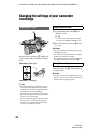
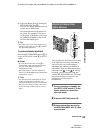
If flashes during standby mode, set the
ND FILTER switch F to 1 to turn on the
indicator. If flashes, set the ND
FILTER switch to 2 to turn on the
indicator. If flashes, set the ND
FILTER switch to OFF to turn off the
indicator.
b Notes
• If you move the ND FILTER switch during
recording, the picture and sound may be
distorted.
• If you adjust the iris manually, no ND filter
indicator will appear even if the ND filter
should be activated.
z Tip
• If you close the iris extensively when recording
a bright subject, diffraction may occur, resulting
in a fuzzy focus (this is a common phenomenon
with video cameras). The ND filter suppresses
this phenomenon and gives better recording
results.
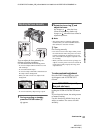
If there is a part of the screen where
brightness is over a certain level, the part
may appear excessively white when played
back. By displaying the zebra pattern on
such a part, you can be reminded to adjust
the brightness before recording.
Select the brightness level to display the
zebra pattern with the ZEBRA switch E,
then the zebra pattern will appear.
Select the brilliance value from [70] or
[100].
If you select [70], the zebra pattern appears
at the part with 70±5 % of the brilliance
signal.
If you select [100], the zebra pattern
appears at the part with 100% or more.
To hide the zebra pattern
• Set the ZEBRA switch E to OFF.
b Note
• The zebra pattern is not recorded on the tape.
z Tip
• This is convenient for adjusting the brightness
while a histogram (p. 62) is displayed.
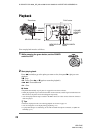
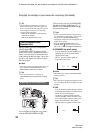
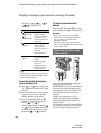
You can adjust the gain manually when
shooting blackish or dark objects if you do
not want the AGC (auto gain control) to be
activated.
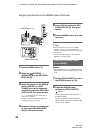
1 During recording or standby, set the
AUTO LOCK switch A to the center
position to release the auto lock.
2 Press the GAIN button B.
The current gain value appears.
3 Adjust the gain by turning the SEL/
PUSH EXEC dial D.
The gain can be adjusted between 0dB
and 18dB by every 3dB.
z Tip
• The gain value can be stored temporarily by
setting the AUTO LOCK switch A to HOLD
after the manual adjustment.
To restore automatic adjustment
Press the GAIN button B, or set the
AUTO LOCK switch A to AUTO LOCK.
b Notes
• If you set the AUTO LOCK switch A to
AUTO LOCK, other manually adjusted items
(iris, shutter speed, white balance) also become
temporarily automatic.
• The setting returns to automatic adjustment
when you set the POWER switch to OFF (CHG)
for more than 12 hours.
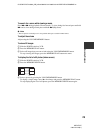
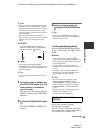
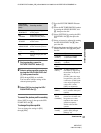
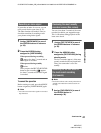
You can manually adjust and fix the shutter
speed. Depending on the shutter speed, you
can make the subject look still, or
emphasize the fluidity of movement.
1 During recording or standby, set the
AUTO LOCK switch A to the center
position to release the auto lock mode.
2 Press the SHUTTER SPEED button C.
Displaying the zebra pattern to
adjust the brightness
Adjusting the gain
Adjusting the shutter speed
Changing the settings of your camcorder recordings (Continued)