87
G:\SONY\PV\CX18500_GB_kaihan\2887515141\2887515141HDRFX7E\01GB08COM.fm
HDR-FX7E
2-887-515-14(1)
Using a Computer
* See page 53 for menu settings.
z Tips
• To copy HDV format images as they are
without changing their format, an HDV
compatible environment is required.
For details, refer to your software instruction
manual or contact the software manufacturer.
• To play movies by a regular DVD player, you
need to create DVD video in the SD format. the
DVD video is not in the HDV format.
Notes on connecting to the computer
• Connect the i.LINK cable to the computer first,
then to your camcorder. Connecting in the
opposite order may cause static electricity to
build up, resulting in a malfunction of your
camcorder.
• The computer may freeze or may not recognize
the signal from your camcorder in the following
situations.
– Connecting your camcorder to a computer
that does not support the video signal formats
appearing on the LCD screen of your
camcorder display (HDV or DV).
– Changing [VCR HDV/DV] (p. 66) and
[i.LINK CONV] (p. 67) settings while
connected with an i.LINK cable.
– Changing [REC FORMAT] setting while
connected with an i.LINK cable with the
POWER switch set to CAMERA (p. 66).
– Changing the POWER switch position while
connected with an i.LINK cable.
• The format (HDV or DV) of input/output signal
appears on the LCD screen of your camcorder
while connected with an i.LINK cable.
Use the supplied AC Adaptor to obtain AC
power (p. 15).
1 Prepare editing software (not provided).
2 Turn on your computer.
3 Insert a tape into your camcorder and set
the POWER switch to VCR.
4 Set the menu of your camcorder.
The menu settings vary depending on
the copying image.
5 Copy images to the computer with your
software.
b Notes
• If images are copied in HDV format but not
recognized, your editing software may not
support HDV format. Convert the images to DV
format according to step 4 and copy again.
• A tape recorded in DV format cannot be copied
to a computer in HDV format.
HDV DV
[VCR HDV/DV]
t [HDV]
[i.LINK CONV]
t [ON]
DV DV
[VCR HDV/DV]
t [DV]
[i.LINK CONV]
t [OFF]
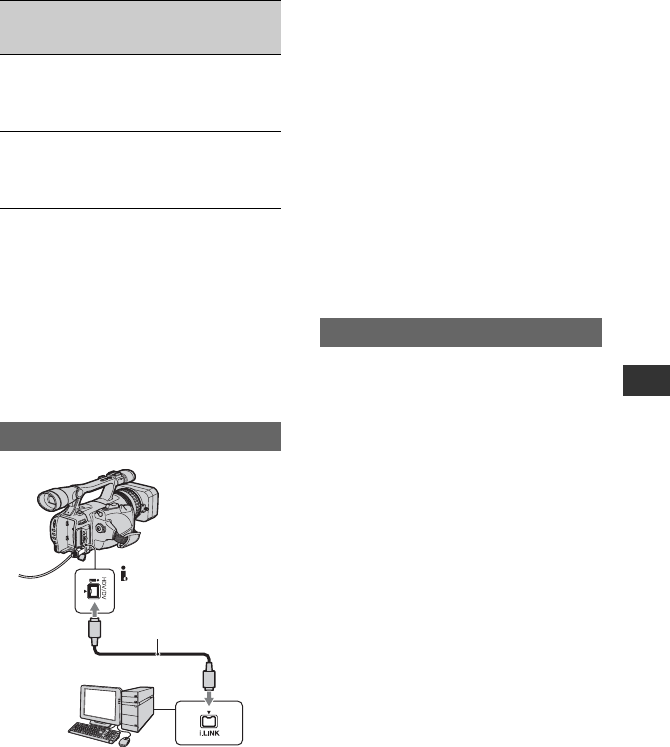
Step:1 Connect an i.LINK cable
Recorded
format
Format for
copying to
the computer
Menu setting*
i.LINK cable (optional)
HDV/DV interface
(i.LINK)
Step:2 Copying the movies
Continued ,


