


Operations
Monitoring
13
Monitoring
This section explains the procedure of monitoring from
the selected camera.
Before monitoring, you need to register the camera(s) in
the Network Camera Recorder application and assign
the camera(s) to the monitor window.
For registration of cameras and assignment to the
monitor window, see the “Setups” chapter on page 24.
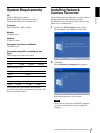
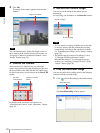
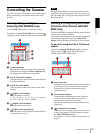
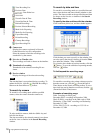
1
Start Network Camera Recorder to display the main
window.
For starting, see “1. Start the Program” on page 7.
The image(s) of the camera(s) appear(s) in the
monitor window according to the selected layout.
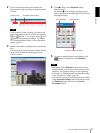
2
Control the camera using the Pan & Tilt toolbar
and Pan & Tilt Presets toolbar.
For details, see “Controlling the Camera” on page
15.
To monitor audio
When a microphone is connected to the selected camera,
you can monitor the audio together with the camera
image.
If you are monitoring multiple cameras, click on the
monitor window showing the image of the camera
whose you want to monitor. The audio of the selected
camera is heard.
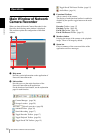
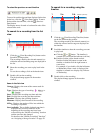
Using the Pop-up Menu in the
Monitor Window
Right-clicking in the monitor window with a camera
image displays a pop-up menu. The pop-up menu allows
you to change the monitoring camera and the display
items in the monitor window, etc.
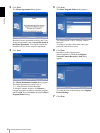
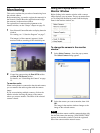
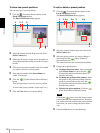
To change the camera in the monitor
window
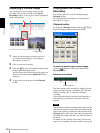
1
Select Select Camera… from the pop-up menu.
The Select Camera dialog appears.
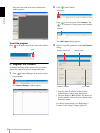
2
Select the camera you want to monitor, then click
OK.
The image in the monitor window changes to the
image of the selected camera.
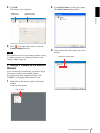
Note
If the application cannot establish communication with
the selected camera, the message “NO CONNECTION”
appears in the monitor window. Check the registered
data of the camera and the network status.