7
Chapter 7 Location and Function of Parts and Controls 131HDC-900/950/930 Series Product Information Manual
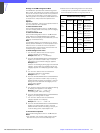
Settings on the RM Configuration Menu
The RM-B150 is provided with an RM Configuration
Menu mode. This enables you to select and adjust the
function of the buttons and controls on the panel and
to check various information. At the beginning of an
RM Configuration menu operation, select ‘Basic menu’
or ‘Detail menu’ and proceed with operations as
desired.
Operation
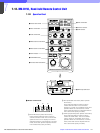
For menu operations, use the menu operation block of
the unit to start the menu operation.
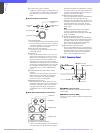
To select the Basic menu
Push the RM Configuration switch in the V direction.
The menu display shows ‘Cbl Comp’ (the first category
of the Basic menu).
To select the Detail menu
Push the RM Configuration switch in the V direction
while holding the CANCEL/ENTER switch toward
ENTER. The menu display shows ‘Mode Set’ (the first
category of the Detail menu).
Note
The RM Diag category of the Detail menu is used to
display various information, to check operations and
reset the menu. For items for which the operation
procedure differs, the procedure is discussed in the
corresponding ‘Contents’ column.
To make settings on the menu
1. Turn the menu select knob until the required
category appears on the display.
Example: Mode Set t ... t VR Setup
2. Push the CANCEL/ENTER switch toward ENTER to
register your selection made in step 1. The first
subcategory of the selected category appears.
Example: Knee
If there is no subcategory belonging to the selected
category, the first setting (or display) item of that
category appears on the display (proceed to step
5).
3. Turn the menu select knob until the desired
subcategory appears on the display.
Example: Knee t ... t Iris
4. Push the CANCEL/ENTER switch toward ENTER to
register your selection made in step 3. (Pushing
toward CANCEL reverses the operation.) The first
setting item of the selected subcategory and its
current setting appear.
Example: Ctrl: Abs
5. Turn the menu select knob until the desired setting
(or display) item appears on the display.
Example: Ctrl: Abs t ... t Min : Cls
For a setting item, make your setting.
6. Push the CANCEL/ENTER switch toward ENTER to
register your setting made in step 5.
7. Turn the menu select knob until the desired
category appears on the display.
Example: Min : Cls t ... t Min : 22
8. Push the CANCEL/ENTER switch toward ENTER to
register your setting made in step 7. (Pushing
toward CANCEL cancels the setting in step 7.) To
continue setting items, repeat steps 5 to 8.
To end the menu operation
Push the RM Configuration switch in the v direction.
Notes
• If an operation has not been made in Menu mode
after one minute, the menu automatically exits.
• Values set on the RM Configuration menu are stored
in memory when you exit the menu operation. Be sure
to exit the operation before turning the power off.
Basic Menu (An underlined item under ‘Setting’
indicates the factory setting.)
Cate-
gory
Subcategory
Item Setting Contents
Cbl
Comp
–Len
10m,
50m,
100m
Sets the cable
length for the
cable compen-
sation circuit
B r i g h t
–LED
10 to
99 (50)
Sets the bright-
ness of the
LEDs on the
control panel
–Disp
10 to
99 (50)
Sets the bright-
ness of the
menu display
Buzzer
–Lvl
10 to
99 (50)
Sets the sound
volume of the
buzzer
– Out On, Off
Turns buzzer
output on and
off


