


97
Performing with Your Computer
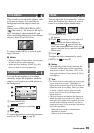
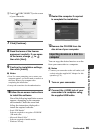
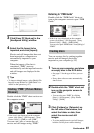
3 Click [Easy PC Back-up] in the
[Handycam Utility] window.
4 Select the file format to be
imported, and click [Import].
Movies and still images that have not
been imported to a computer are
automatically imported to your
computer.
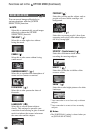
When the import of the data is
completed, “PMB” starts up
automatically and the imported movies
and still images are displayed in the
window.
z Tips
• To import selected images, select [Media File
Import] in step 3. Refer to “PMB Guide” for
details on the operation (p. 97).
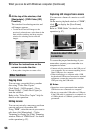
Double-click the “PMB” short-cut icon on
the computer screen.
• If the icon is not displayed on the computer
screen, click [Start] - [All Programs] - [Sony
Picture Utility] - [PMB] to start “PMB.”
You can view, edit, or create discs of
movies and still images using “PMB.”
Referring to “PMB Guide”
Double-click the “PMB Guide” short-cut
icon on the computer screen to open “PMB
Guide.”
• If the icon is not displayed on the computer
screen, click [Start] - [All Programs] - [Sony
Picture Utility] - [Help] - [PMB Guide].
You can also open “PMB Guide” from [Help] of
“PMB.”
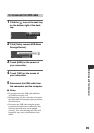
You can create a disc by putting together
movies and still images previously
imported to your computer (p. 95).
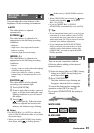
1 Turn on your computer, and place
an empty disc in the DVD drive.
• See page 12 for the type of discs you can
use.
• If any other software starts automatically,
shut it down.
2 Double-click the “PMB” short-cut
icon on the computer screen to
start “PMB.”
• You can also start “PMB” by clicking
[Start] - [All Programs] - [Sony Picture
Utility] - [PMB].
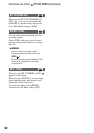
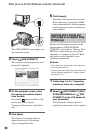
3 Click [Folders] or [Calendar] on
the left side of the window, and
select the folder or date, then
select the movies and still
images.
• To select multiple movies and still images,
hold the Ctrl key down while selecting.
Starting “PMB” (Picture Motion
Browser)
Creating discs
Continued ,