


Setting the User — User Setting Page
15
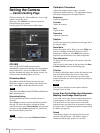
System(PC) Current Date&Time
Displays the date and time set on your computer.
When you want to synchronize the camera’s date and
time with the date and time setting of the computer,
operate as follows:
Click Time Synchronization, and “Applied, OK”
window appears. Click OK to change the date and time
on SNC-VL10 Current Date&Time to the date and
time setting of the computer.
Manual Date&Time Setting
When you want to set the camera’s date and time
manually, operate as follows:
Type the date and time you want to set for the camera
and click Time Synchronization. “Applied, OK”
window appears. Click OK to change the date and time
on SNC-VL10 Current Date&Time to the date and
time you typed.
Time Zone Selecting
When you want to set the camera’s date and time to the
time in the area where the camera is installed, select the
camera location from the drop-down list.
The Number of Supported Clients
Type the maximum number of clients (1 to 100) that can
log in this camera at the same time.
Factory Default
Resets to the factory settings.
Click Factory Setting, and “All configuration
information will be initialized as factory setting. Are
you sure?” appears. Click OK to reset to the factory
settings.
Note
The following settings cannot be reset with this
operation: Date and time on the System Setting page,
and IP Address, Subnet Mask, Broadcast Address and
Default Gateway on the Network Setting page.
Reboot
Reboots the camera.
Click Reboot, and “The SNC-VL10 will be rebooted.
Are you sure?” appears. Click OK to reboot the camera.
Note
If the setting page cannot be displayed after you have
clicked Reboot, refresh the Web browser window.
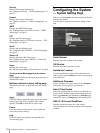
The Menu page is displayed.
Apply/Cancel/Help
See “Buttons common to every setting page” on page
14.
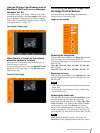
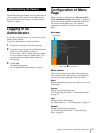
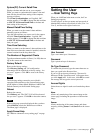
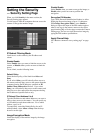
Setting the User
— User Setting Page
When you click User in the menu section, the User
Setting page appears.
Use this page to set the user names and passwords of
Administrator and up to five kinds of users (User 1 to
User 5), and the access right of each user.
User Account
Type a user name up to 9 characters.
Password
Type a password up to 9 characters.
Re-Type Password
To confirm the password, type the same characters as
those you typed in the Password box.
If you re-type an incorrect character, “Password is
different with Re-Typed Password” will appear when
you click Apply later. In this case, click OK to cancel
the message and re-type the correct password.
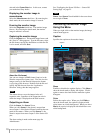
Access Rights
Select the access right for each user from the drop-down
list.
None
Allows only monitoring of the camera image on the
viewer page, including the operations of the monitor
image.
Sensor
Allows monitoring of the camera image and alarm
output by clicking Sensor 1 and Sensor 2 on the viewer
page.