


Connecting the Camera to a Network
29
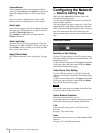
Connecting the Camera
to a Network
This section explains how to connect the camera to a
network using various interfaces.
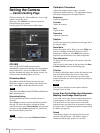
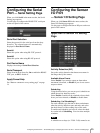
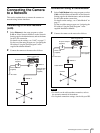
Connecting to a Local Network
(LAN)
1
Select Ethernet in the setup program or select
LAN on Select Network Interface on the Network
Setting page for the Administrator, and set the items
for the LAN connection.
For details on the settings, see “LAN” on page 17.
For the use of the setup program, see “Assigning the
IP Address Using the Setup Program” in the
supplied Installation Manual.
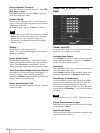
2
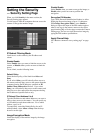
Connect the camera to the network as follows:
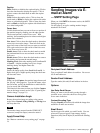
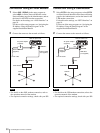
Connection Using a Cable Modem
1
Select Cable Modem in the setup program or select
Cable on Select Network Interface on the Network
Setting page for the Administrator, and set the items
for the cable modem connection.
For details on the settings, see “Cable Modem” on
page 17.
For the use of the setup program, see “Assigning the
IP Address Using the Setup Program” in the
supplied Installation Manual.
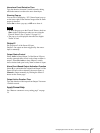
2
Connect the camera to the network as follows:
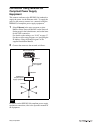
Notes
• For details on the cable modem connection, refer to
the operation manual of the modem.
• For required connection settings, check with your ISP.
AC power adaptor
(supplied)
Power cord
(supplied)
to an AC outlet
Ethernet cable
(straight, not
supplied)
Hub
Network
SNC-VL10N/VL10P
DC IN
12 V
10BASE-T
10BASE-T
AC power adaptor
(supplied)
Power cord
(supplied)
to an AC outlet
Ethernet cable
(not supplied)
Cable Modem
Network
SNC-VL10N/VL10P
DC IN
12 V
10BASE-T
10BASE-T