


30
Opmerkingen
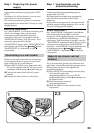
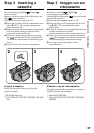
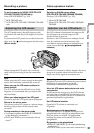
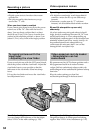
•Trek de handgreepband stevig aan.
•Let op dat u tijdens het opnemen de
ingebouwde microfoon niet aanraakt.
Betreffende de opnamesnelheid
Deze camcorder kan opnemen en afspelen met
de SP (standaard) opnamesnelheid of de LP
(langspeel) snelheid. Kies de stand SP of LP in
het instelmenu (p. 148). Met de LP
langspeelsnelheid kunt u 1,5 keer*
1)
/ twee*
2)
keer
zo lang opnemen als met de SP snelheid. Een
videoband die is opgenomen met de LP
langspeelsnelheid op deze camcorder, kunt u
beter ook afspelen op deze camcorder.
Voor soepel aansluitende opnamen
Het begin van een nieuwe video-opname zal
altijd direct aansluiten op het eind van de
voorgaande opnamen, mits u de videocassette
niet uit de camcorder verwijdert. Als u tijdens het
opnemen het batterijpak moet verwisselen, zet u
dan eerst de POWER schakelaar in de “OFF
(CHG)” stand.
Als u de camcorder, met een cassette erin,
langer dan 3 minuten*
1)
/ 5 minuten*
2)
in de
opnamepauzestand laat staan
Uw camcorder schakelt automatisch uit. Zo
voorkomt u onnodig uitputten van het
batterijpak en slijtage aan de cassetteband. Om
terug te keren naar de opnamewachtstand, zet u
de POWER schakelaar op OFF (CHG) en
vervolgens op CAMERA, of drukt u op START/
STOP zonder de POWER schakelaar opnieuw te
verplaatsen om de opname te starten. Als uw
camcorder zich in de wachtstand bevindt en er
geen cassette is ingebracht, schakelt hij niet
automatisch uit.
Als u op een enkele videocassette zowel met
de SP als de LP snelheid opneemt of als u
bepaalde scènes tussendoor opneemt met de
LP snelheid
Het weergavebeeld kan vervormd zijn.
De tijdcode kan niet goed tussen scènes zijn
aangebracht.*
1)
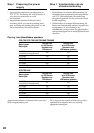
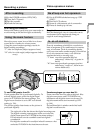
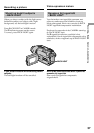
Opnamedatum en -tijd (alleen DCR-TRV140E)
De opnamedatum en -tijd worden tijdens het
opnemen niet aangegeven. Deze gegevens
worden echter wel automatisch op de band
vastgelegd. Om later de opnamedatum en -tijd in
beeld te zien, drukt u tijdens afspelen op de
DATA CODE toets van de afstandsbediening.
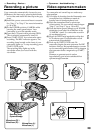
Video-opnamen maken
Notes
•Fasten the grip strap firmly.
•Do not touch the built-in microphone during
recording.
Note on Recording mode
Your camcorder records and plays back in the SP
(standard play) mode and in the LP (long play)
mode. Select SP or LP in the menu settings
(p. 140). In the LP mode, you can record 1.5
times*
1)
/twice*
2)
as long as in the SP mode. When
you record a tape in the LP mode on your
camcorder, we recommend that you play back
the tape on your camcorder.
To enable smooth transition
You can make the transition between the last
scene you recorded and the next scene smooth as
long as you do not eject the cassette even if you
turn off your camcorder. When you change the
battery pack, set the POWER switch to OFF
(CHG).
If you leave your camcorder in the standby
mode for 3 minutes*
1)
/5 minutes*
2)
while the
cassette is inserted
Your camcorder automatically turns off. This is
to save battery power and to prevent battery and
tape wear. To resume the standby mode for
recording, set the POWER switch to OFF (CHG)
once, then set it to CAMERA, or press START/
STOP without changing the POWER switch
again to start recording. If your camcorder is in
the standby mode, with no cassette inserted, it
does not turn off automatically.
When you record in the SP and LP modes on
one tape or you record some scenes in the LP
mode
The playback picture may be distorted.
The time code may not be written properly
between scenes.*
1)
Recording date and time (DCR-TRV140E only)
The recording date and time are not displayed
while recording. However, they are recorded
automatically onto the tape. To display the
recording date and time, press DATA CODE on
the Remote Commander during recording.
Recording a picture