TV-IP612P/WN (Wireless N) Pan/Tilt/Zoom Internet Camera
30
6
Using the Camera Web Manager
The camera is easy to use and manage. Use a normal web browser to access the camera’s live
video display, as well as the configuration software. It is recommended to check and make sure the
computer can access and use the camera before placing it in the location where it will be used,
especially if it is mounted to a ceiling or other area that is difficult to physically access.
For the initial setup, use the Setup Wizard program located on the TV-IP612P/WN CD-ROM
included with the camera. Use the IPCam Wizard to assign an IP address and other network
settings. Once the camera has an IP address, follow the instructions below to access the camera’s
web management interface used to manage the camera and its video display.
Accessing the Camera Video Display
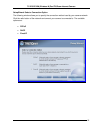
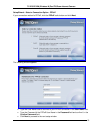
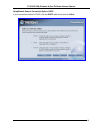
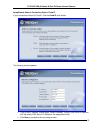
If the camera is used on a network with an active DHCP server, the camera will detect it and obtain
an IP address. If you are using the camera on a network with a DHCP server it is necessary to first
determine what the IP address of camera is. To do this, follow the instructions in the Quick
Installation Guide to launch the Setup Wizard to link to the camera.
NOTE: If your network uses DHCP or has an active DHCP server running, use the Setup
Wizard utility on the installation CD-ROM shipped with the camera to first access the camera.
Once it is accessed, you can change the IP address or continue to use the DHCP assigned
address as preferred. See the Quick Installation Guide for instructions on using the Setup
Wizard utility.
If your network does not use a DHCP server, the camera will use a default IP address of
192.168.10.30. Use this address to access the web-based management software. Use a web
browser and type in http:// followed by the default IP address, 192.168.10.30 in the address bar of
the browser and press the Enter key. The URL in the address bar should read:
http://192.168.10.30
If the login dialog does not appear, check the proxy server settings on your browser.
NOTE: The wrong proxy server settings on your browser can prevent connection to the web
manager. If you are having trouble connecting to the web interface of the VLAN Switch,
configure the proxy settings to bypass the proxy server or disable use of proxy servers and try
to connect again.
To check proxy setting for Windows Internet Explorer:
1. In Windows, click on the Start button, go to Settings and choose Control Panel.
2. In the Control Panel window, double-click on the Internet Options icon. (Alternatively you
can access this Internet Options menu using the Tools pull-down menu in Internet
Explorer.)
3. Click the Connections tab and click on the LAN Settings button.
4. Verify that the “Use proxy server” option is NOT checked. If it is checked, click in the
checked box to deselect the option and click OK.


