User’s Manual >>
EN-73
Step 2: Connecting the ViviCam 8300s to Your
Computer
1. Turn on your ViviCam 8300s.
2. Set the mode dial to [
].
3. On the [Basic] menu, select [USB] with the
S/T buttons, and press the SET button.
4. Select [PC] with the S/T buttons, and press
the SET button.
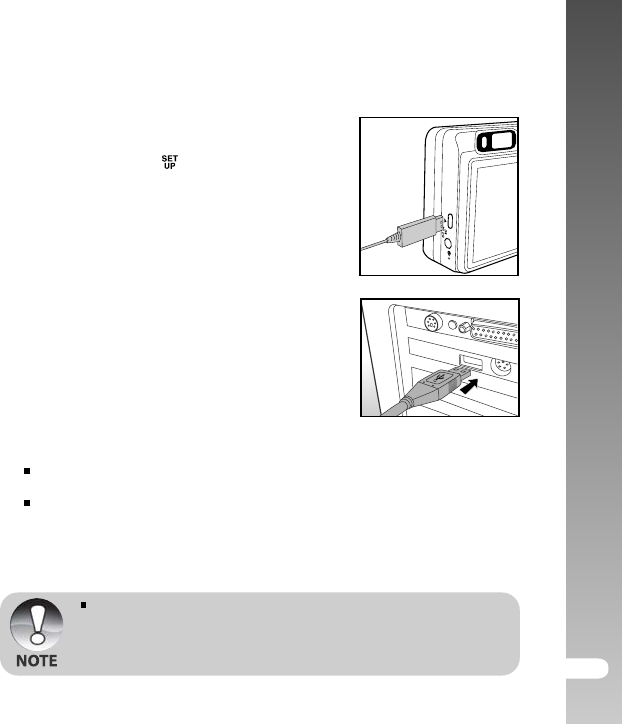
5. Connect one end of the USB cable to the USB
terminal of the
ViviCam 8300s.
6. Connect the other end of the USB cable to an
available USB port on your computer.
7. From the Windows desktop, double click on
“My Computer”.
8. Look for a new “Removable disk” icon. This
“Removable disk” is actually the memory card
in your
ViviCam 8300s. Typically, the ViviCam
8300s
will be assigned drive letter “e” or higher.
9. Double click on the removable disk and locate
the DCIM folder.
10.Double click on the DCIM folder to open it to
find more folders.
Your recorded images and video clips will
be inside these folders.
Copy & Paste or Drag-N-Drop image and
video files to a folder on your computer.
Mac users: Double-click the “untitled” or “unlabeled” disk drive icon on our
desktop. iPhoto may automatically launch.
The data saved to the SD card may be damaged if the power to the
ViviCam 8300s is cut off during image transfer. We recommend that
you use the AC power adapter when connecting the ViviCam 8300s
to the PC.


