


35
AXIS 231D/232D - System Options
Notes: • If the referrers feature is enabled and you wish to also allow normal access to the Live View page, the
product's own IP address or host name must be added to the list of allowed referrers.
• Restricting referrers has no effect on an MPEG-4 video stream. To restrict an MPEG-4 stream, IP address
filtering must be enabled.
• Restricting referrers is of greatest value when not
using IP address filtering. If IP address filtering is used,
then the allowed referrers are automatically restricted to those allowed IP addresses.
HTTPS
For greater security, the AXIS 231D/232D can be configured to use HTTPS (Hypertext
Transfer Protocol over SSL (Secure Socket Layer)). That is, all communication that would
otherwise go via HTTP will instead go via an encrypted HTTPS connection.
Certificate - to use HTTPS for communication with the AXIS 231D/232D, a Certificate
must be created using one of the following methods:
• A self-signed certificate can be created in the network camera, but this does not guar-
antee the same level of security as an official certificate.
• An official certificate issued by a CA (Certificate Authority). A CA issues and manages
security credentials and public keys for message encryption.
1. Click either Create self-signed certificate or Create Certificate Request and enter
the required information in the provided fields.
2. Click OK.
3. Create self-signed certificate generates and installs a certificate which will be
displayed under Installed Certificate.
Create Certificate Request generates a PEM formatted request which you copy and
send to a CA for signing. When the signed certificate is returned, click Install signed
certificate... to install the certificate in the AXIS 231D/232D.
4. Set the HTTPS Connection Policy for the administrator, Operator and Viewer to
enable HTTPS connection (set to HTTP by default)
Please refer to the home page of your preferred CA for information on where to send the
request etc. For more information, please refer to the online help files
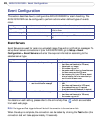
Date & Time
Current Server Time - displays the current date and time (24h clock). The time can be
displayed in 12h clock format in the Overlay Images (see Date & Time Format Used in
Images).
New Server Time - Select your time zone from the drop-down list and check the daylight
saving time changes, if desired.