


21
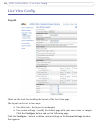
AXIS 231D+/232D+ - Live View Config
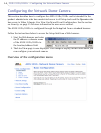
Customizing the default page
The appearance of the default AXIS
231D+/232D+ Live View page can be
customized to suit your requirements,
or you can upload and use your own
home page. To upload your own files,
click the Upload/Remove button and
see the description below.
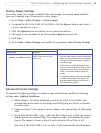
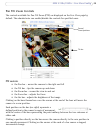
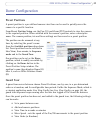
Upload Own Web Files
Your own web files, background
picture, color must first be uploaded
to the AXIS 231D+/232D+ in order to
be available for selection in the
Custom Settings window. Once
uploaded, the files appear in the
drop-down list.
1. Enter the path to the file, or
click the Browse button.
2.
Select the user level for the uploaded file. Setting the user access level means that
you decide who gets to view the pages.
3. When the path is shown correctly in the text field, click the Upload button.
All uploaded files are shown in the list in the lower
section of the page. To remove a file,
check the box provided next to it and then click the Remove button.
• To use your uploaded file, in the Custom Settings
window, click the Own radio
button and select the file from the drop-down list:
• To use an external file located somewhere
other than in the AXIS 231D+/232D+,
click the External radio button and enter the URL:
Own Home Page
To use a web page, already uploaded as the default page, check the box, select the page
from the drop-down list and click OK.
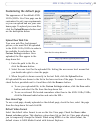
Default Video Format
Select the default video format to use on the Live View page. Check the Show video
format selection option. This displays a drop-down list on the Live View page allowing
you to temporarily change the format. When using MPEG-4 as the video format, the
default viewer is AXIS Media Control with Internet Explorer.
Note that the setup address is:
http://<ip address>/operator/basic.shtml