


94
1
2
3
4
5
6
7
8
9
Cover
Preliminary Notes and
Legal Information
Contents: Basic
Operations
Advanced Guide
Camera Basics
Smart Auto
Mode
Other Shooting
Modes
Playback Mode
Wi-Fi Functions
Setting Menu
Accessories
Appendix
Index
Basic Guide
P Mode
Connecting to a Printer
Connect the camera to a printer via Wi-Fi to print as follows.
When establishing a Wi-Fi connection with a printer, you can either use the
camera as an access point (Camera Access Point mode) or use another
access point.
Follow these instructions when using the camera as an access point. When
using another access point, see “Connecting to Access Points in the List”
(=
92).
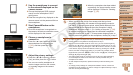
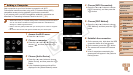
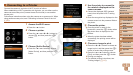
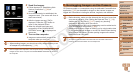
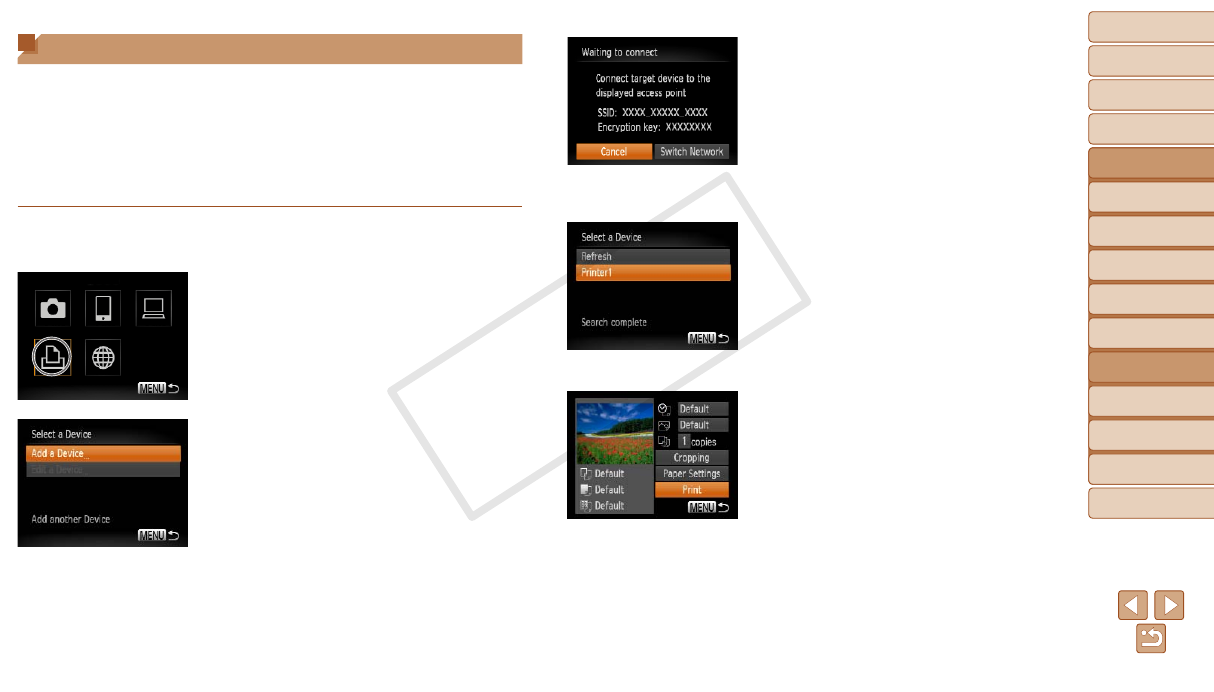
1 Access the Wi-Fi menu.
Press the <o> button.
2 Choose a printer.
Press the <o><p><q><r> buttons to
choose [2], and then press the <m>
button.
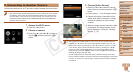
3 Choose [Add a Device].
Press the <o><p> buttons to choose
[Add a Device], and then press the <m>
button.
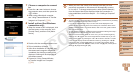
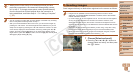
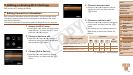
4 Use the printer to connect to
the network displayed on the
camera screen.
Choose the displayed SSID (network
name) from the printer’s Wi-Fi setting
menu.
Enter the encryption key displayed on the
camerascreenintothepasswordeldon
the printer.
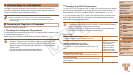
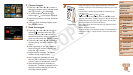
5 Choose the printer.
Once the printer is ready for the
connection, press the <m> button when
the printer name is displayed on the
camera.
When the printer has been added
successfully, the printing screen will be
displayed.
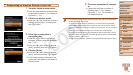
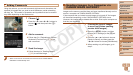
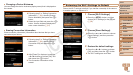
6 Choose an image to print.
Press the <q><r> buttons to choose an
image to print, and then press the <m>
button to access the printing screen.
Press the <o><p> buttons to choose
[Print], and then press the <m> button.
Printing now begins.
For detailed printing instructions, see
“Printing Images” (=
113).
C OPY