80
E
Editing
Notes:
• Use the audio or the microphone attenuator during audio dubbing if you need to lower the volume level
or correct audio distortion of the input audio. Monitor the level of the input sound with headphones and
if necessary, turn the attenuator on through the menu by selecting LINE ATT or MIC ATT and setting it
to ON.
• When you add sound using the built-in microphone, make sure not to connect any cables to the MIC
terminal.
• To use your TV to monitor video, connect the S-video terminal and the A/V terminal to your TV. You
can monitor the sound with headphones.
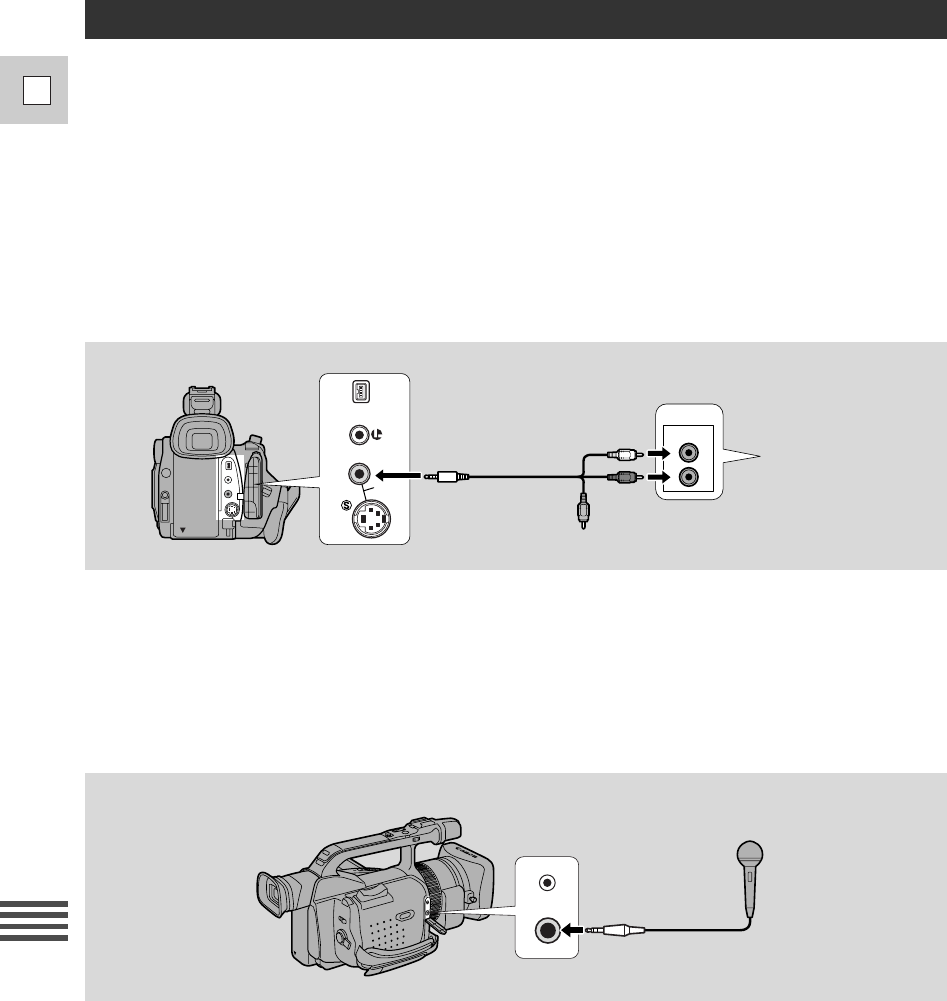
Audio Dubbing
A/V
OUTPUT
AUDIO
L
R
STV-250N Stereo
Video Cable
An audio device
(i.e. CD player)
DV
IN/OUT
IN/
OUT
To connect other audio equipment:
Notes:
• Do not use the yellow video terminal.
• The A/V terminal doesn’t put out any video, so connect the S-video terminals and check your TV, or
check the LCD or the viewfinder as you add new sound. Always check the new sound with the speaker,
or the headphones if you have the docking unit attached.
To connect the external microphone:
You can add sound to the original sound on a prerecorded tape from audio products (AUDIO IN) or with
the internal or an external microphone (MIC IN). Audio added through audio dubbing is dubbed onto
Stereo 2. The original sound will not be erased. For best results, add sound to tapes that have been
recorded with this camera in SP mode with 12-bit sound. If there are non-recorded portions on the tape, or
portions recorded in LP mode, or with 16-bit or 12-bit, 4-channel sound, dubbing may be interrupted or
you may not be able to dub audio correctly. You cannot dub audio onto a tape recorded with 12-bit and
16-bit sound intermingled. If your tape hasn’t been recorded with 12-bit sound, we recommend dubbing
your original tape onto a blank tape using the GL1’s analog line-in function, then dubbing audio onto the
new tape. Make absolutely sure to set the audio mode of the new tape to 12-bit and the recording mode to
SP.


