Getting Started Connections Playback Information Troubleshooting Specifi cations
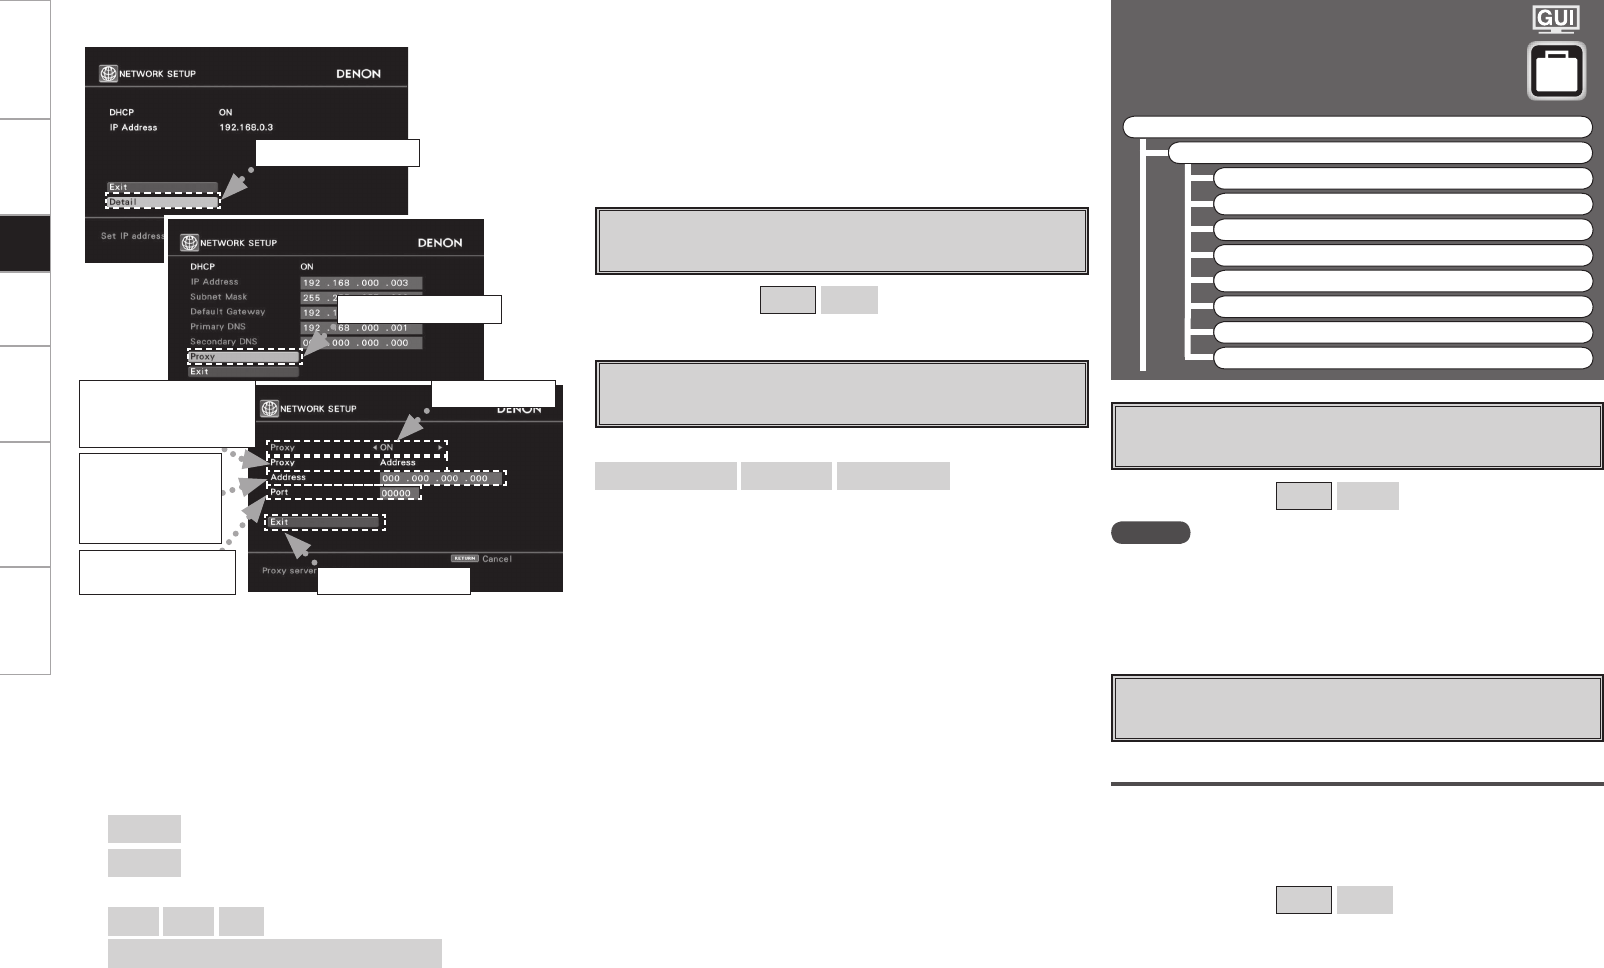
n Proxy settings
Make this setting when connecting to the Internet via a proxy server.
q On the GUI menu, select “Setup” – “Network Setup” – “Network
Setup” – “Detail” and press the ENTER button.
w Use the ui button to set “Proxy” and press the ENTER button.
e Use the o p button to set “Proxy” to “ON” and press the i
button.
The proxy server is enabled.
r Use the o p button to select the proxy server input method, and
then press the i button.
[Selectable items]
Address
: Select when inputting by address.
Name
: Select when inputting by domain name.
[Characters that can be input]
A ~ Z
a ~ z
0 ~ 9
! # % & ’ ( ) * + , - . / : ; < = “ > ? @ [ \ ] (space)
q Select “Detail”.
e Set “ON”.
w Select “Proxy”.
y Input the port
number.
u Select “Exit”.
t Input the
address
or domain
name.
s Power Saving
Make setting for power saving when not connected to network.
[Selectable items]
ON
OFF
d Network Information
Display network information.
[Items to be checked]
DHCP= ON or OFF
IP Address
MAC Address
Option Setup
Make various other settings.
F Menu tree F
Setup
Option Setup
a Source Delete
s GUI
d Trigger Out
f Dimmer
g Setup Lock
h Maintenance Mode
j Firmware Update
k Add New Feature
a Source Delete
Remove input sources that are not used from the display.
[Selectable items]
ON
Delete
NOTE
• Input sources being used in the various zones cannot be deleted.
• Input sources set to “Delete” cannot be selected from GUI menu
“Source Select” or using the SOURCE button on the remote control
unit.
s GUI
Make GUI related settings.
Screensaver
Make screensaver settings.
Use the screensaver to prevent burn-in on the monitor screen.
When set to “ON”, the screensaver is activated if there is no activity
for about 3 minutes.
[Selectable items]
ON
OFF
Setup
r Selecting the
input method
Example) Address
t Use the ui p button to input the proxy server address or domain
name and press the ENTER button.
When “Address” is selected in Operation r : Input the address
When “Name” is selected in Operation r : Input the domain name
y Use the uio p button to input the proxy server port number
and press the ENTER button.
u Use the i button to select “Exit” and press the ENTER button.
Setup is complete.
DVP602CI_ENG_6th.indd 19 2008/03/26 16:37:36
