


24 25
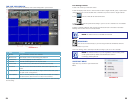
THE LIVE VIEW WINDOW
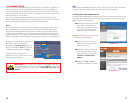
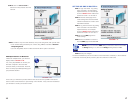
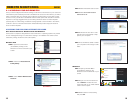
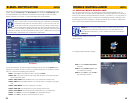
After logging in, the Remote Surveillance main screen will appear in your browser.
PICTURE 2-17
# Item Function
1 Modes LIVE, PLAYBACK, SETUP and LOGOUT.
2 Main Screen Main display screen for live viewing and playback.
3 Time Stamp Time stamp appears on each channel.
4 Channel Channel number appears in the top left corner.
5 PTZ Control PTZ control for any connected PTZ cameras (not included).
6 Functions Click the icons to show/hide channels, take screen captures, and
record.
7 Display Modes Click the icons to view channels in single-channel full-screen, quad,
and split-screen configurations.
8 Volume/Mute Select a channel (outlined in red) and then click the bars to increase/
decrease volume; click the icon to mute/un-mute volume.*
*Audio-capable cameras or powered microphones (not included) required for audio listening
and recording.
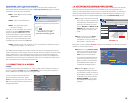
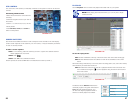
Live Viewing Controls
• Click LIVE at the top of the main screen.
• Click the display mode icons to view the main screen in single-channel, quad, or split-screen
configurations. You can also double-click a channel at any time to view it in single-channel.
• Click
to show or hide all the channel windows.
• Click to start/stop manual recording to your PC on ALL channels. For more details
see RECORDING.
• Select a channel (outlined in red) and then click the audio bars to increase or decrease
listening volume. Click the icon to mute/unmute.
NOTE! The Talk function is not enabled on this DVR.
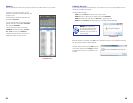
NOTE! You will record video to your PC regardless of the recording mode
on the system itself. By default, recorded files are saved in
C:\DVR\[ip_address]\Record.
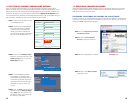
RECORDING
You can record video directly to your PC using the remote surveillance software.
To record video to your PC:
From Live viewing, click to start/stop manual recording to your PC on ALL channels
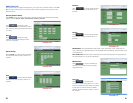
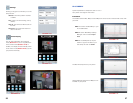
SHORTCUT MENU
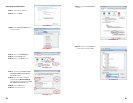
Right-click any channel to open the Shortcut
Menu.
PICTURE 2-18