


26 27
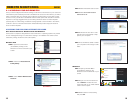
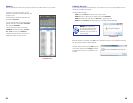
PTZ CONTROL
You must have a PTZ camera (not included) connected to the system in order to use the PTZ
controls.
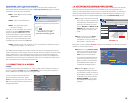
Controlling a PTZ Camera
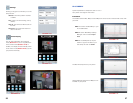
• Select the channel of the connected PTZ
camera(s).
• Click the navigation arrows to pan and tilt
the camera.
• Click + /- to control zoom, focus, and iris.
• Enter presets.
• Click SETTING, HAND, and CLEAR to
further control presets.
PICTURE 2-19
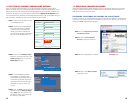
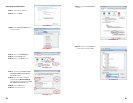
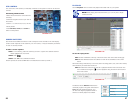
SCREEN CAPTURES
Use the remote surveillance software to take a snapshot of the channels on the main display
screen. Screen Captures can be useful for your own records, or may be needed by authorities
in case of a security incident.
To take a screen capture:
STEP 1. In Live Viewing, select the channel you want to capture. The selected channel
will be highlighted in a red frame.
STEP 2. Click .
STEP 3. Click OK in the confirmation window.
Screen captures are saved as BMP files to the default save location (C:\DVR\...).
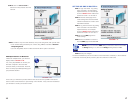
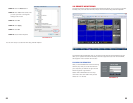
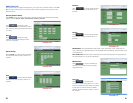
PLAYBACK
Use the Playback menu to search and playback recorded video on your system.
NOTE! When playing back video files online, you can only view a single
camera at a time.
To use the replay menu:
STEP 1. Click PLAYBACK at the top of the main screen. The main screen will be grey.
STEP 2. Click REFRESH below the calendar to view the recorded files for the current
month.
Normal recording is indicated by a clock icon; alarm recording (alarm, loss, and motion events)
are indicated by an exclamation mark icon.
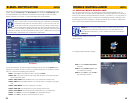
STEP 3. Double-click a file from the File List to playback the file in the main screen. The
icon in the file list changes to “ ” .Control playback using the buttons at the bottom
of the main screen.
PICTURE 2-20
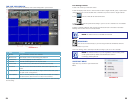
PICTURE 2-21
The blue bar above BACKUP indicates the
download progress. The green marker above
PLAY indicates playback progress. You
can click and drag the playback marker to
advance or rewind playback as needed.
Switch between pause/play
Stop play
Fast play
Slow play