`
IC-7000 CAM User’s Guide
P
P
a
a
n
n
/
/
T
T
i
i
l
l
t
t
I
I
P
P
S
S
u
u
r
r
v
v
e
e
i
i
l
l
l
l
a
a
n
n
c
c
e
e
C
C
a
a
m
m
e
e
r
r
a
a
IC-7000 USER’S GUIDE PAGE 12/62 Rev. PV1.0
Figure 2
2.3 NETWORK SETUP
Before you set up IP CAM, you have to know how your ISP provide you with IP address
(static or dynamic). If you do not know, please contact your ISP and ask for help.
Common network architecture (1 ~ 7 types).is listed in section 2.5, you can refer to the
listing to find out which type is suitable for your computer and finish the setting as the
instructions given in section 2.5. To set up IP-CAM and IP address, the common way that
people use is to change the obtaining of IP address of IP-CAM**. Detailed information is
listed in section 2.4-1 to 2.4.3.
2.4 SETTING THE WAY HOW IP-CAM OBTAIN IP ADDRESS
2.4-1 STATIC - IP Address Setting
z You computer must be equipped with network card and RJ-45 network jack.
z Connect the RJ-45 jack on the rear of IP-CAM with the red test network
cable. One end is connected to the network card of computer; the other end
is connected to the network jack located at the rear of the IP-CAM.
z Connect the power adaptor to the power jack (on the rear of IP-CAM). Now,
the status LED on the top of IP-CAM will be illuminated.
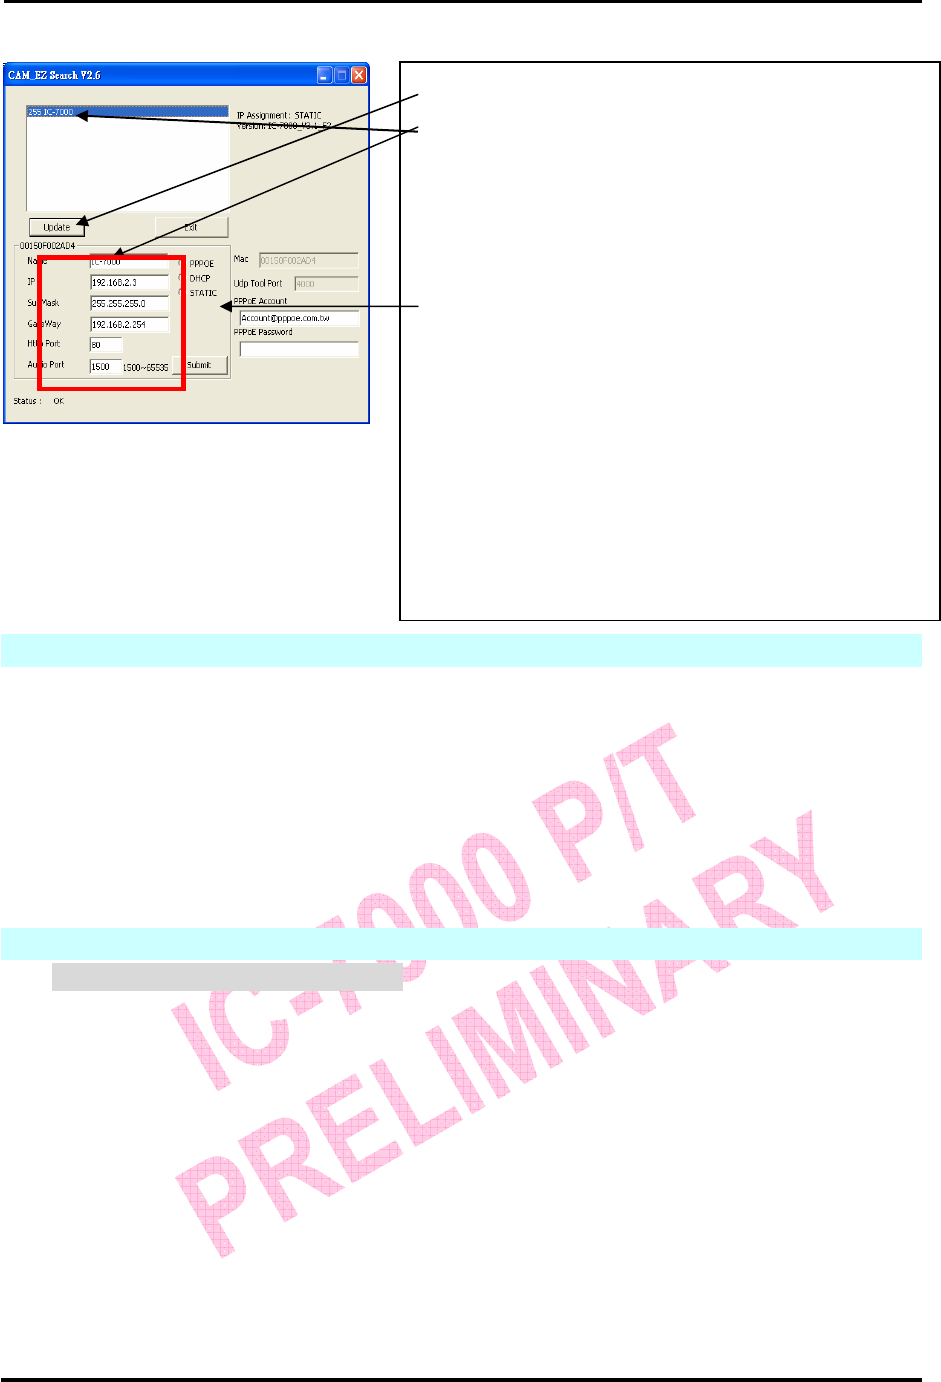
Step 1. Click Update. You can see 255IC-7000.
Step 2. Click 255IC-7000. You can see
Name : IC-7000
IP : 192.168.9.1
SubMask :255.255.255.0
GateWay :192.168.9.254
HTTP Port :Http communication port. The default
setting is 80.
AudioPort: Port used for audio transmission,
default setting is 1500.
Step 3. Make sure the IP setting is STATIC.
Step 4. Double click on 255IC-7000 to launch the
browser. Type ID/Password to login and get accessed to
network monitoring screen (for detailed information,
please refer to 3.1). If you can see the image displayed in
web browser, it means that IP-CAM is working properly.


