


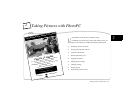


1-6
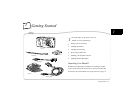
Getting Started
If you have the PhotoPC Mac Version, use the software diskettes that
came in the box with the camera. If you have the Mac Connectivity Kit,
make sure you use the diskettes that came in the kit.
Follow these steps to install EasyPhoto:
1
Insert EasyPhoto diskette 1 in your diskette drive.
2
Double-click the Install icon. You see the EasyPhoto setup screen.
3
Click Continue.
4
Click Install.
NOTE
If you want to have the time and date of each picture automatically
recorded, see page 5-2 for instructions.
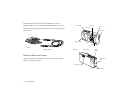
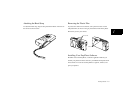
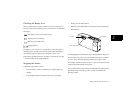
Installing the PhotoPC Plug-in
The software that you installed includes the PhotoPC
Plug-in. This is the interface that lets you transfer pictures from the
camera to your Macintosh. If you have other applications that support
the Plug-in, such as Adobe
®
PhotoShop
3.0 or Adobe PhotoDeluxe,
you can also use these applications to transfer pictures.
First you need to install the Plug-in for PhotoShop or PhotoDeluxe.
Follow these steps:
1
Open the EasyPhoto folder, then the EasyPhoto files folder, then
the Plug-ins folder.
2
Click on the PhotoPC Plug-in.
3
Choose Make Alias from the File menu.
4
Drag the alias to the PhotoShop or PhotoDeluxe
Plug-ins folder.
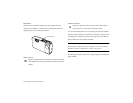
You can now use PhotoShop
or PhotoDeluxe to transfer your pictures, as
well as EasyPhoto. Turn to Chapter 2 for picture-taking instructions.