


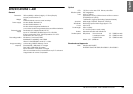


50
ADDITIONAL SETTINGS
Note:
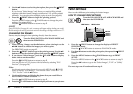
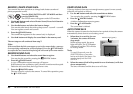
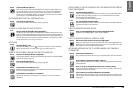
SD MEMORY CARD LOCKING MECHANISM
How to protect your precious photos from accidental deletion. Slide the small switch
on the side of the SD memory card in the direction of the arrow to the LOCK position.
Images will not be able to be deleted or overwritten. If you try to take a photo when
the card is locked the message "This memory card is write-protected." appears on
the monitor.
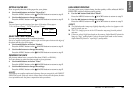
RULES FOR NAMING FILES (Cumulative function)
Explanation of the rules for naming files
The format for an image file name must always be EPSNXXXXXX.xxx
Pictures (image files) and linked files are automatically numbered by the
camera. When the setting for "File Number Reset" is ON, the numbers are
counted from EPSN0001.xxx in each new folder.
When "File Number Reset" is OFF, the numbering is cumulative. For
example, if the last picture on one memory card is ESPN0500.jpg, the picture
on a new card will be numbered ESPN0501.jpg.
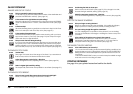
ALERT
Memory cards and file names.
❏
If you change the name of a file on the memory card, the camera may have
trouble retrieving that file.
❏
When folder numbers reach 999, or file numbers reach 9999, you will not be
able to add any more photos to that memory card. Replace it with a new one.
❏
When you copy any data to a computer, be sure that the same file name
(number) doesn't already exist in your picture directory. The newly copied file
could overwrite the existing one and you would lose it.
RESETTING FILE NUMBERS
It is possible to reset the sequence of image file numbers.
FYI
About file numbers
Picture files are automatically numbered so that no two files can have the same
number. They are numbered in the order in which they are shot.
Use the ud buttons to choose "File No. Reset" then use the lr buttons
to choose either ON or OFF.
RESETTING VIDEO OUT
You may have to reset the "video out" to match the national video system
of wherever you may be showing pictures.
Use the ud buttons to choose "Video out".
Use the l r buttons to change the setting.
Note:
About Video Signals
There are two available settings, NTSC and PAL, each used in different countries.
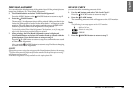
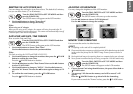
SETTING THE MENU LANGUAGE
You can change the language displayed on the LCD monitor.
1. Use the ud buttons to choose "Language".
Use the r button to select the language list.
2. Use the udl r buttons to highlight the language you want to use for
the LCD monitor. Press the FLASH button to confirm the selection.
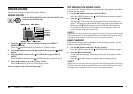
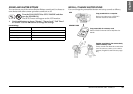
Turn the DIAL SWITCH to SET UP MODE and then
turn the POWER ON.
The SETUP menu will appear on the LCD monitor.
Turn the DIAL SWITCH to SET UP MODE and then
turn the POWER ON.
The SETUP menu will appear on the LCD monitor.
Turn the DIAL SWITCH to SET UP MODE and then
turn the POWER ON.
The SETUP menu will appear on the LCD monitor.