120 121
Viewing Images
6
6.1 CAMERA CONNECTION
6
Viewing Images
1
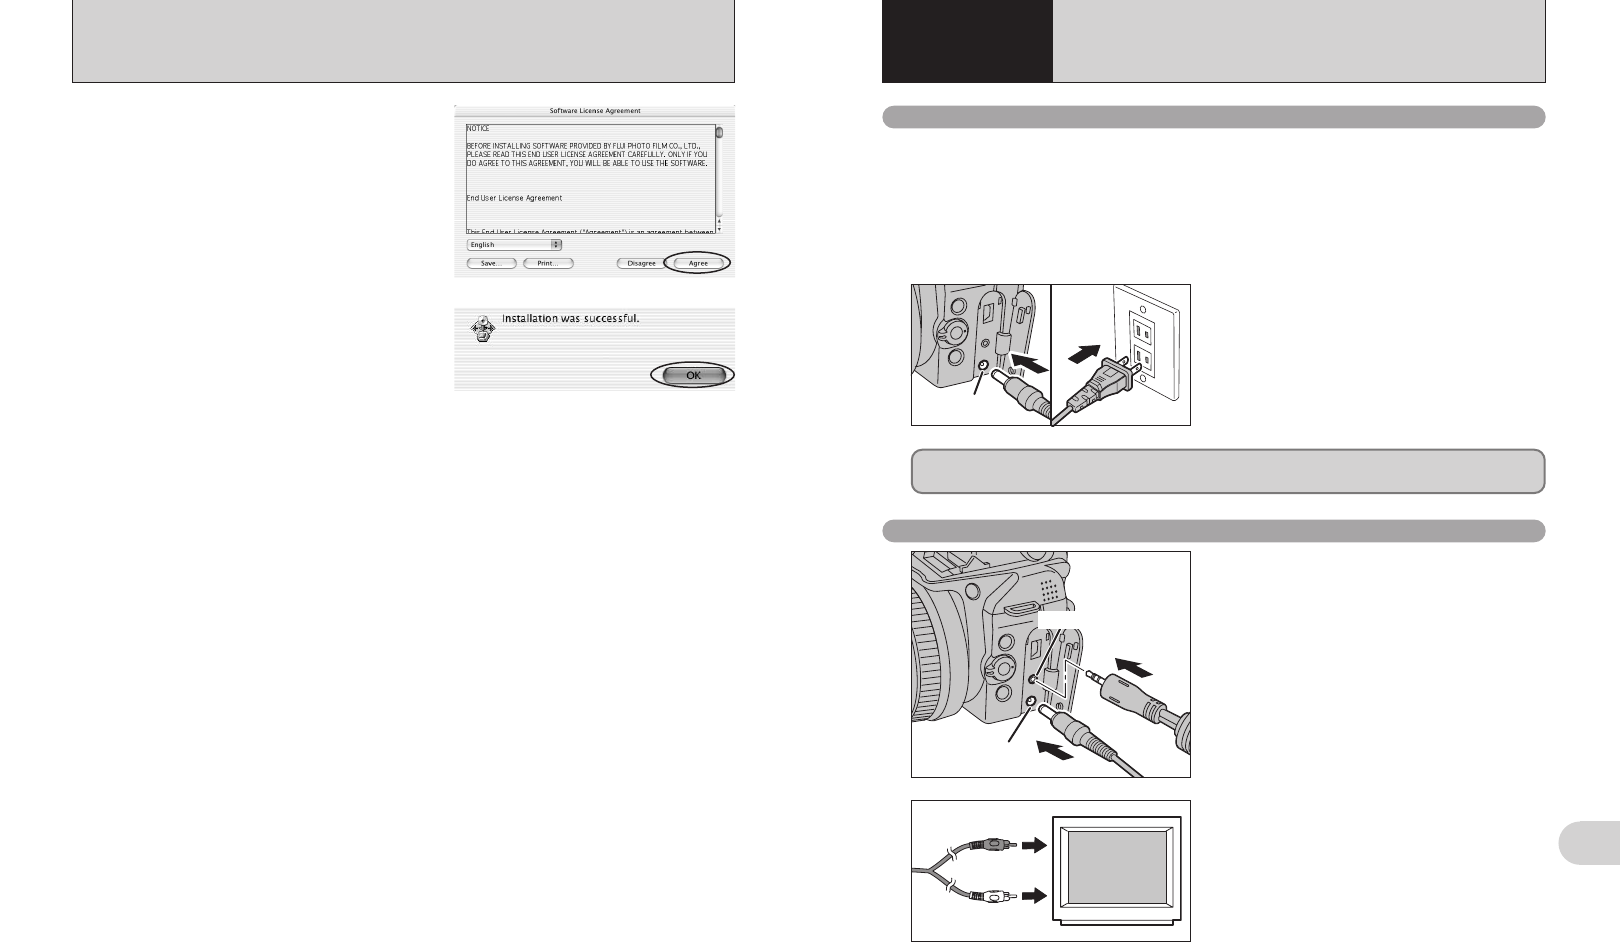
DC IN 5V socket
A/V OUT socket
6.1.2 Connecting to a TV
Turn off the camera and TV. Plug the A/V cable
(included) into the “A/V OUT” (Audio/Visual output)
socket.
●
!
Plug the A/V cable (included) and the AC power adapter
correctly and push them in the terminals.
●
!
When there is a power outlet available, connect the AC
Power Adapter AC-5VX.
2
Video (yellow)
Audio (white)
To terminals
Plug the other end of the cable into the audio /
video input socket on the TV. Then turn the camera
and TV on and take pictures or play back images
normally.
●
!
When connecting the A/V cable to TV, the camera’s screen is
turned off.
●
!
Refer to the instructions provided with your TV for more
information on audio/video input for your TV.
●
!
The image quality for movie playback is lower than for still
images.
Check that the camera is off. Plug the AC power
adapter connector into the “DC IN 5V” socket and
then plug the AC power adapter into the power
outlet.
●
!
The socket-outlet shall be installed near the equipment and
shall be easily accessible.
●
!
The shape of the plug and socket-outlet depends on the
country of use.
●
!
See P.138 for notes on using the AC power adapter.
6.1.1 Using the AC power adapter
Always use a FUJIFILM AC Power Adapter AC-5VX (sold separately) (➡P.136).
Use the AC power adapter to prevent losing power at inconvenient times, such as when
downloading photographed images to your PC. You can take pictures and play back images without
worrying about depleting the batteries.
●
!
Only connect or disconnect the AC power adapter when the camera is off.
Connecting or disconnecting the AC power adapter while the camera is turned on temporarily interrupts the power supply
to the camera, so that images or movies being shot at the time are not recorded. Failing to turn the camera off first can
also result in damage to the media or malfunctions during PC connection.
DC IN 5V socket
Do not connect the AC power adapter to charge the AA-size Ni-MH (nickel-metal hydride)
batteries. Use the optional charger (➡P.136) to charge the Ni-MH batteries.
5.5 INSTALLATION ON A Mac OS X (Hyper-Utility2)
The Software User License Agreement is
displayed.
Read the Agreement carefully. If you accept the
terms of the Agreement, click the [Agree]
button.
●
!
Clicking [Disagree] cancels the installation.
8
Click the [OK] button as directed by the on-
screen instructions. The software is installed in
the HyperUtility folder inside the application
folder on the startup volume.
Remove the CD-ROM from the PC and store it
in a safe place.
9


