6
107
CAMERA CUSTOMIZING
106
DISCONNECTING THE CAMERA FROM YOUR COMPUTER
1 2
●
!
Do not remove the SmartMedia or disconnect the
USB cable without following the removal/
disconnection procedure described above.
Always take the following steps before
disconnecting the camera from your computer:
➀
Check that the indicator lamp is green (the
camera is not exchanging data with the
computer).
➁
Select the correct procedure below for the
operating system used on your computer.
Then proceed to step
➂
on the right side of
this page.
●
Windows 98
Check that the indicator lamp is green.
●
Windows Me/2000 Professional
Exit “FinePixViewer”. Then click the Eject
icon in the taskbar and eject the media.
Check that the “REMOVE OK” message is
displayed.
●
Macintosh
Quit “FinePixViewer”. Drag the “Removable
Drive” icon to the Trash and check that
“REMOVE OK” is displayed on the camera’s
screen.
➂
Switch the camera off.
➃
Disconnect the special USB cable from the
camera.
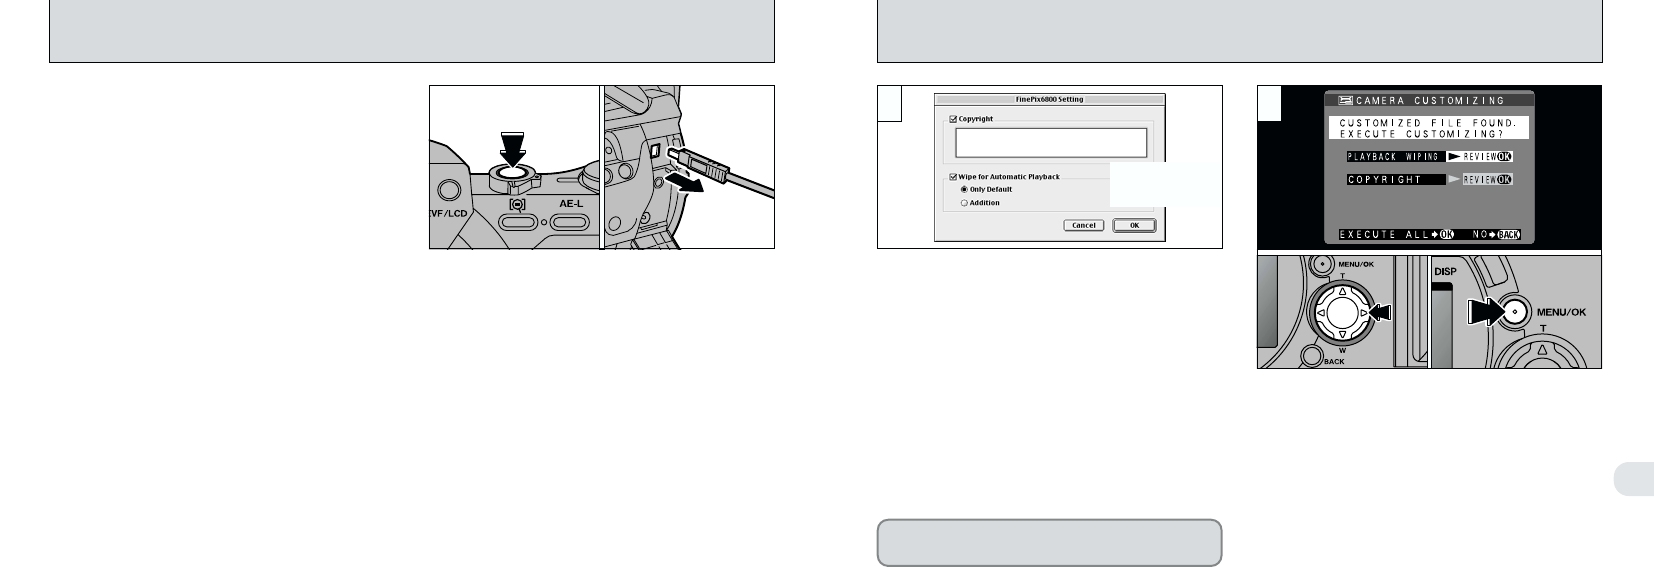
Load a SmartMedia that has available space and
connect as a “CARD READER (DSC)”. (➡P.104)
➀
Use the downloaded “FinePix6900Customizer”
software to specify the functions to be added.
➁
Click the “OK” button to write the data to the
SmartMedia.
Disconnect the camera from the computer and
unplug the special USB cable (➡P.106).
➀
When you switch the camera on, the
customized screen appears.
➁
Press “c” to check the details.
➂
Press the “MENU/OK” button to proceed.
Do not switch the SmartMedia during the
customization procedure.
●
!
If you selected “NO”, the customized screen appears
the next time you switch the camera on.
●
➂
●
➁
●
➀
●
➂
●
➃
✽The figure shows
the Macintosh
screen display.
