


23
Using the Camera
2
22
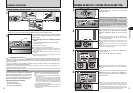
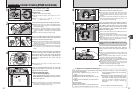
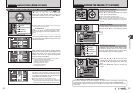
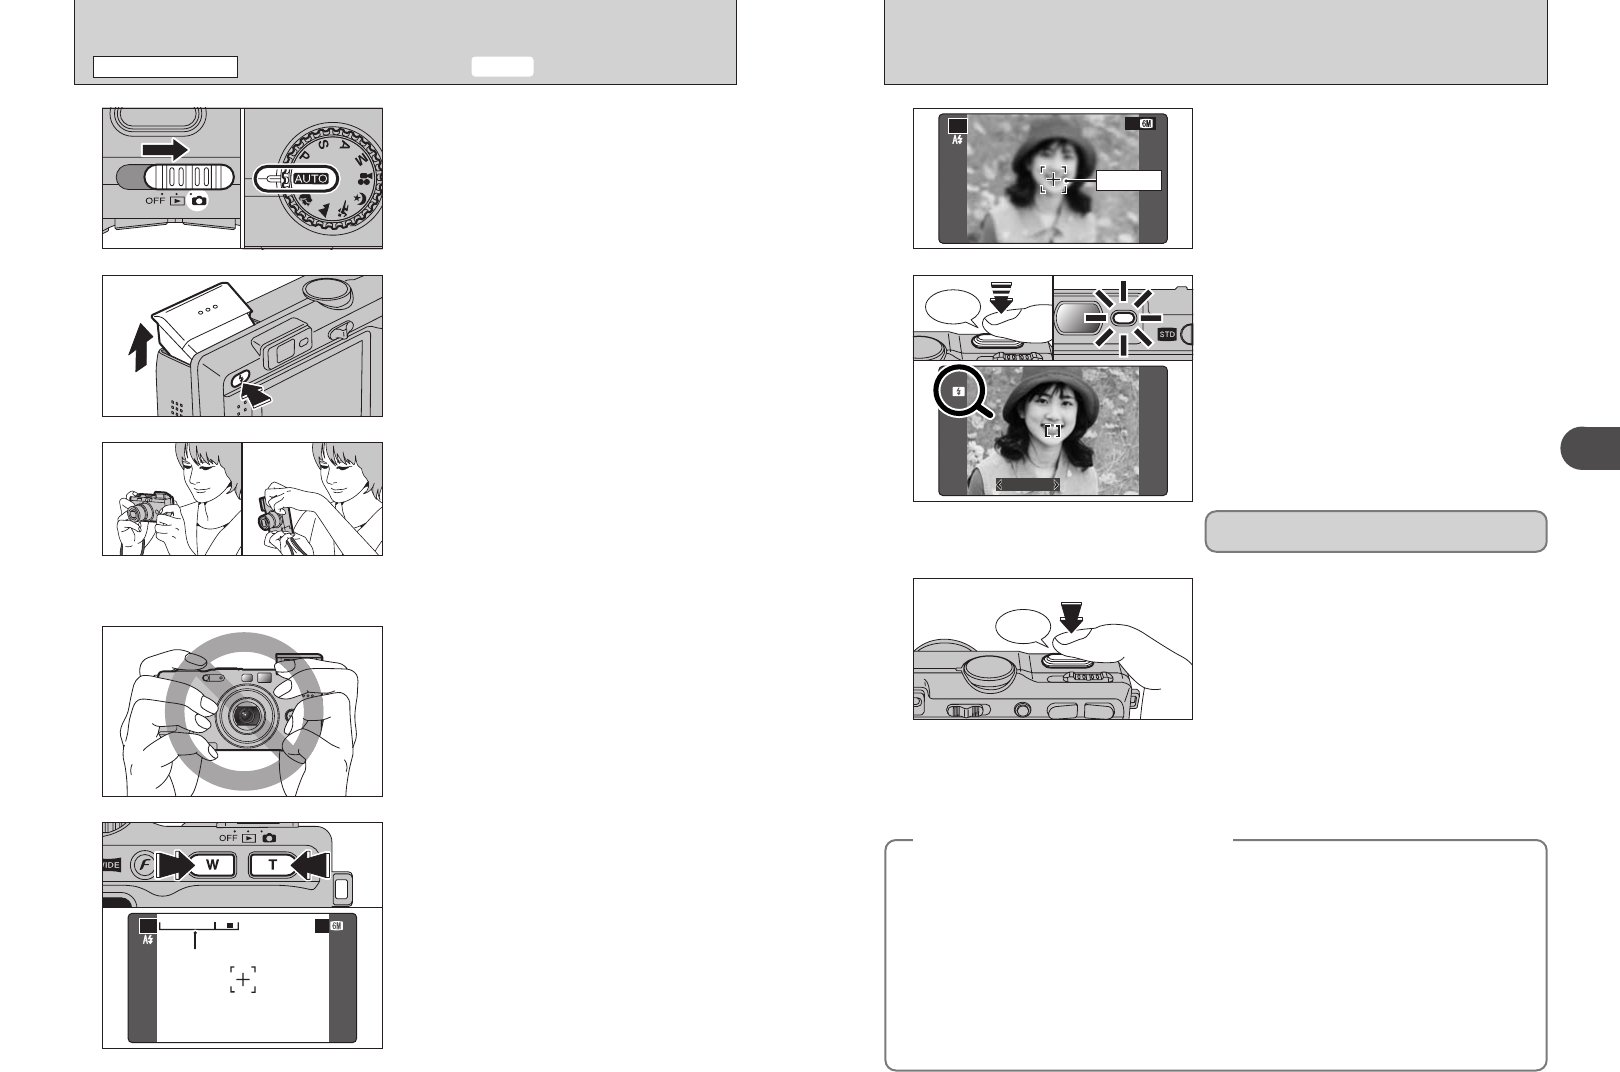
Use the LCD monitor to frame the shot so that the
subject fills the entire AF (Autofocus) frame.
●
!
The image shown on the LCD monitor before the picture is
taken may differ in brightness, color, etc. from the image
actually recorded. Play back the recorded image to check it
(➡P.29).
●
!
The subject may sometimes be difficult to see clearly on the
LCD monitor (in bright sunlight or dimly lit scenes, etc.). If so,
use the viewfinder to take the picture.
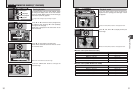
6
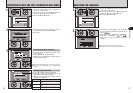
Press the shutter button down fully. When a
clicking noise is heard, the camera records the
image.
●
!
There is a slight delay between the shutter button being
pressed and the picture being taken. Playback the shot to
check the image.
●
!
When pressing the shutter button down fully in one motion,
the picture is taken without the AF frame changing.
●
!
When the camera takes the picture, the viewfinder lamp lights
orange (shooting disabled). The viewfinder lamp then turns
green and the next picture can be taken.
●
!
When taking a picture using the flash, the image may
disappear and go dark briefly due to flash charging. The
viewfinder lamp blinks orange during charging.
●
!
See P.118, 119 for information on the warning displays.
8
Click
Bebeep
Press the shutter button down halfway. When a
short double-beep is heard, the camera focuses on
your subject. The AF frame on the LCD monitor
becomes smaller and the camera sets the shutter
speed and aperture. The viewfinder lamp (green)
changes from blinking to lit.
●
!
When a short double-beep is hard and “{” appears on the
LCD monitor, the camera cannot focus.
●
!
Pressing the shutter button down halfway freezes the image
on the LCD monitor briefly. This image is not the recorded
image.
●
!
When “{” appears on the LCD monitor (e.g. the shot is too
dark for the camera to focus), try standing about 2 m (6.6 ft.)
from the subject to take the picture.
7
Before the flash fires, “∑” appears on the LCD
monitor.
◆
Subjects not suitable for autofocus
◆
The FinePix F810 uses a high-precision autofocusing mechanism. However, it may have difficulty
focusing on the following:
h Very shiny subjects such as a mirror or car
body
h Subjects photographed through glass
h Subjects that do not reflect well, such as hair
or fur
h Subjects with no substance, such as smoke or
flames
h Dark subjects
h Fast moving subjects
h Subjects with little or no contrast between the
subject and the background (such as white
walls or subjects dressed in the same color as
the background)
h Shots where another high-contrast object (not
the subject) is close to the AF frame and is
either closer or further away than your subject
(such as a shot of someone against a
background with strongly contrasting
elements)
For such subjects use AF/AE lock (➡P.26).
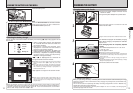
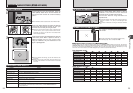
1
2
3
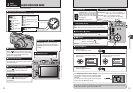
1Set the Power switch to “q”.
2Set the Mode dial to “B”.
h Focal range
Approx. 60 cm (2.0 ft.) to infinity
●
!
Use Macro mode for subjects closer than 60 cm (2.0 ft.)
(➡P.43).
●
!
When “7”, “-”, “q”
or “
=” appears, see P.118.
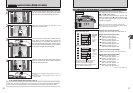
Press the Flash pop-up button to pop up the flash.
●
!
When the flash pops up, the image may disappear and go
dark briefly due to flash charging. The viewfinder lamp blinks
orange during charging.
●
!
If the flash is used in dusty conditions or when it is snowing,
white dots may appear in the image due to the flash reflecting
off the dust particles or snowflakes. Use Suppressed flash
mode.
●
!
When the camera is turned off, the flash is closed.
Brace your elbows against your sides and hold the
camera with both hands. Position your right thumb
so that it is handy for using the zoom.
●
!
Moving the camera while shooting gives a blurred picture
(camera shake). Use a tripod to avoid camera shake,
particularly for shots in the dark when the selected flash
mode is Suppressed flash.
●
!
There may be some uneven brightness at the lower edge of
the LCD monitor. This is normal and does not affect the
image.
01 02
4
●
!
Check that the lens is clean. If it is dirty, clean the lens as
informed on P.115.
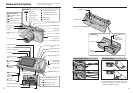
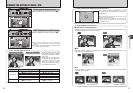
Hold the camera so that your fingers or the strap do
not cover the lens, flash, AF-Assist illuminator or
flash control sensor. If the lens, flash, AF-Assist
illuminator or flash control sensor is obscured, the
brightness (exposure) of your shot may be
incorrect.
5
Press “T” (telephoto) button to zoom in. Press “W”
(wide-angle) button to zoom out. A zoom bar
appears on the LCD monitor.
h Optical zoom focal length
(35 mm camera equivalent)
STD (Standard mode): approx. 32.5 mm-130 mm
WIDE (Widescreen mode): approx. 35.5 mm-142 mm
Max. zoom scale: 4×
●
!
Zooming pauses briefly when the camera changes between
optical zoom and digital zoom (➡P.27). Press the same
Zoom button again to change zoom modes.
Zoom bar
AF frame
TAKING PICTURES
(
B AUTO MODE
)
PHOTOGRAPHY MODE