


63
Advanced Features
3
62
2
01 02
j
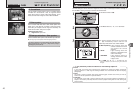
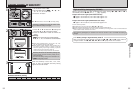
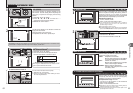
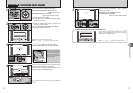
BRACKETING
Available Photography mode:
Use this setting to photograph the same image with
different exposure settings. Bracketing shoots 3
continuous frames, one of which is correctly
exposed while the remaining two are underexposed
and overexposed respectively by a set amount.
h Bracketing settings (3)
±1/3 EV, ±2/3 EV, ±1 EV
See P.125 for more information on EVs.
●
!
If the underexposed or overexposed frame is outside the
camera’s control range, the shot is not taken with the
specified setting increments.
●
!
Flash photography cannot be used.
●
!
This feature always takes 3 shots. However, if there is insufficient
space on the xD-Picture Card for 3 shots, no picture will be taken.
1
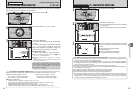
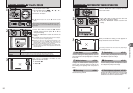
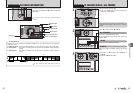
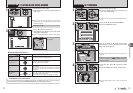
Use this setting to soften or emphasize outlines or
to adjust the quality of the image.
HARD: Emphasizes the outlines.
Best for shots of subjects such as buildings
or text where sharp images are desirable.
SOFT: Softens the outlines.
Best for shots of subjects such as people,
where a softer image is desirable.
NORMAL: Best for ordinary photography.
Provides edge sharpness that is ideal
for ordinary shots.
G
SHARPNESS
Available Photography mode:
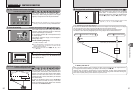
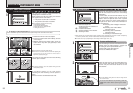
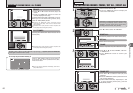
Use this setting to change just the amount of light
emitted by the flash to suit the photography
conditions or to achieve a desired effect.
h Compensation range: ±2 levels
–0.6 EV to +0.6 EV in approx. 0.3 EV increments
(total: 5 levels selectable)
See P.125 for information on EVs.
●
!
Depending on the type of subject and the shooting distance,
brightness adjustment may have no effect.
●
!
The image may appear dark when the shutter speed is set to
speeds higher than 1/1000 sec.
z
FLASH BRIGHTNESS ADJUSTMENT
Available Photography mode:
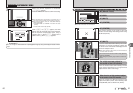
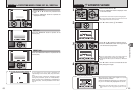
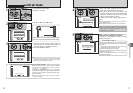
Near
Far
After moving
Before moving
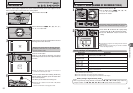
2
The AF frame appears in the location to which the
target point was moved.
Take the picture in the normal way.
To reposition the AF frame, repeat step 1.
1
AF
(
AREA
)
The camera changes the focusing position on the
LCD monitor. Use this setting when composing the
shot using a tripod and changing the focusing
position.
1Hold down the “C-AF” button.
2Press “a”, “b”, “d” or “c” to move the “Ω”
(target point) to the focusing position.
3Release the “C-AF” button.
01 0203
MF
(
Manual Focus
)
1Hold down the “C-AF” button.
2Turn the Command dial to adjust the focus.
Use the LCD monitor to check the focus.
01 02
Moves the focus further.
Moves the focus closer.
PHOTOGRAPHY MENU
PHOTOGRAPHY MENU
Regardless of the AF frame location, the exposure is always set using the area in the center of the
LCD monitor. To expose the shot for your main subject, use AE lock.
◆
Mastering manual focusing
◆
The image is unfocused when the camera moves.
Use a tripod to avoid camera shake.
◆
One-touch AF function
◆
Use this function to focus the shot quickly.
1 Hold down the “C-AF” button.
2 Press the shutter button down halfway to focus
the shot using Autofocus.
Bebeep
01 02
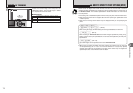
✽ Displaying the menus (➡P.57)
After setting the exposure for bracketing:
1Hold down the “f” button.
2Turn the Command dial to select “j”.
Auto bracketing