


43
Advanced Features
3
42
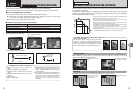
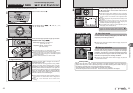
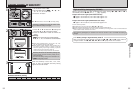
When using the viewfinder to take a
picture in Macro mode, the field visible
through the viewfinder does not match
the field actually photographed because
the viewfinder and lens are in different
positions. Use the LCD monitor to take
pictures in Macro mode.
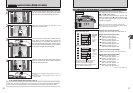
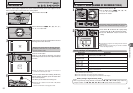
Select Macro mode to take close-up shots.
1Set the Power switch to “q”.
2Press the “e (d)” Macro button. The “e”
appears on the LCD monitor indicating that you
can take close-up shots.
To cancel Macro mode, press the “e (d)”
Macro button again.
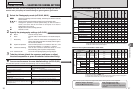
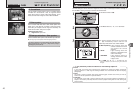
h Focal range
Approx. 7.5 cm to 80 cm (3.0 in. to 2.6 ft.)
(wide-angle)
h Effective flash range
Approx. 30 cm to 80 cm (1.0 ft. to 2.6 ft.)
(wide-angle)
●
!
Any of following cancels Macro mode:
i Changing the Mode dial setting
i Turning the camera off
●
!
If the flash is too bright, use flash brightness adjustment
(➡P.63).
●
!
Use a tripod to avoid camera shake when shooting in the
dark (when “
|” appears).
●
!
Once the LCD monitor is turned on and cannot be turned off.
●
!
Canceling Macro mode, the LCD monitor remains on.
●
!
Selecting AF (MULTI), the focusing position remains near the
center of the LCD monitor.
01 02
e MACRO
(
CLOSE-UP
)
PHOTOGRAPHY FUNCTIONS
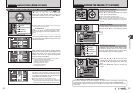
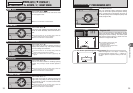
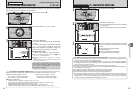
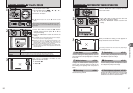
Set the Mode dial to “>”.
Use Manual mode to set any shutter speed and
aperture setting.
Shutter speed
Aperture
01 02
> MANUAL
PHOTOGRAPHY FUNCTIONS
Setting the shutter speed
Turn the Command dial to select the shutter speed.
h Shutter speed setting
3 sec. to 1/2000 sec. in 1/3 EV increments
●
!
See P.125 for information on EVs.
●
!
Use a tripod to avoid camera shake.
●
!
In shots with long exposures, noise (dots) may appear on the
image.
●
!
If the shutter speed is set to a speed faster than 1/1000 sec.,
the image may appear dark even if the flash is used.
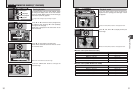
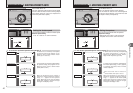
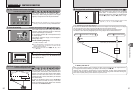
Setting the aperture
1Hold down the “D” button.
2Turn the Command dial to select aperture.
h Aperture settings
Wide-angle: F2.8 to F8 in 1/3 EV increments
Telephoto: F5.6 to F8 in 1/3 EV increments
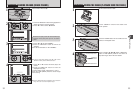
◆
The exposure indicator
◆
Use the exposure indicator on the LCD monitor as a
guide when setting the exposure.
When the brightness of the subject is outside the
camera’s brightness metering range, the indicator
moves to the (+) end to show that the image will be
overexposed (the (+) turns yellow) or to the (–) end to
show that the image will be underexposed (the (–)
turns yellow).
Exposure
indicator
Available Photography mode: