


GV44…, GV45…, GV46… Allgemeiner Teil / General
GRUNDIG Service-Technik 1 - 35
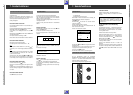
EURO-AV
DECODER A2
L
H
L
H
ń
ń
EURO-AV A1
L
R
AUDIO
L
R
PAY-TV
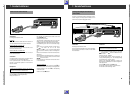
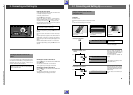
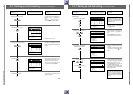
Connecting the Recorder
Connecting the recorder to the aerial
Remove the plug of the cable from the aerial socket of your
TV set and insert it into the aerial socket
–
II
–
of the recorder.
Connecting the recorder and the TV set
Connect the socket ə of the recorder with the aerial socket
of the TV set using the cable supplied with the recorder.
If your TV set is provided with a EURO-AV socket, also
connect the EURO-AV socket of the TV set via a Euro-AV
cable with the EURO-AV A1 socket of the recorder.
The EURO-AV cable is available from your specialized dealer.
The advantage of this connection is even better picture and
sound quality during playback and in the EE mode (loop-
through mode.
In addition, this connection is necessary for stereo sound
when playing back on a stereo television.
Connecting a "Pay-TV" decoder
If you wish to receive and record scrambled television pro-
grammes broadcast by private cable companies, you will
need a decoder. See your specialized dealer.
Use a EURO-AV cable to connect the decoder to the A2
socket of the recorder.
Connecting the recorder to the mains
Insert the mains cable supplied into the mains socket
ʋ
on
the recorder.
Insert the plug of the mains cable into the wall socket.
The recorder is now on.
Only by pulling out the mains plug will the recorder be iso-
lated from the mains.
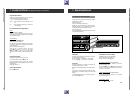
2. Connecting and Setting Up 2. Connecting and Setting Up
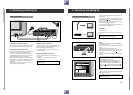
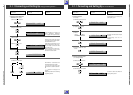
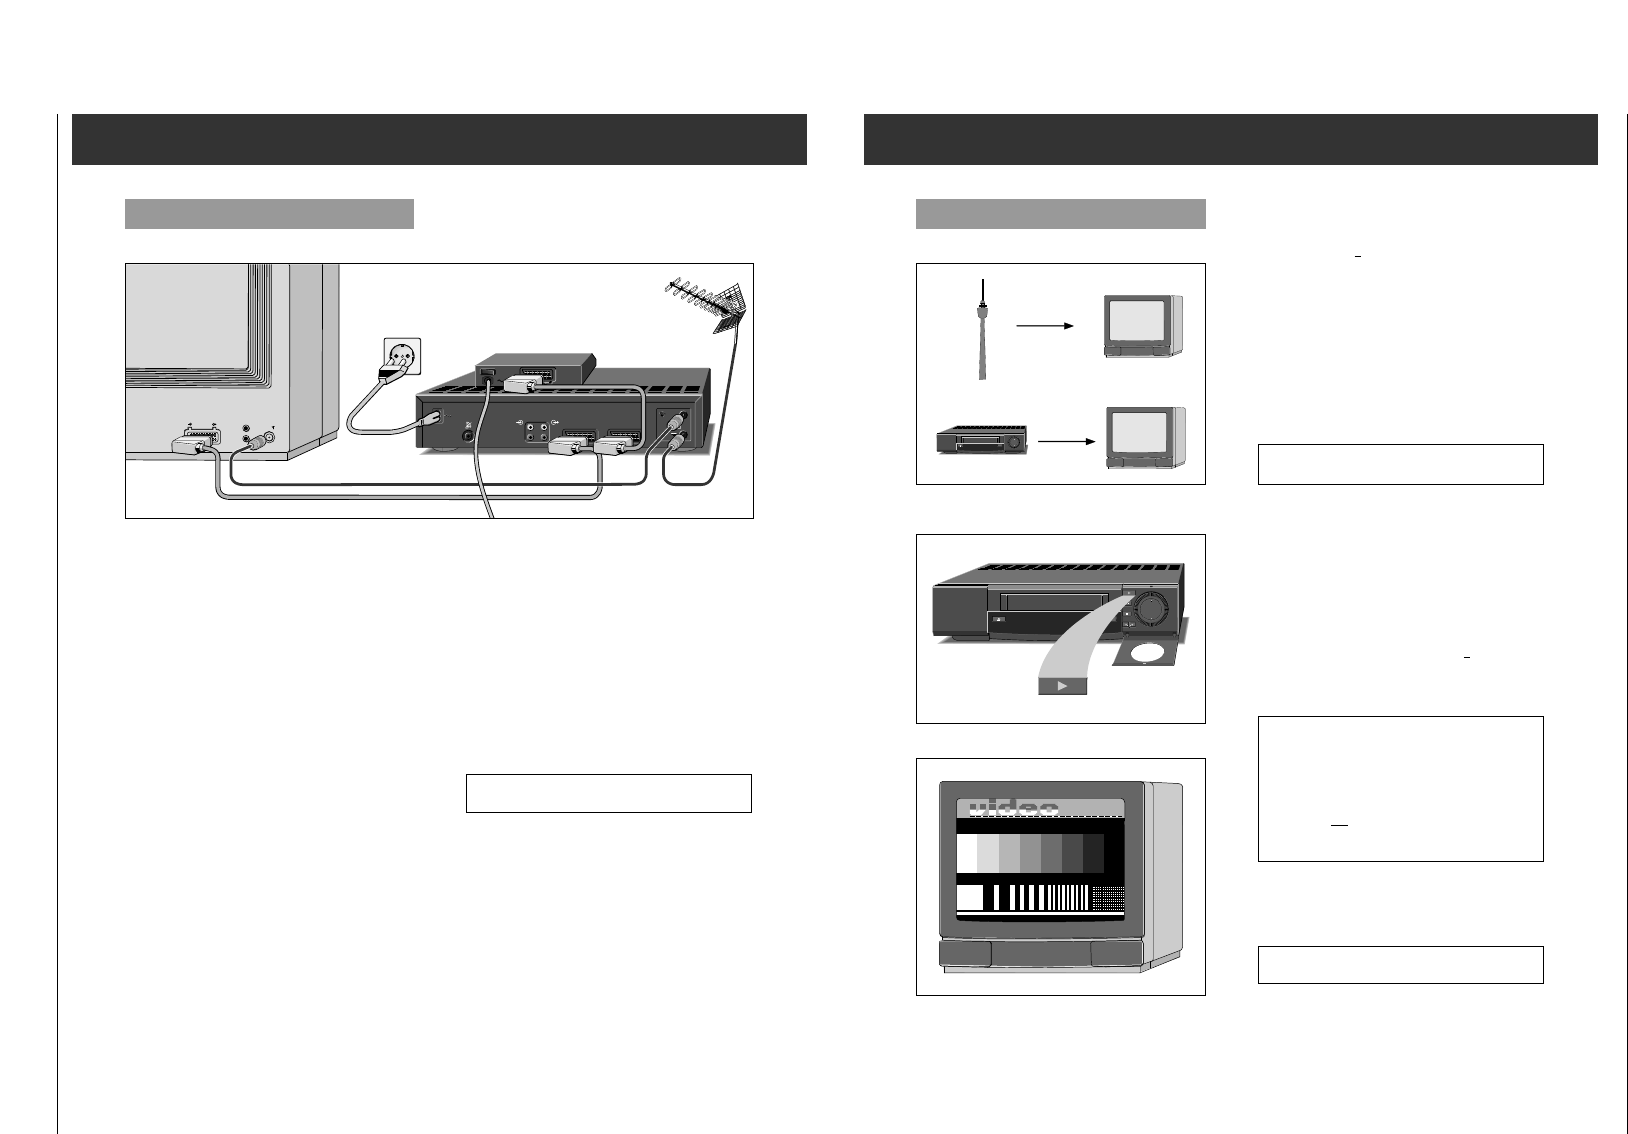
Tuning the TV set to the Recorder
Your TV set receives programmes from different stations on
certain channels.
You recorder also transmits on such a channel (between
channels 30 and 40
+
2 channels in the UHF band) to which
the TV set must now be tuned.
So that you can find this channel, the recorder is fitted with a
"transmitter" which generates a test pattern.
This adjustment is not necessary if the recorder and the TV
set are connected with a EURO-AV cable.
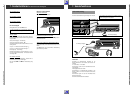
Preparation
Switch the TV set on.
Select the AV programme position for the recorder on the TV
set.
Open the right flap on the recorder (see illustration).
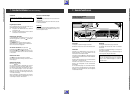
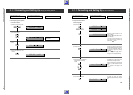
Tuning
Switch to the colour test pattern by pressing the
J
button
(see illustration to the left).
After a short period of time, the recorder "transmits" the test
pattern.
»TEST«
appears in the display of the recorder.
Search for the recorder´s test pattern on the TV set – in the
UHF band between the channels 30 and 40
+
2 – and store it
in the memory.
How this is done is explained in the operating instructions for
the TV set.
Insert the aerial cable plug into the aerial socket
–
II
–
of the
recorder.
If the picture quality is good, complete tuning by pressing the
“
Ǽ
button on the recorder.
If the picture quality is poor, proceed as described in the
chapter on the next page.
If you have connected your recorder to a 100 Hz technolo-
gy TV set and the colour test pattern jumps or appears
unsteady, you must tune the recorder.
Press the
Z
button on the remote control, the num-
bered buttons
8547
and then the
O
button.
If you connect the recorder to a conventional 50 Hz tech-
nology TV set after making this adjustment, press the
Z
button, the numbered buttons
8546
and the
O
button.
Remove the aerial cable from the socket
–
II
–
of the recorder.
There should be no cassette in the recorder.
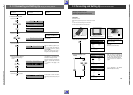
Ǽ
Ǽ
GRUNDIG CTI TEST PATTERN
No reception of Programme 1
GRUNDIG
PATTERN
ŁŁ