


Abgleichvorschriften / Adjustment Procedures GV44…, GV45…, GV46…
3 - 8 GRUNDIG Service-Technik
Set frequency with R3402 (CFL) to 1.4MHz ±5kHz.
Set frequency with R3435 (CFR) to 1.8MHz ±5kHz.
To cancel the service function: Press the "Standby" button
or disconnect the recorder from the mains.
Set output voltage with R3390 (PBL) to 50mV
rms
±0.5dB.
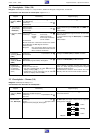
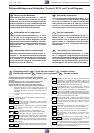
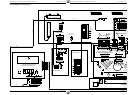
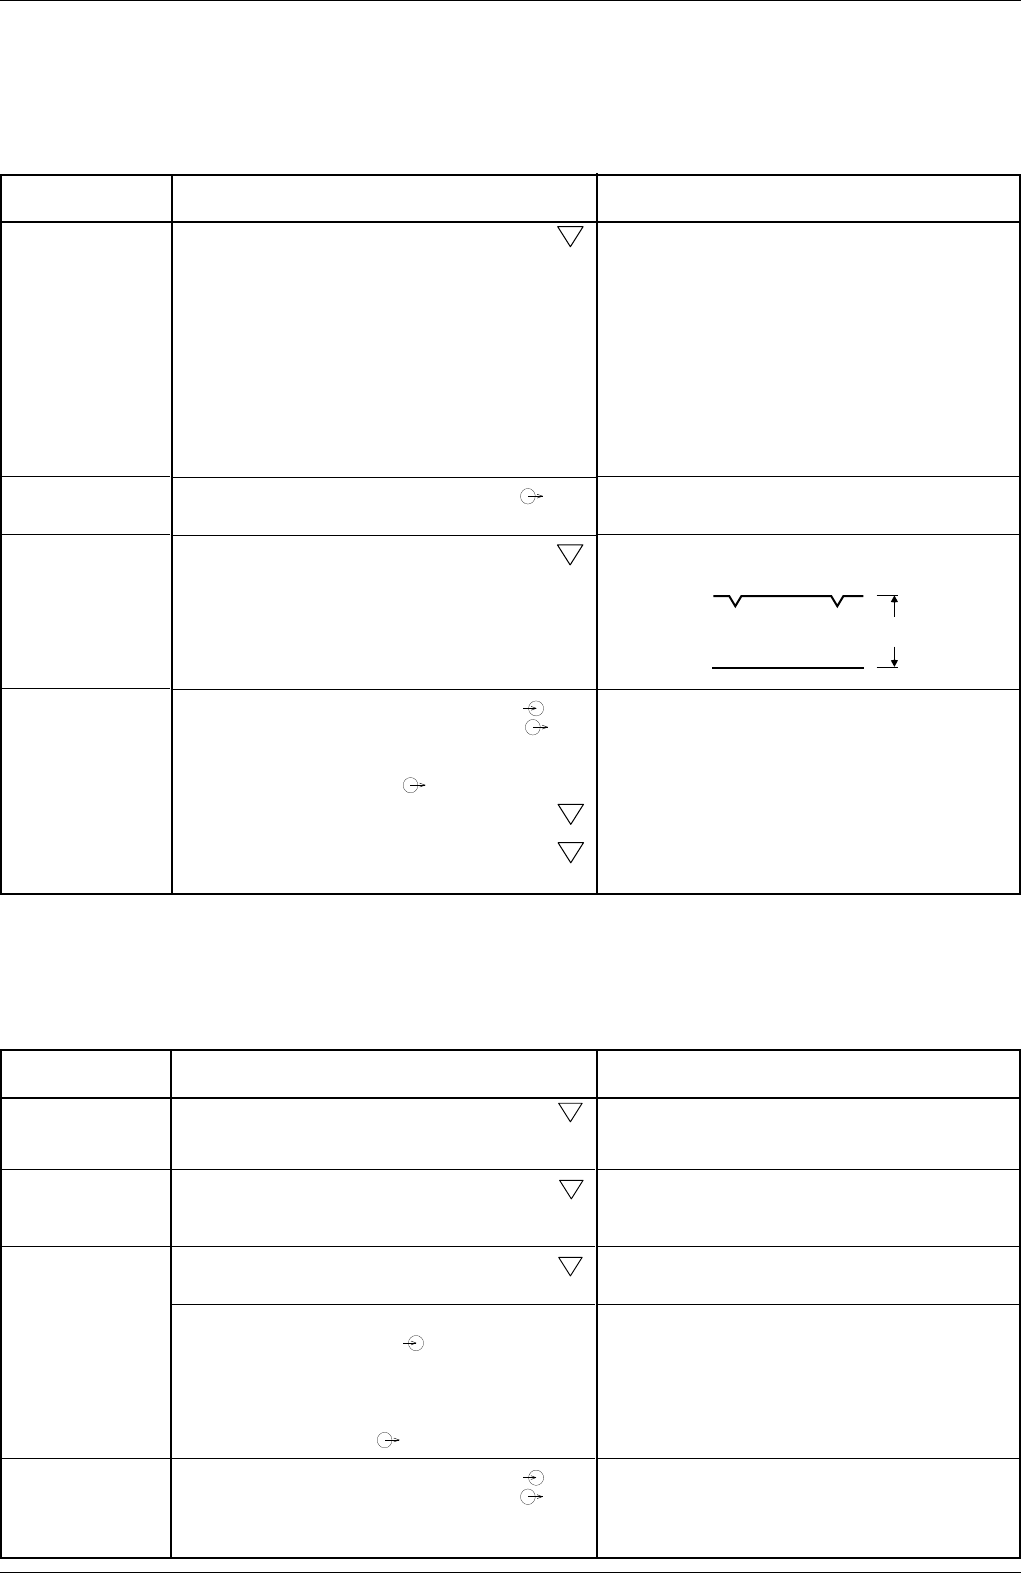
With R3455 (FME) set the voltage as shown in the oscillo–
gram below.
2.9V
5ms/cm
Set DC voltage with R3385 (AEL) to 1.5V.
Set DC voltage with R3380 (AER) to 1.5V.
2.6 Family Board – FM Sound (AF)
Test Equipment: Oscilloscope, 10:1 Test Probe, Frequency Counter, AF Generator, AF Millivoltmeter, Test Cassette (HiFi).
Service work after changing the:
… Family Board, the Tape Drum / Headwheel: Adjustment no. 1…4
… IC7320: Adjustment no. 1…4
Adjustment Preparation Adjustment Procedure
1. Carrier Frequency
Left Channel
R3402 (CFL),
Right Channel
R3435 (CFR)
2. Playback Amplitu-
de, R3390 (PBL)
3. Voltage of the FM-
Envelope, R3455
(FME)
4. Voltage of the
Sound Envelope
Left Channel
R3385 (AEL),
Right channel
R3380 (AER)
Frequency counter:............................................. MP
21
Load a cassette, call up the service function:
– Press the Z button on the remote control handset
("
CODE – – – –
" is indicated in the display).
– Enter the code number 4 9 3 4 and press the O
button ("
SERV
" is indicated in the display).
Do not feed in an AF signal! HiFi recording.
Press button 5. The display shows "
A 1-4 HI 00 00 A5
".
Press button 6. The display shows "
A 1-8 HI 00 00 A6
".
AF millivoltmeter: .................................... Audio L/ R
Play back the test cassette (HiFi).
Oscilloscope: ...................................................... MP
22
Play back the test cassette (HiFi).
AF generator, 1kHz, 400…600mV
rms
: .... Audio L/ R
Oscilloscope: ........................................... Audio L/ R
Manual control of the HiFi recording:
Press the Ü button on the recorder, with the buttons W
Q
set the audio output levels L / R to 500mV
rms
.
Oscilloscope: ...................................................... MP
23
Oscilloscope: ...................................................... MP
24
2.7 Family Board – Standard Sound / Audio Linear (AL)
Test Equipment: Oscilloscope, 10:1 Test Probe (TK), Frequency Counter, AF Millivoltmeter, AF Generator, Trademarked Chromium Dioxide Cassette.
Service work after replacing the Family Board or the RP-Head: Adjustment no. 1…4
Adjustment Preparation Adjustment Procedure
1. Sound Erase
Frequency,
F1055 (FAEH)
2. Full Track Erase
Head,
F1052 (FFEH)
3. Bias (VM),
R3312 (BIAS)
3.1 Frequency
Response Test
4. Playback Level,
R3300 (LL)
Set frequency with F1055 (FAEH) between 59kHz and
65kHz.
Set frequency with F1052 (FFEH) between 59kHz and
65kHz.
With R3312 (BIAS) alter the voltage between 22V
pp
and
62V
pp
until the frequency response is linear.
The voltage ratio of 400Hz to 8kHz must not be greater
than 1:0.7 or 0.7:1 (±3dB). If the voltage ratio exceeds
these limits, the bias must be altered:
To increase the playback voltage at 8kHz: Reduce bias (VM).
To reduce the playback voltage at 8kHz: Increase bias
(VM).
Set output voltage with R3300 (LL) to 0.5V
rms
.
Frequency counter, 10:1 test probe: .................. MP
13
Record
Frequency counter, 10:1 test probe: .................. MP
14
Record.
Oscilloscope, 10:1 test probe:............................ MP
13
Record.
– Feed an audio signal of 10mV
rms
(28mV
pp
) from the AF
generator to the socket Audio L / R(on the rear side of
the recorder).
–
Make a recording at 400Hz and 8kHz, at least 1 min duration
of each frequency. Afterwards play back these recordings.
– Connect an AF millivoltmeter (oscilloscope) to EURO AV
socket pins 1 / 3 or Audio L / R.
AF generator, 333Hz / 0.5V
rms
:................ Audio L / R
AF millivoltmeter: .................................... Audio L / R
HiFi-recording (automatic level control, Normal Play)
Play back this recording (switch over to standard sound).