42
ISO & WHITE BALANCE ON GRIP
– presets and manual
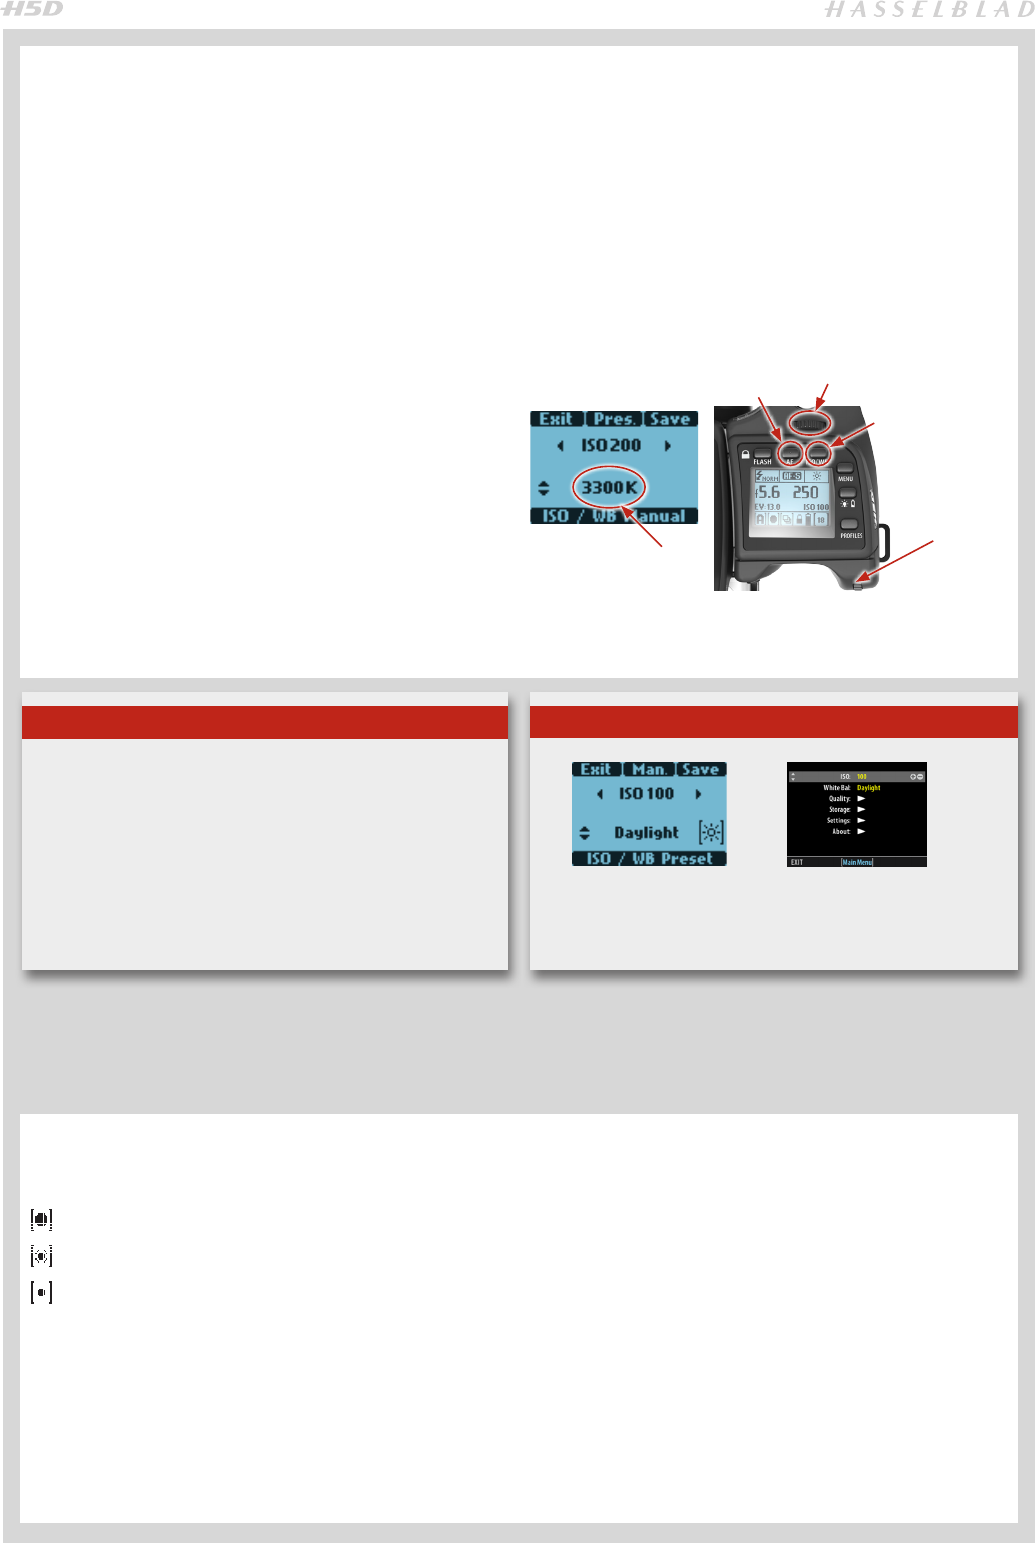
1. Press ISO/WB.
2. Turn the FRONT scroll wheel to select ISO setting.
3. Turn the REAR scroll wheel to select WB (Daylight,
Shade, Cloudy, Flash, Fluorescent and Tungsten).
4. To make a Manual White Balance setting (not a
White balance test exposure), press the Man. (AF)
button and then turn the REAR scroll wheel to choose
a color temperature in figures (degrees Kelvin): 2000 –
10000 K
5. Press SAVE.
ISO/WB
&
SAVE
MAN.
Front scroll
wheel
Rear scroll
wheel
Custom white balance
setting in degrees K.
Note
White Balance settings are technically not necessary
for 3F/3FR files because raw format files contain all the
information required for correction in Phocus and/or other
software, regardless of the original color temperature of the
light source or color temperature setting of the camera at the
time of exposure. However, if you intend to shoot RAW & JPEG
or use Phocus / Phocus Quick for JPEG production and plan to
deliver or print the JPEG files directly, then you should make a
White Balance setting.
ISO & WHITE BALANCE
Both ISO and White Balance can be set either via the grip, the sensor unit or, when tethered, via Phocus.
On the grip, the ISO/WB button provides immediate access to ISO and White Balance settings. The front and rear scroll
wheels are used to make the desired changes. On the back, settings are changed with the zoom button. In Phocus there is
a specific tool to control camera settings.
The settings are automatically and simultaneously transferred from the grip to the sensor unit. Likewise all changes on the
back are automatically transferred to the grip display. Please note that the changes are only displayed on the sensor unit
when the settings have been saved.
See more information about making manual white balance settings
in the
‘Sensor Unit Settings’
section.
LIGHT METERING MODES
There are three reflective metering modes available. These
have the following designations on the grip display:
– Centre Weighted
– CentreSpot
– Spot
Centre Weighted: Commonly used for ‘average’ light situa-
tions where there is no particular dominance of light or dark
areas across the tonal range. Takes into account approxi-
mately 25% of the image seen in the viewfinder.
CentreSpot: Emphasizes the central section of the focus-
ing screen equivalent to approximately 25% of the image.
This provides a balanced assessment and is a typical choice
where the main subject is in the centre of the image.
Spot: The sensitive area is equivalent to approximately
2.5% of the image area (the central spot on the viewfinder
screen). Any parts of the image outside of this area will not
affect the exposure reading. This provides a very accurate
measurement of specific tones. Typically used in the zone
system and similar light measuring situations where maxi-
mum control is required. Also excellent for tonal comparison
measurements. The spot mode can display ‘zones’ instead
of EVs in the viewfinder display (see Custom Options #14).
Tip
ISO and White Balance settings can be made either on the
grip or the sensor unit. Settings are automatically updated on
each other.
