


FRU information (service only) 123
3. Remove the left-side cover (see “Removing the side
cover” on page 44.
4. Turn the server onto its right side so that the open left
side is facing up.
Note: Rotate the feet in toward the server so they do
not detach due to the weight of the server.
5. Remove the bezel assembly (see “Bezel assembly” on
page 114).
6. Remove the main bezel (see “Main bezel” on page
115).
7. Remove the support bracket (see “Removing the sup-
port bracket” on page 45) and air baffle.
8. Remove all adapter cards (see “Working with adapters”
on page 45).
9. Detach cables from the system board.
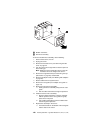
10. Remove the hard disk drive cage (see “Installing a hard
disk drive in bays E, F, or G” on page 53).
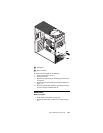
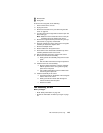
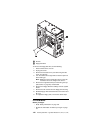
11. Using side cutters, sever the four rubber extensions on
the outside of the server.
12. Pull the fan away from and out of the server.
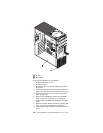
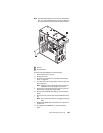
13. To install the new fan assembly, place the fan in posi-
tion in the server.
14. Guide the rubber extensions through the apertures.
15. Use needle-nosed pliers to pull the extensions through
the apertures.
16. Reconnect cables.
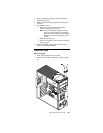
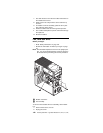
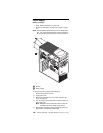
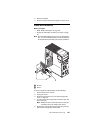
Floppy disk drive
Before you begin:
• Read “Safety information” on page 155.
• Review the information in “Before you begin” on page
43.
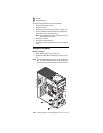
Note: This illustration depicts the server in the upright posi-
tion. It is recommended that the server be placed on
its left side before performing this service procedure.