E-29
ENGLISH
PRIVATE MASK Setup
Use the PRIVATE MASK screen to set up the private mask function, which grays out areas that are not required to be included in
the monitored picture. Up to four private masks can be set per screen, and up to eight private masks can be set in total.
SETUP
MENU SET
SPEED
IRIS
AF
FOCUS
ZOOM
OPEN
FAR
TELE CLEAR
/HOME
7
4
1
8
0
5
2
9
6
3
ENTER
AUTO
PAN
OPTION
1
OPTION
2
CAMERA
POSI-
TION
AUTO
PATROL
CLOSE
NEAR
WIDE
AUTO F-1 F-2 F-3
PAN/TILTLENS
CAMERA/POSITION
CAMERA POSITION
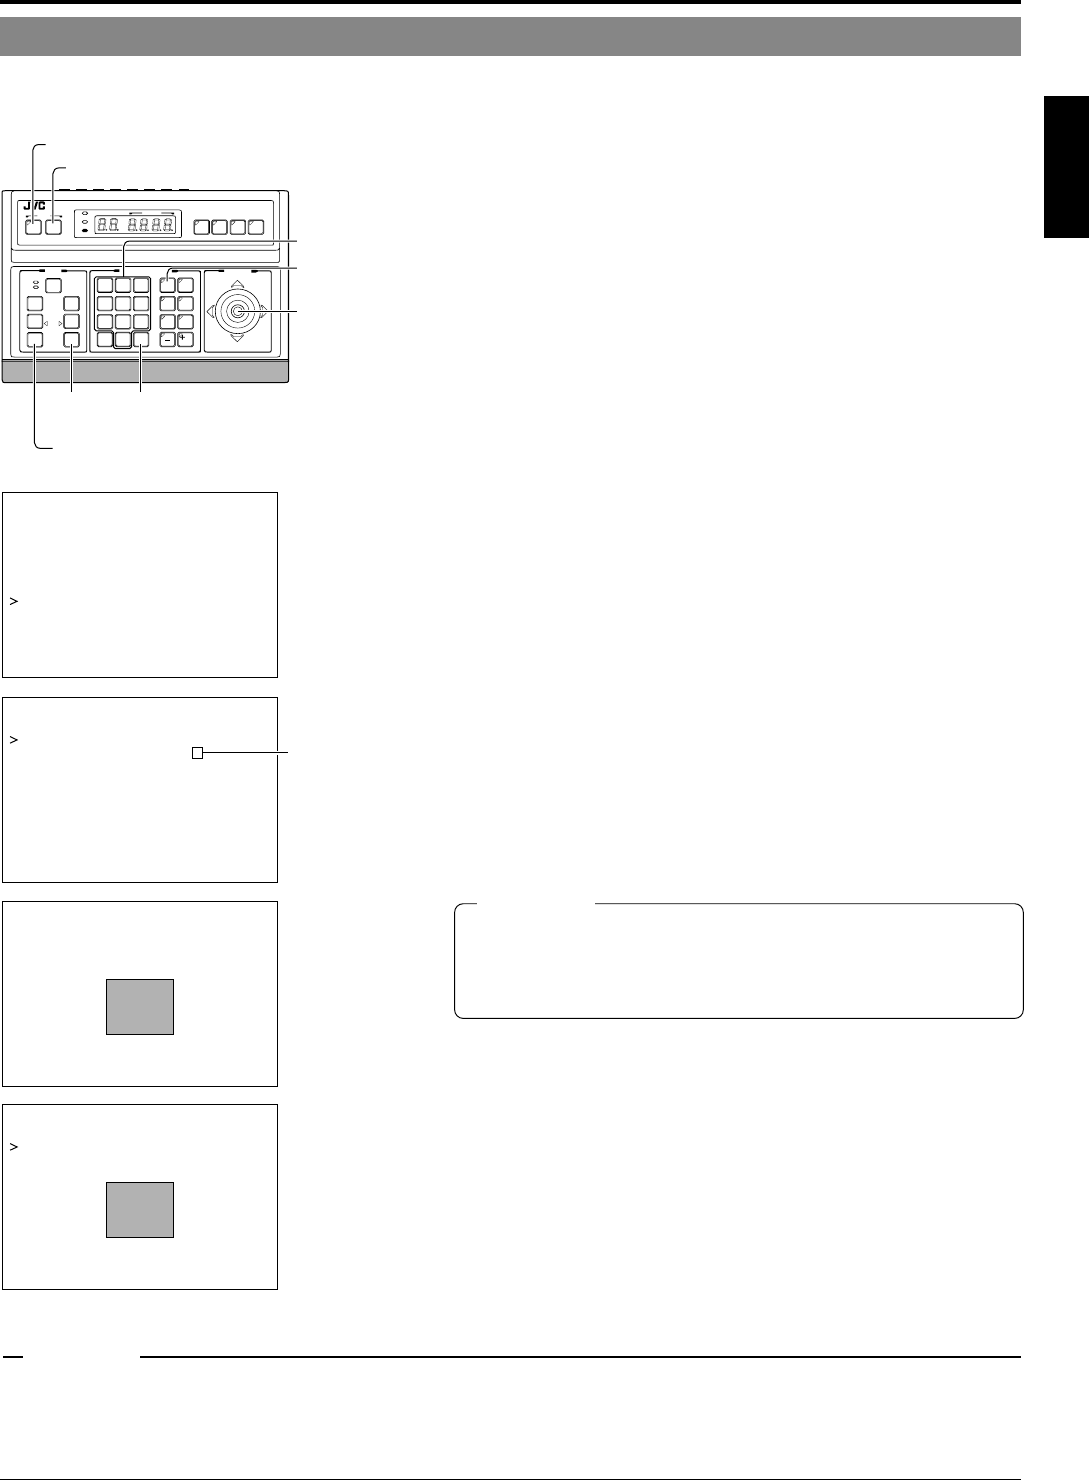
REMOTE CONTROL UNIT
RM-P2580
ALARM
POWER
KEY LOCK
PAN/TILT
lever
CAMERA
buttons
TELE
button
WIDE button
ENTER
button
Numeric keys
SET button
MENU button
POS.TI TLE LOC. UP-L
–––CAMERA FUNCTION – ––
FLIP DIGITAL
VAR.P/T SPEED ON
EASY AF OFF
D.ZOOM MAX X2
PRIVATE MASK..
MODE ON
–––PRIVATE MASK – ––
MASK NO 1
*
MASK EDIT..
MASK DELETE. .
Already set.
–––MASK EDI T – ––
PUSH MENU SAVE&RETURN
→
CANCEL
–––MASK DELETE – ––
DELETE
1.
Select the camera. (
☞
RM-P2580 Instruction manual)
CAMERA button → Numeric key (camera number) → ENTER button.
The picture of the selected camera is output.
2.
Select the angle of view.
Use the PAN/TILT lever and the lens button to set the viewing angle
to which the private mask function is to be applied.
3.
Display the SETUP menu on the camera.
(
☞
P. 18, steps
1
to
4
)
MENU button (3 sec.)
→
Select “CAMERA” using the PAN/TILT
lever
→
SET button.
The camera moves to the home position.
4.
Tilt the PAN/TILT lever up or down to move the cursor
(>) to “CAMERA FUNCTION” and press the SET button.
The CAMERA FUNCTION menu is displayed.
5.
Move the cursor (>) to “PRIVATE MASK” and press
the SET button.
The PRIVATE MASK submenu is displayed.
6.
Select the private mask function ON or OFF.
Turn the private mask function on or off by setting the “MODE” item
in the submenu to ON or OFF (Factory setting: OFF)
7.
Select the mask number.
Select the private mask number from MASK NO. 1 to 8 and move the
cursor on to the item “MASK EDIT.” Of these, a maximum of 4 can be set
within one picture.
If an already set mask number is selected, the (
*
) mark will be displayed.
8.
Edit the masking area.
• Move the cursor to “MASK EDIT” and press the SET button to
display the MASK EDIT screen. (The masked area will be dis-
played as a grayed-out area.)
• Tilt the PAN/TILT lever to move the grayed-out area to the center
of the area to be masked.
• Press the TELE and WIDE buttons to set the masked area size.
9.
Press the MENU button.
• The screen returns to the “PRIVATE MASK menu”.
•
To delete a private masked area, select “MASK DELETE”, move the cur-
sor to “DELETE” and press the SET button.
The PRIVATE MASK menu reappears after the data has been deleted.
To cancel deletion, select “CANCEL” and press the SET button.
10.
Repeat steps
6
to
9
for each additional masked area.
11.
Press the MENU button.
The screen returns to the “CAMERA FUNCTION” menu.
●
Depending on the camera direction, a picture may be shot even in the setting private mask area.
● The private MASK function cannot be carried out during the initializing process immediately after the power is turned on.
● If a high value is set in item “SENSE UP”, the masked object may be displayed depending on the camera orientation even when the object is
located within the private masking area.
● If the picture being shot contains 5 or more masks, the entire picture is masked.
CAUTIONS
CAUTIONS
● It is not possible to set five or more masks in adjacent areas. (Even when
this is attempted, the masked area that is required to be set will not be
displayed.)
● MASK cannot be set at lower than approx. 45° in the horizontal direction.
(The masks for new settings are not displayed.)


